Creating a Main Client Account and Linking Sub-Clients
The system allows you to manage your client structure in a more organized way by creating a main client and linking sub-client to it. This helps you track transactions for a group of clients tied to one entity, such as companies and their branches, or institutions and their affiliates. It simplifies account, sales, and reporting management in a fully integrated and accurate manner.
Routing Client Accounts
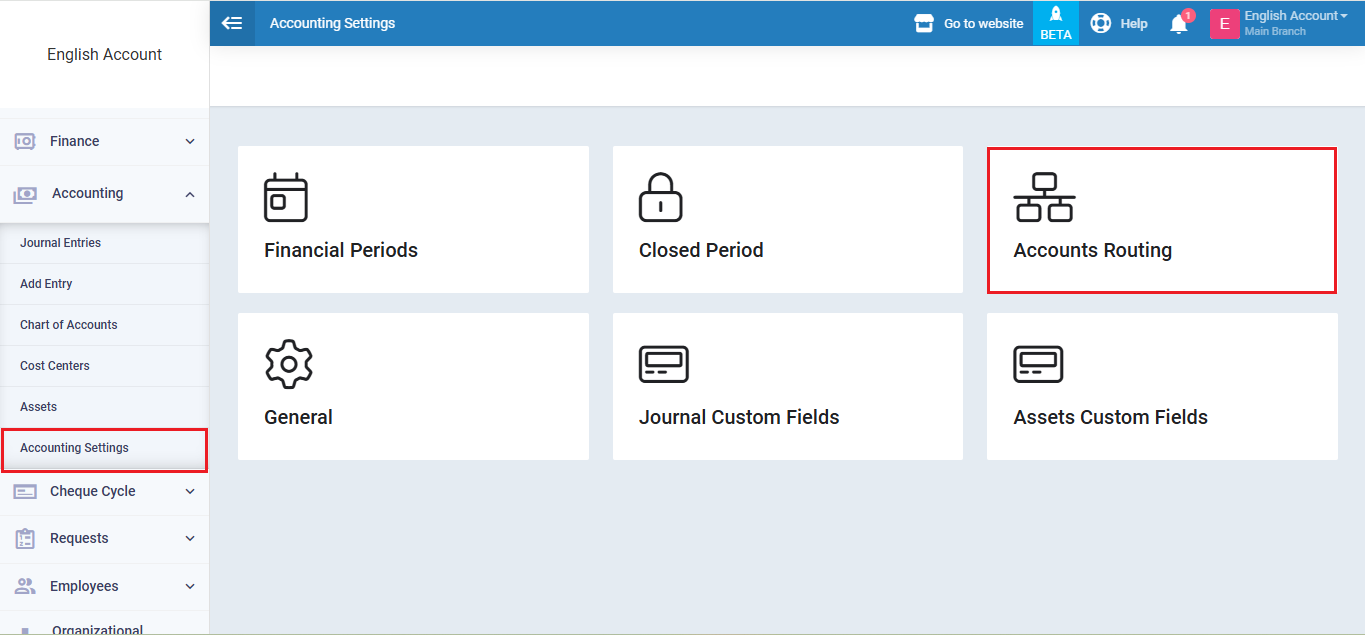
From the main menu, click “Accounting”, then select “Accounting Settings“.
Choose “Account Routing“.
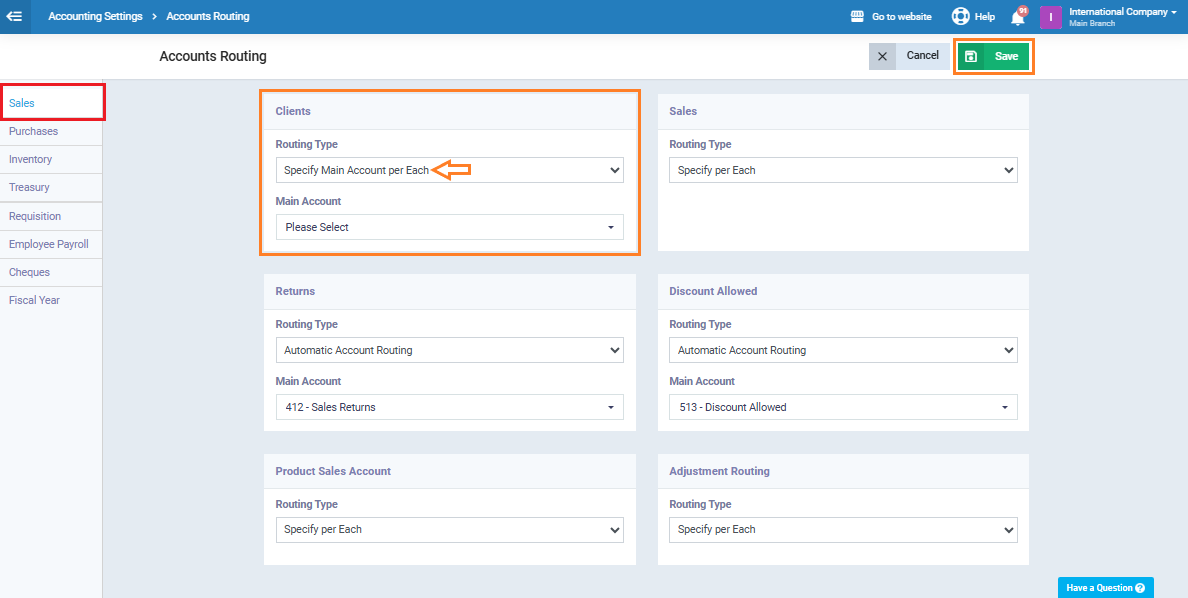
Under “Sales” in clients, select the routing type “Specify Main Account per Each.”
Adding a Main Client Account in the Chart of Accounts
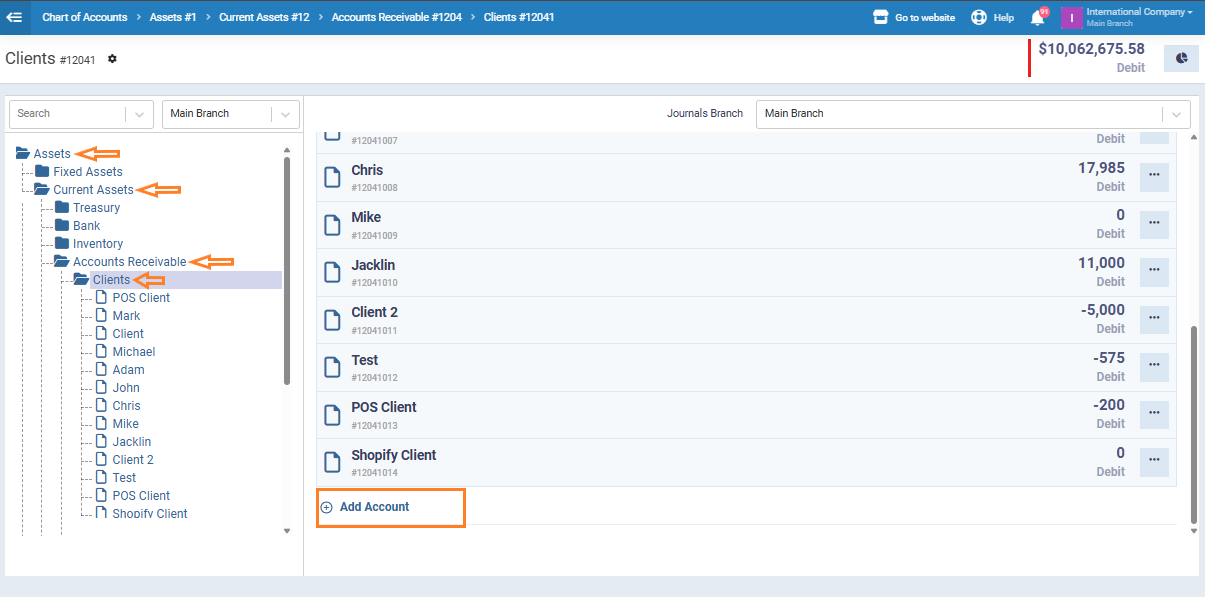
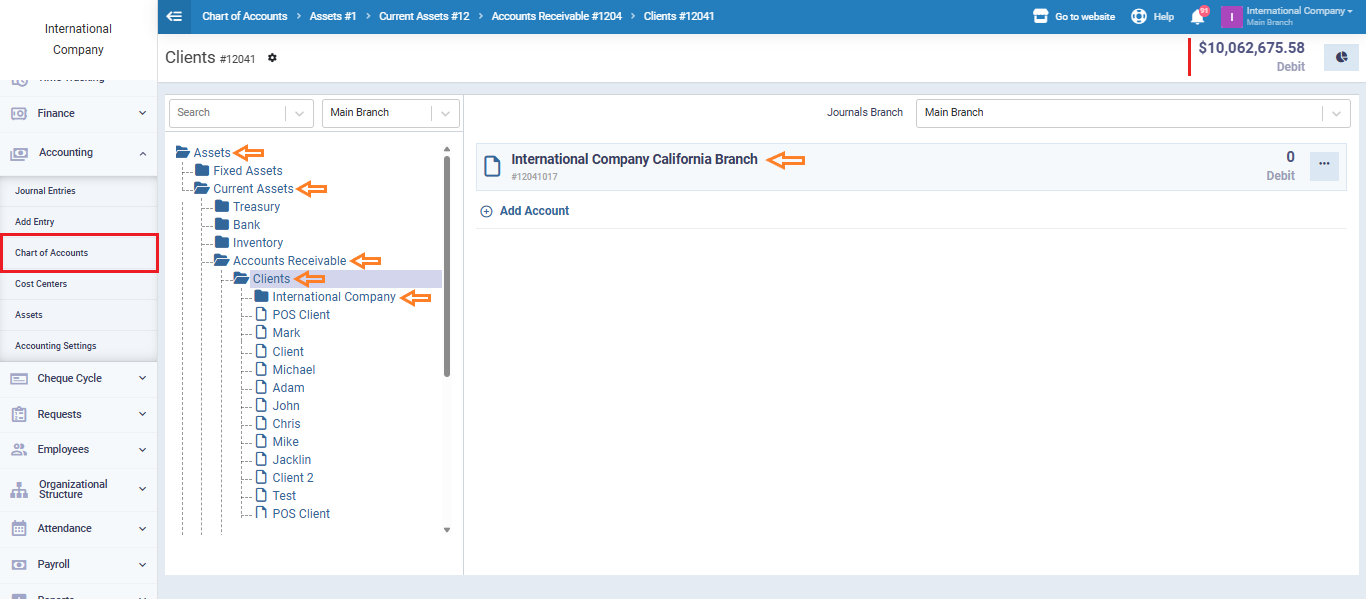
Go to “Chart of Accounts” from the “Accounting” dropdown menu.
Navigate to “Clients” by selecting: Assets → Current Assets → Accounts Receivable → Clients
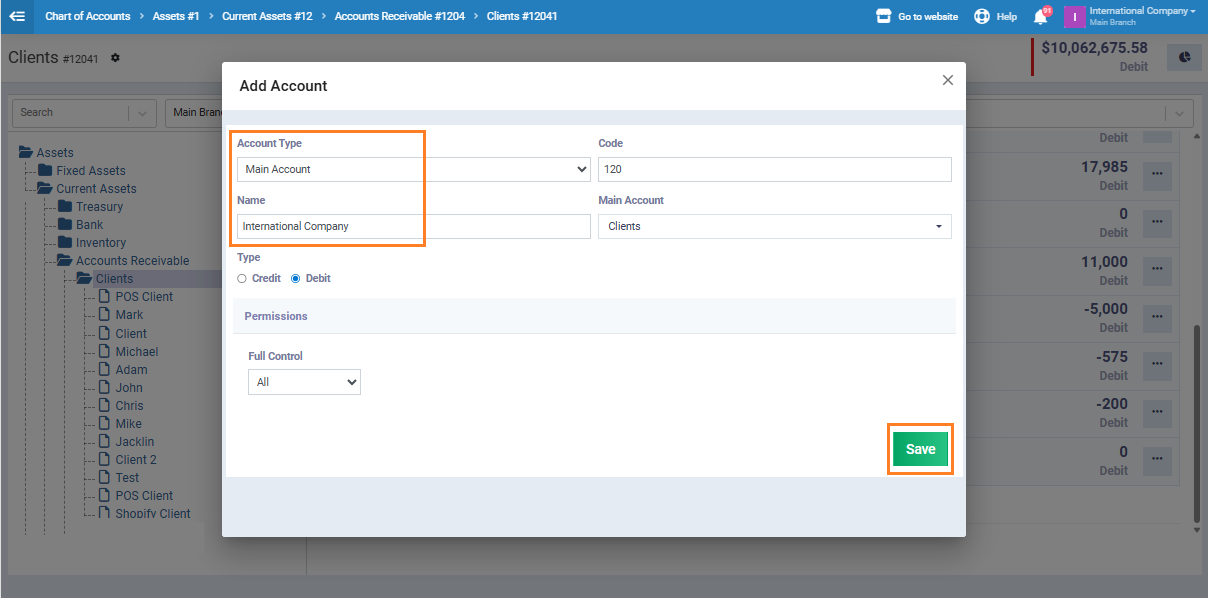
Click the “Add Account” button.
Choose “Main Account” as the account type, enter the account name, then click “Save“.
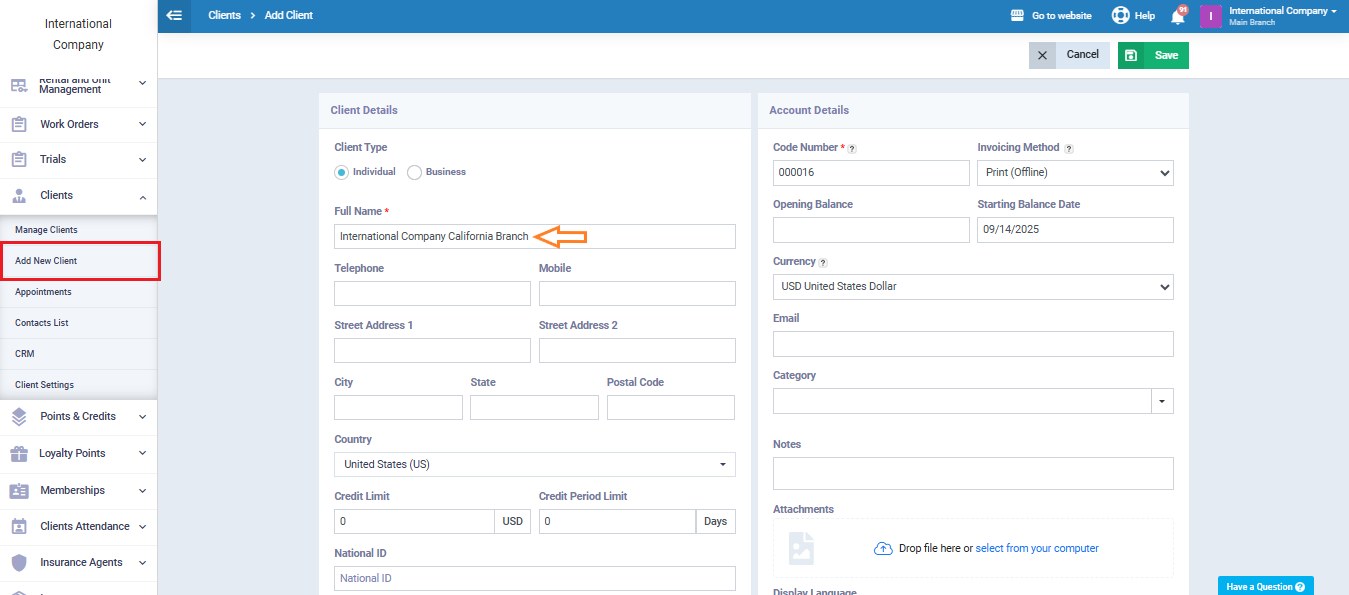
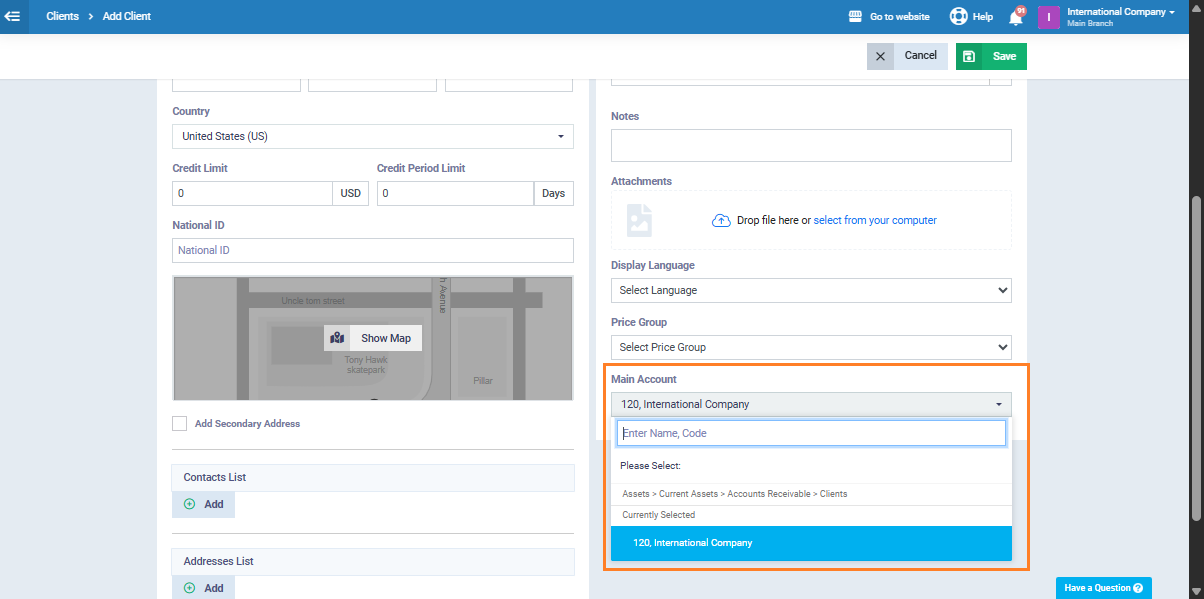
Adding a New Client
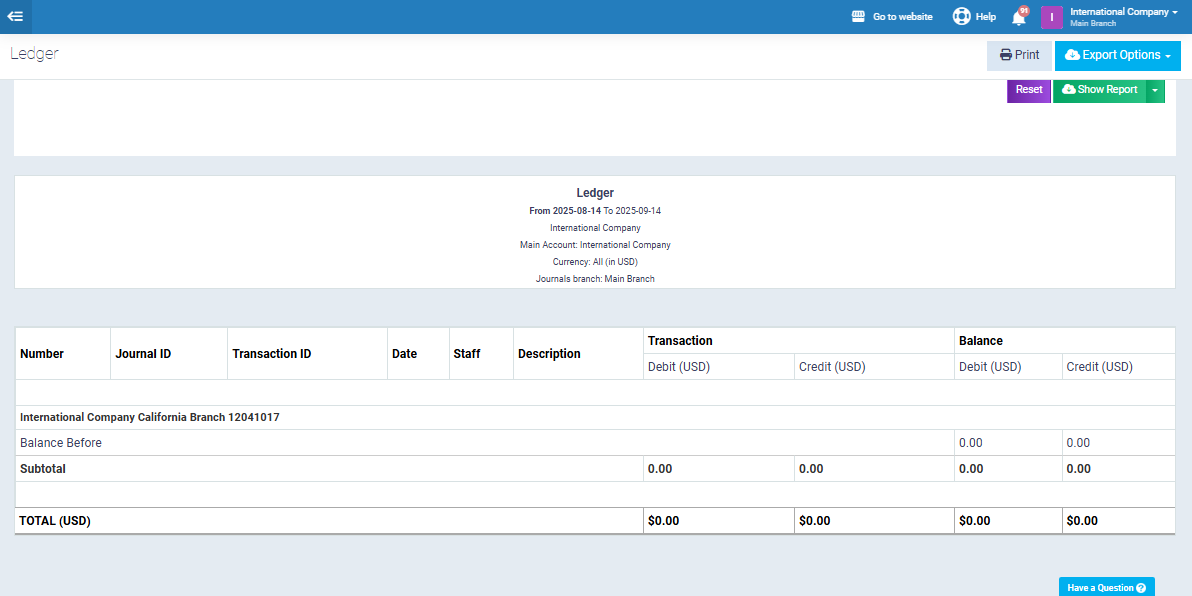
Viewing Accounts in the Ledger Report
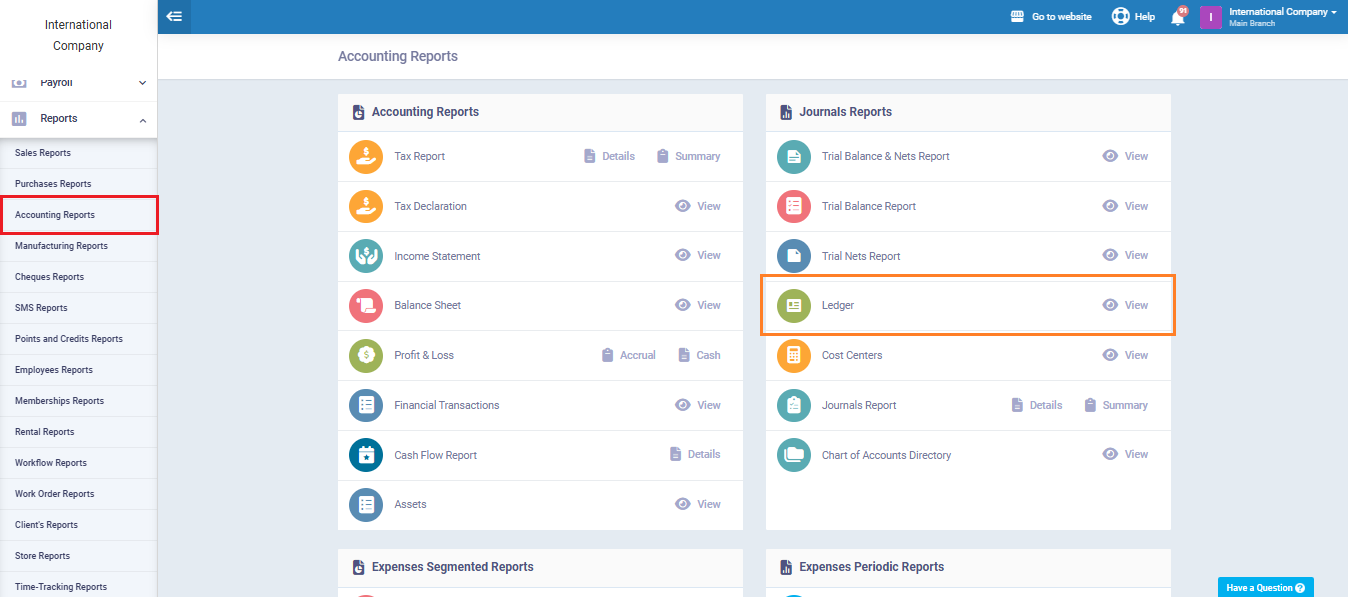
From the sidebar menu, click “Reports”, then select “Accounting Reports.” Choose “Ledger Report.”
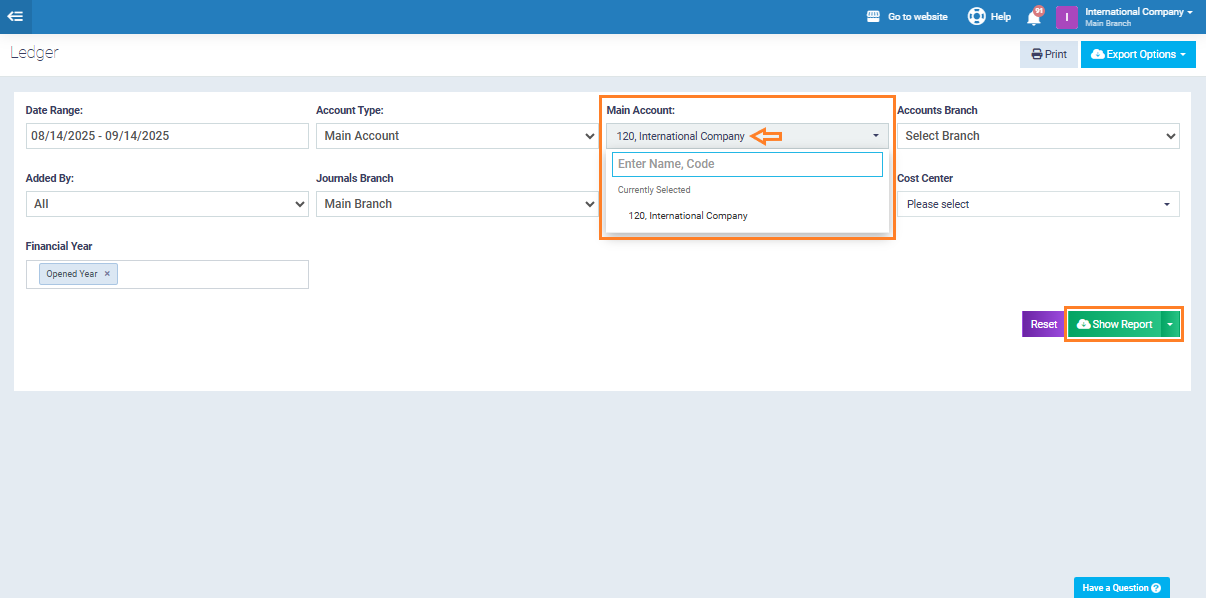
From the filter options, select “Main Account.”
Choose the main account you created earlier to view its details, then click “View Report.”
The sub-account will appear inside the report, linked to the selected main account, allowing you to track all financial transactions in an organized and clear manner.