Comprehensive Expenses Guide
Through the system, you can add expenses to document outgoing financial transactions, which is essential for controlling the reports and financial statements related to your business.
Expenses Categories
You can perform some actions on expenses such as deletion, printing, and creating an invoice for the expense. Additionally, you can create categories to which expenses belong.
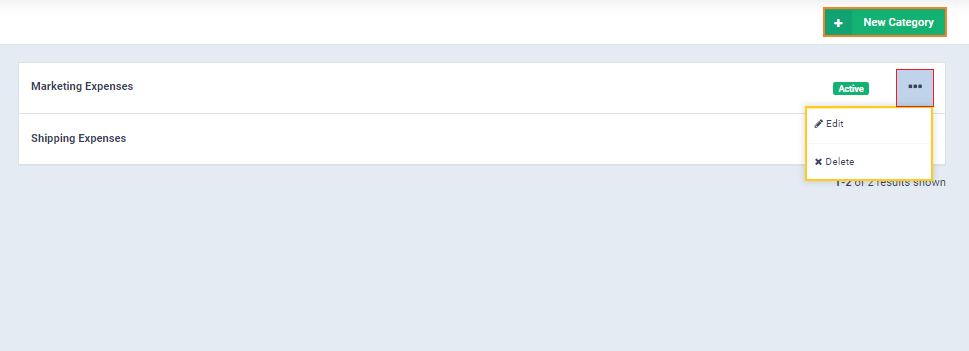
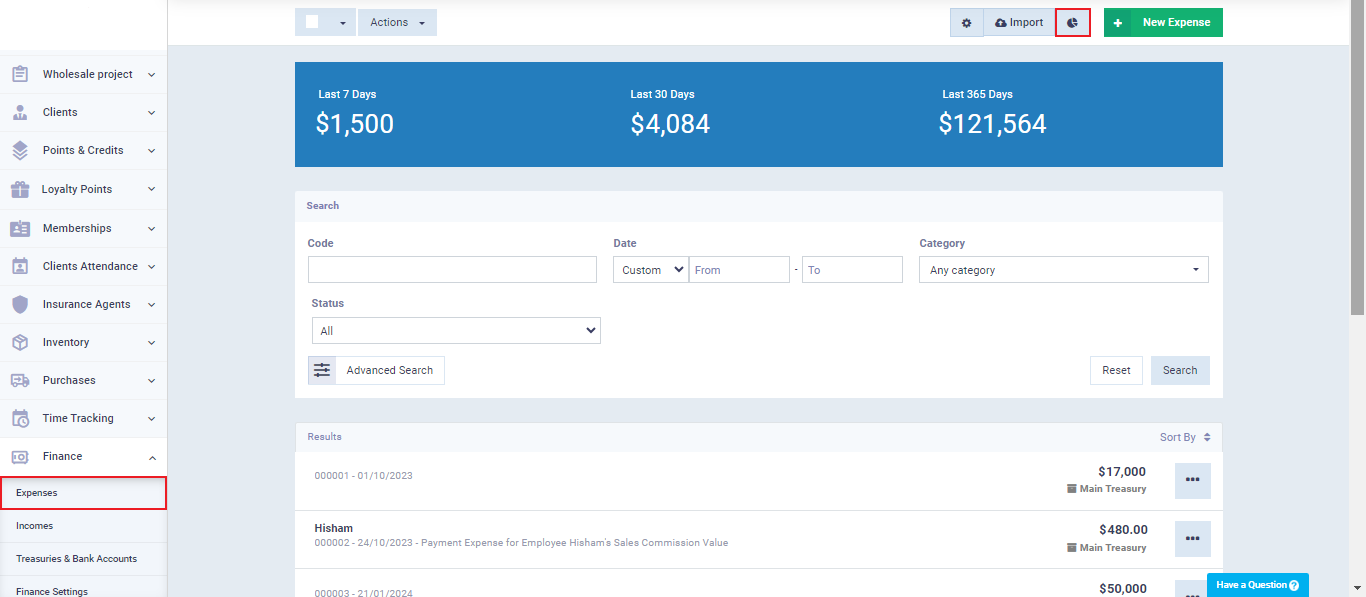
When creating a new expense, you can choose its corresponding category, making your expenses more organized. To create a new expense category, click on “Expenses” under “Finance” in the main menu, then click on the gear icon “⚙” to access the expense categories page.
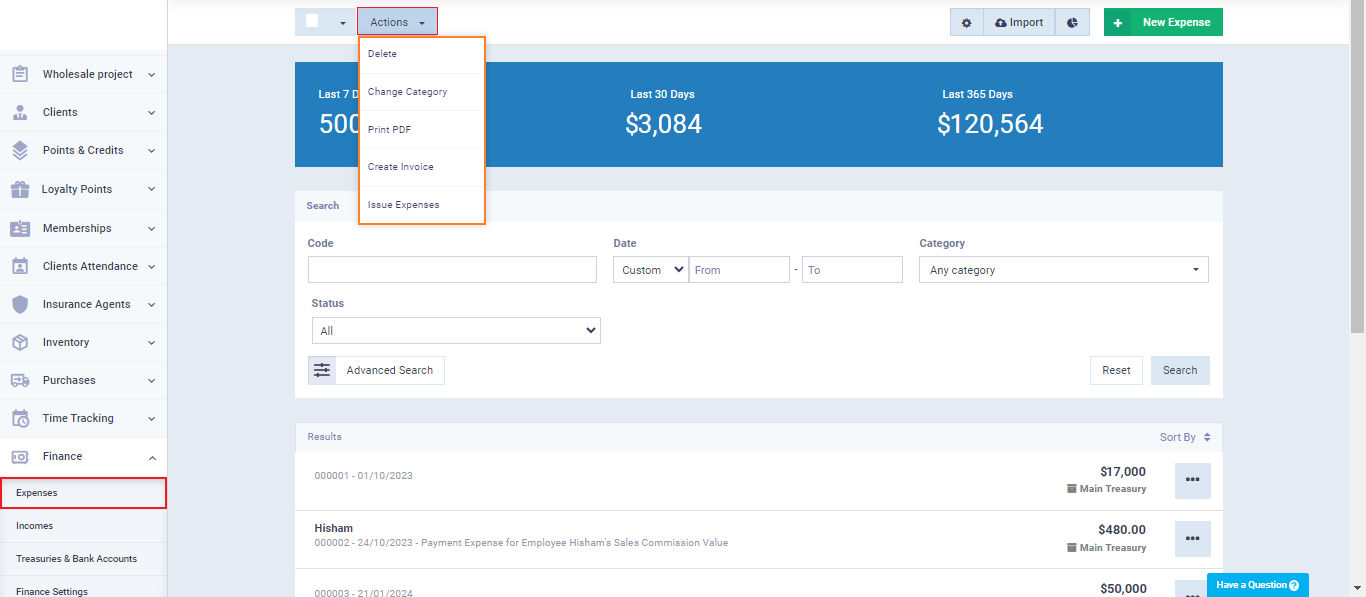
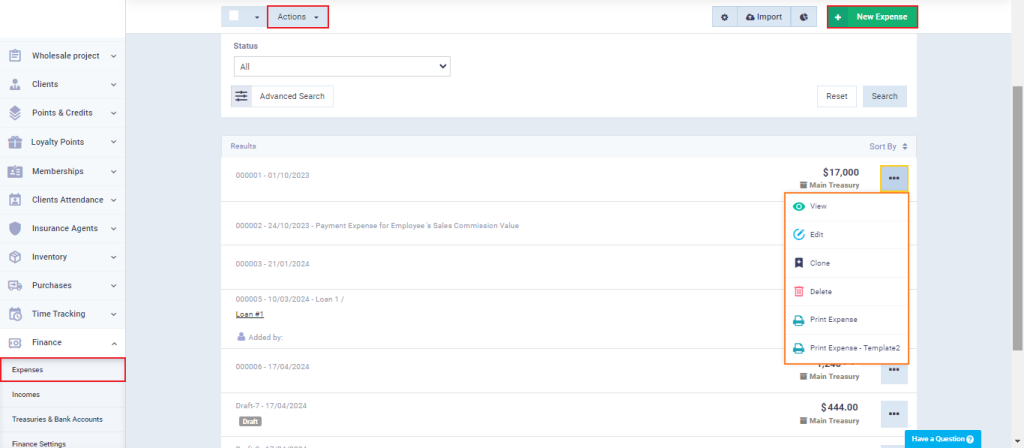
You can edit or delete existing categories, or add a new expense category by clicking on the “New Category” button.
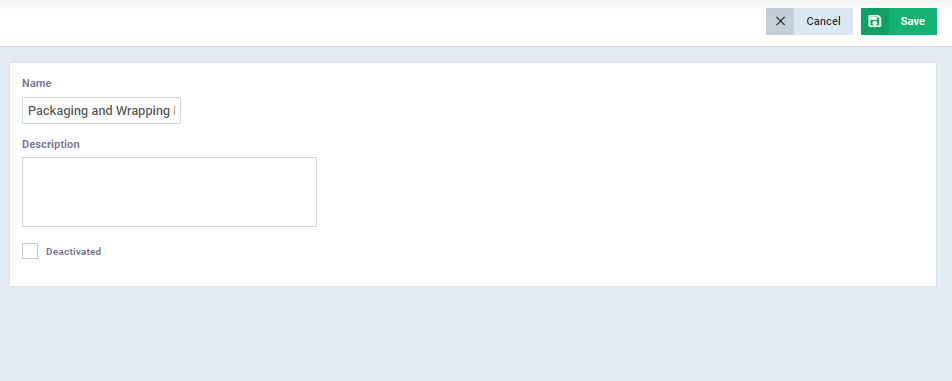
Enter the category details as follows:
Name: The name of the category as it will appear in the expense category list within the expense screen.
Description: Enter a general description of the category’s nature.
Click on the “Save” button.
Create an Expense
Click on “Expenses” under “Finance” in the main menu, then click on the “Expense” button to create a new expense.
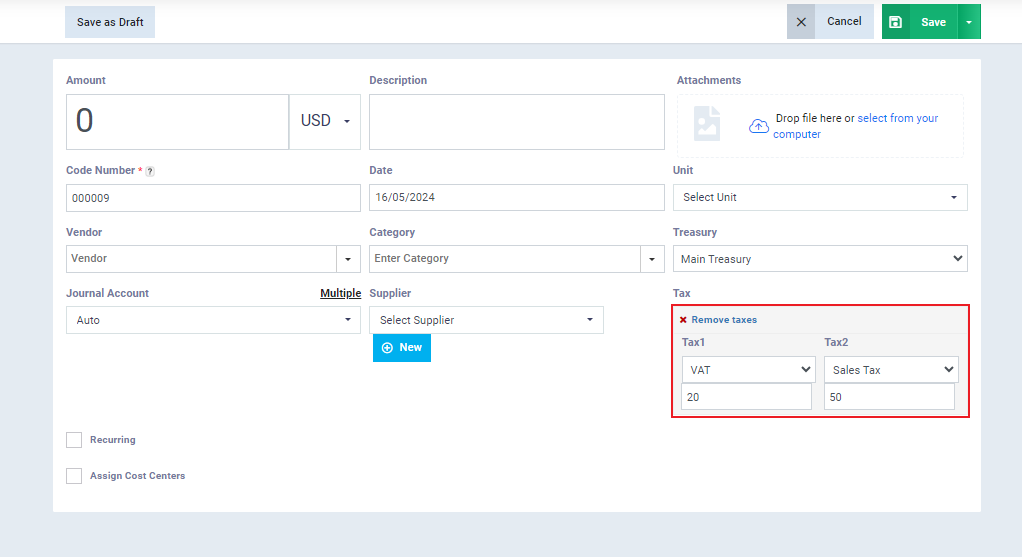
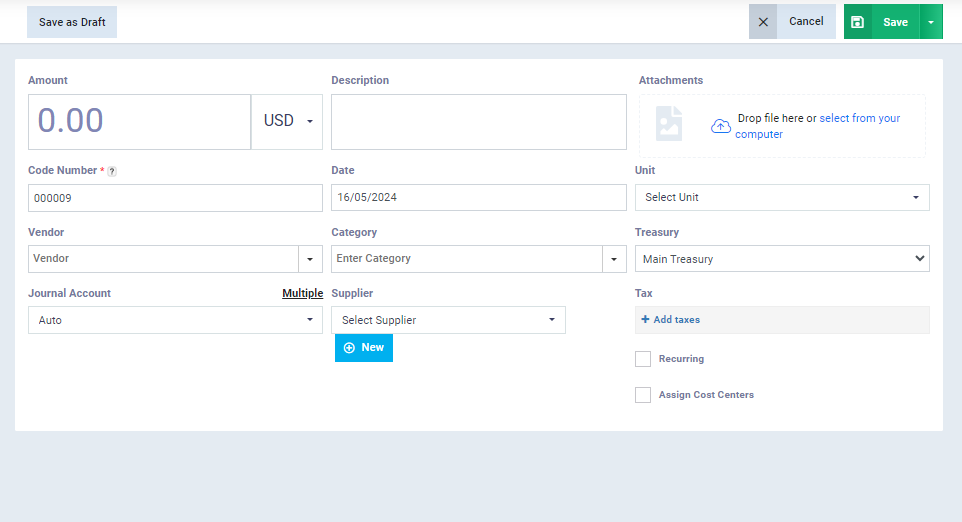
Enter the expense details as follows:
Amount: Enter the value or amount of the expense and select the currency of the expense to be recorded.
Description: Enter any notes or additional guidance that describe the expense.
Attachments: You can attach an image of the receipt by clicking on the “Upload” button and selecting the image from your device, or by dragging and dropping it.
Code Number: This is a serial number that distinguishes the expense. You can change the number and control the format of the serial from the “Auto Numbering Settings” in the account.
Date: Select the date of adding the expense to the system from the calendar.
Vendor: Enter the name of the vendor from whom you made the purchase and for whom the expense is issued.
Category: Select one of the categories from the dropdown menu or add a new expense category as explained in this guide.
Treasury/Bank Account: Select the treasury or bank account from which the payment will be made. This can be chosen from the treasury or bank accounts added to the account. For more details on how to add a new treasury/bank account, you can refer to the “Add Treasury/Bank Account” guide.
Supplier: Choose the supplier associated with the expense being added. You can add a new supplier from the expense page by clicking on the “+ New” button.
This option allows the supplier’s name and tax number to appear in the “Tax Report” in front of the movement associated with this expense.
Subaccount: The debit side of the expense can be redirected by selecting the desired account from the dropdown list.
Recurring Expense
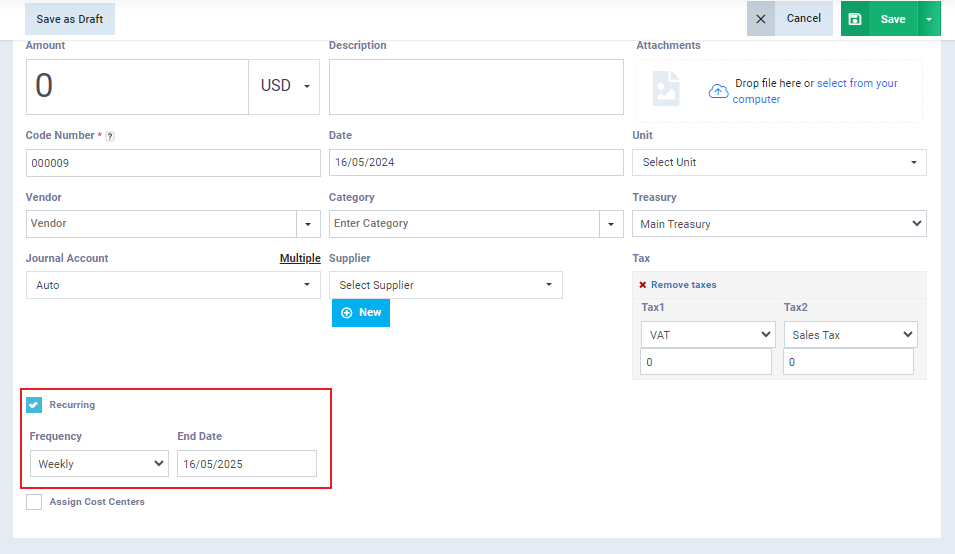
You can use this feature in the system if you have recurring expenses that are spent periodically and regularly. You can assign the expense, specify its recurrence rate, and set an end date for the recurrence.
To activate it, click on “Recurring.”
- Select the “Recurrence” period, whether it’s weekly, monthly, or yearly.
- Select the “End Date” from the calendar, which is when the expense recurrence stops.
Then click on “Save“.
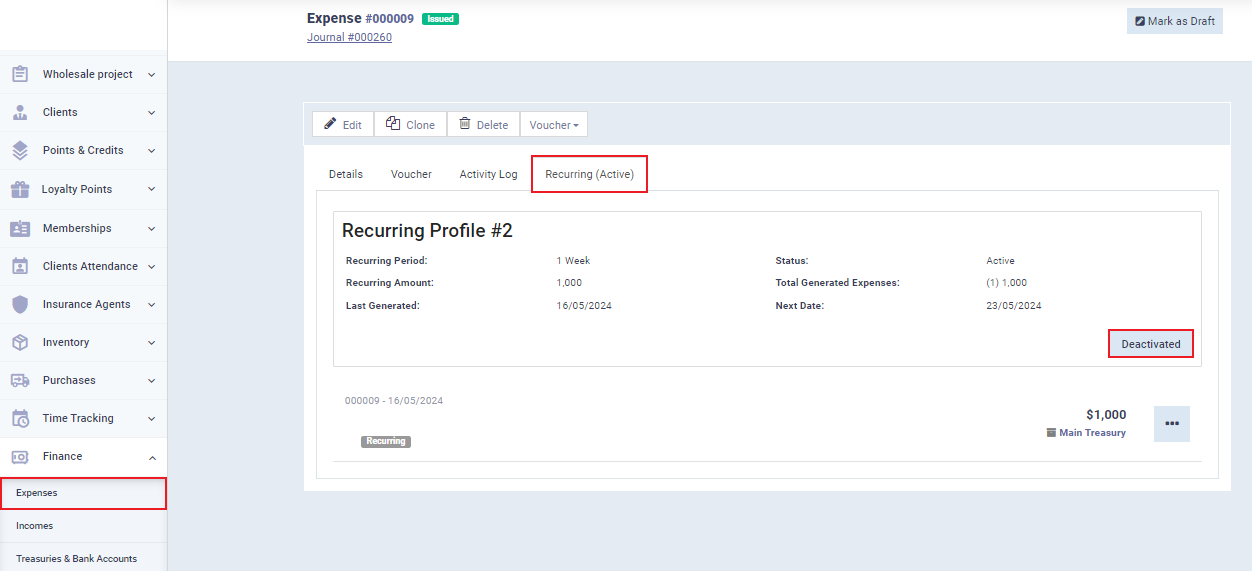
To disable the recurrence of the expense, go to the expenses menu, click on the desired expense, then click on the “Recurring” tab, and finally press the “Deactivate” button.
Multiple Expenses
Through the system, you can issue multiple expenses and distribute the expenses across multiple accounts in your chart of accounts.
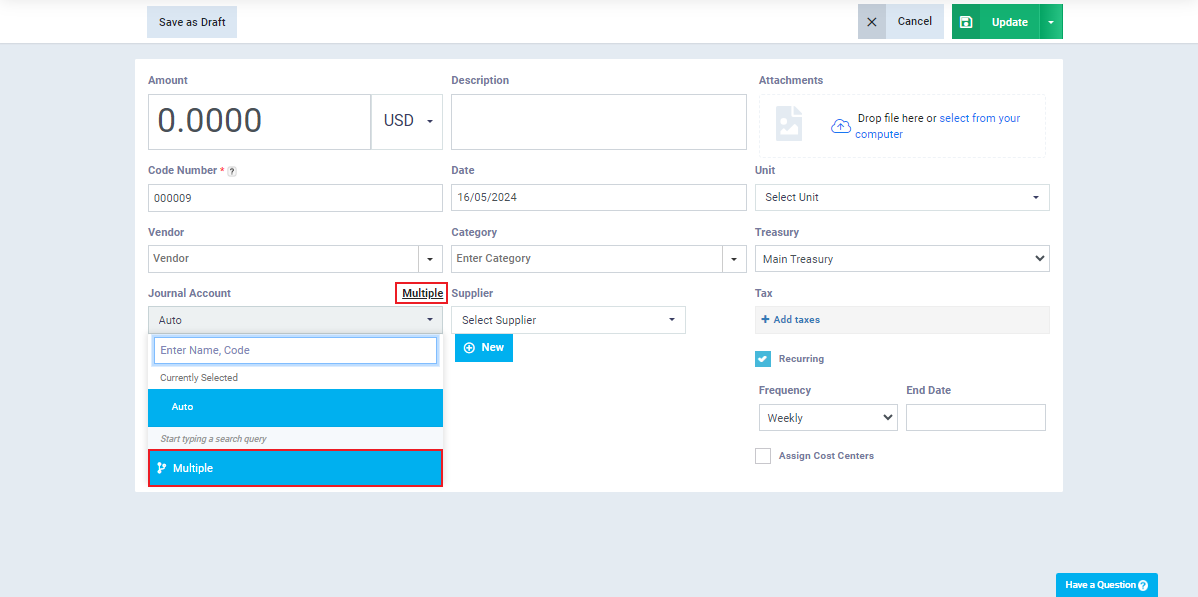
In the “Journal Account” field, click on “Multiple.”
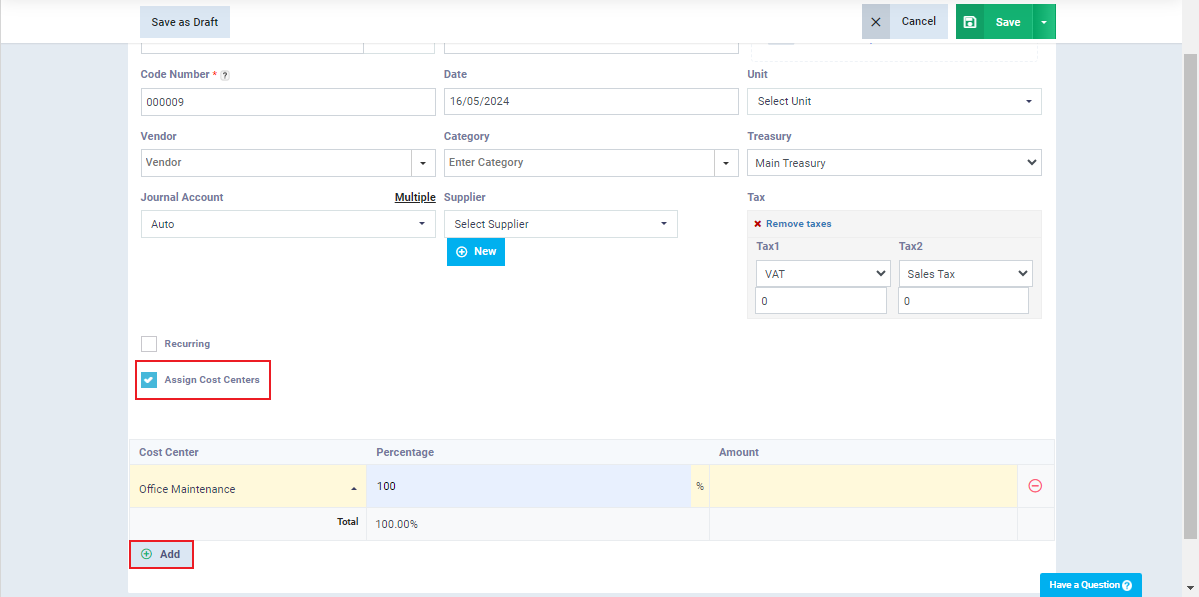
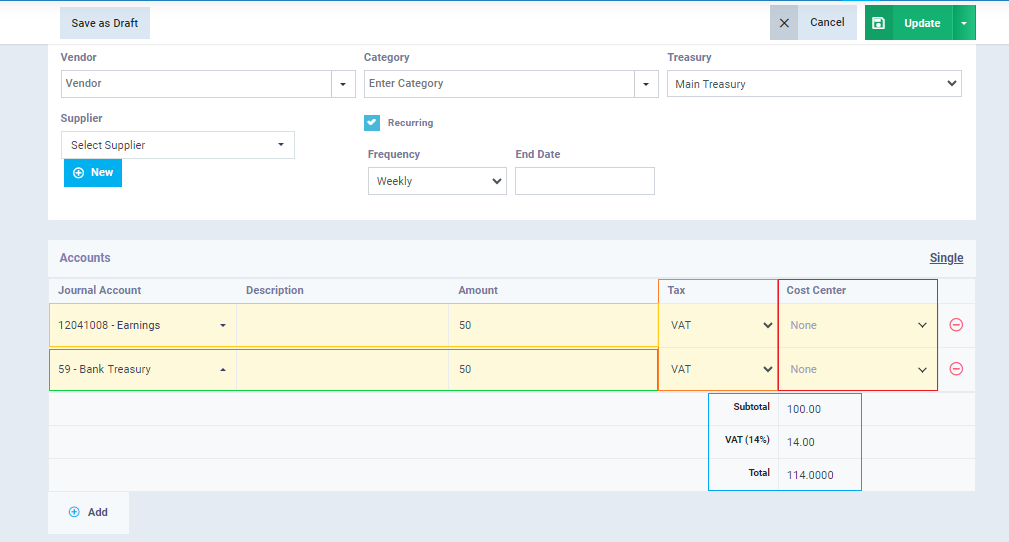
When activating the multiple expenses feature, the position of cost centers and taxes changes on the expense screen, allowing you to assign a cost center and tax for each journal account separately.
Journal Account Name: Click on “Select Account” and then search and choose the desired account.
Description: Enter the description for each journal account related to the transaction.
Amount: Enter the amount for each journal account selected in each row separately.
The total expense amount will be automatically calculated by the program based on the entries in each row.
Tax: Select the type of tax to be added to the expense value from the dropdown menu for each journal account separately.
Cost Center: Select the desired cost center to be assigned to the expense value for each journal account separately.
Complete the expense details and then click on the “Save” button.
Expenses Reports
You can access expense reports either by clicking on the ” ![]() ” icon on the expenses page or by navigating to the expense reports section from the main menu.
” icon on the expenses page or by navigating to the expense reports section from the main menu.
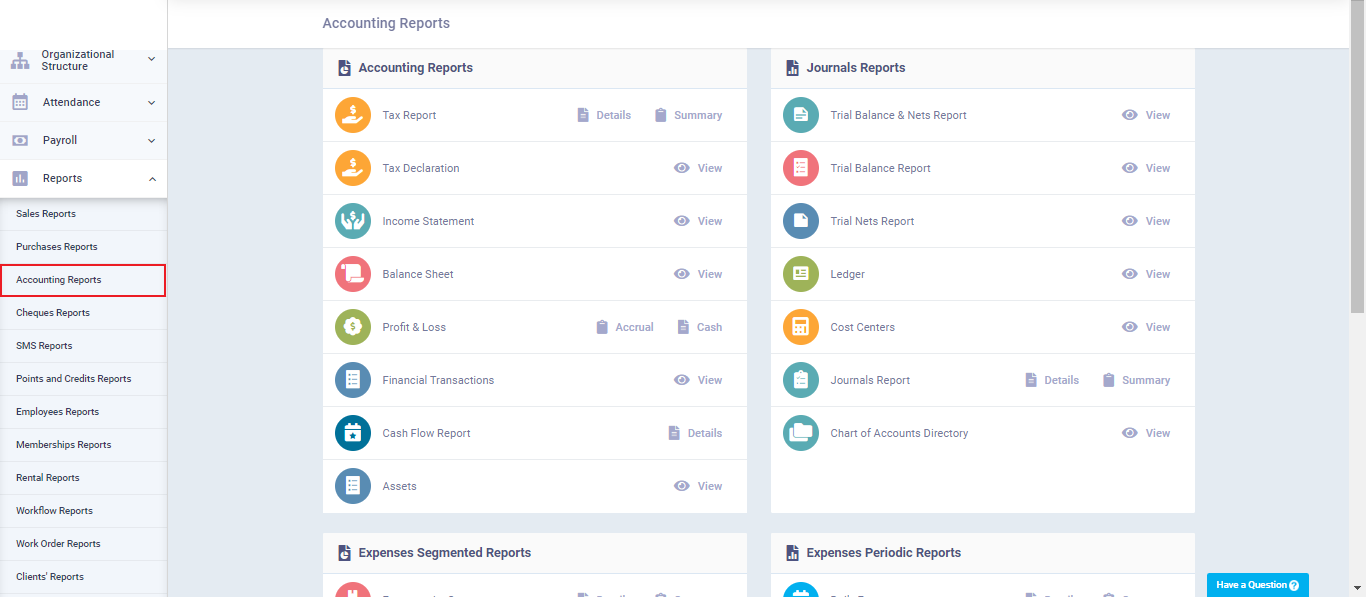
You can also access expense reports by clicking on “Accounting Reports” from the dropdown menu under “Reports” in the main menu. Then, select the expense report you want to view and click on “Details.”
