Filtering Entries (Assigning Tags to Journal Entries)
The Assign Tags to Journal Entries feature is one of the essential features in the system. It allows you to easily classify and label journal entries using tags.
These tags help you search and filter more quickly and accurately when you need to refer to entries related to specific categories.
In this topic, we will learn how to activate the “Assign Tags to Journal Entries” feature and how to use it in advanced search whether you’re searching for a single tag or multiple tags together.
Activating Assign Tags to Journal Transactions
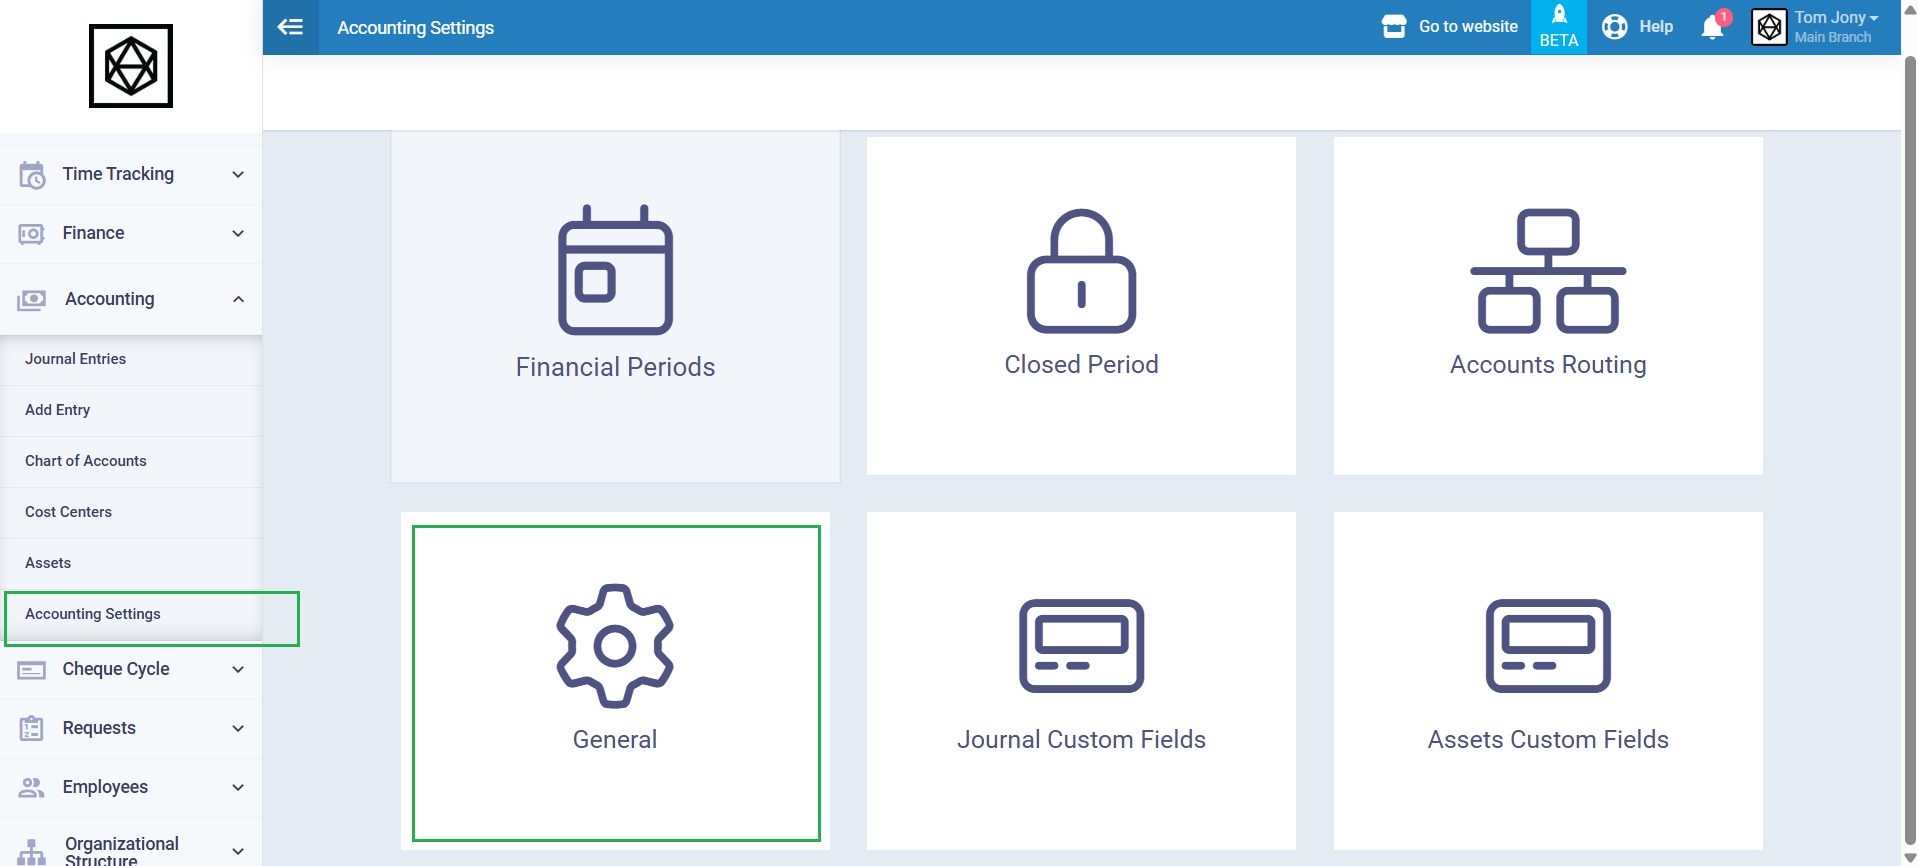
Click on “Accounting Settings” under “Accountings” in the main menu, then click on the “General” card.
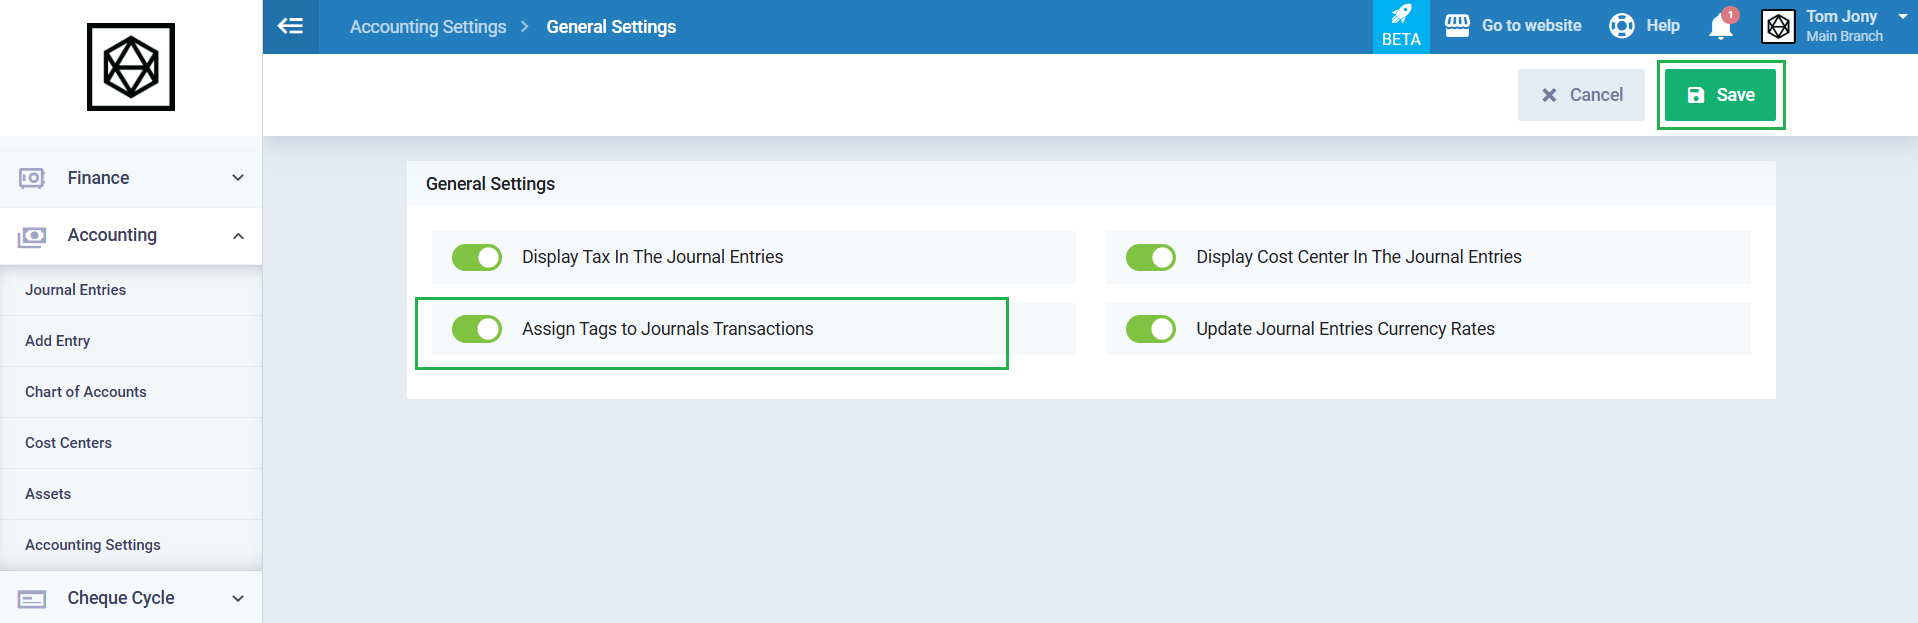
Activate the “Assign Tags to Journal Transactions” button.
Then, click the “Save” button.
Assign Tags to Journal Entries
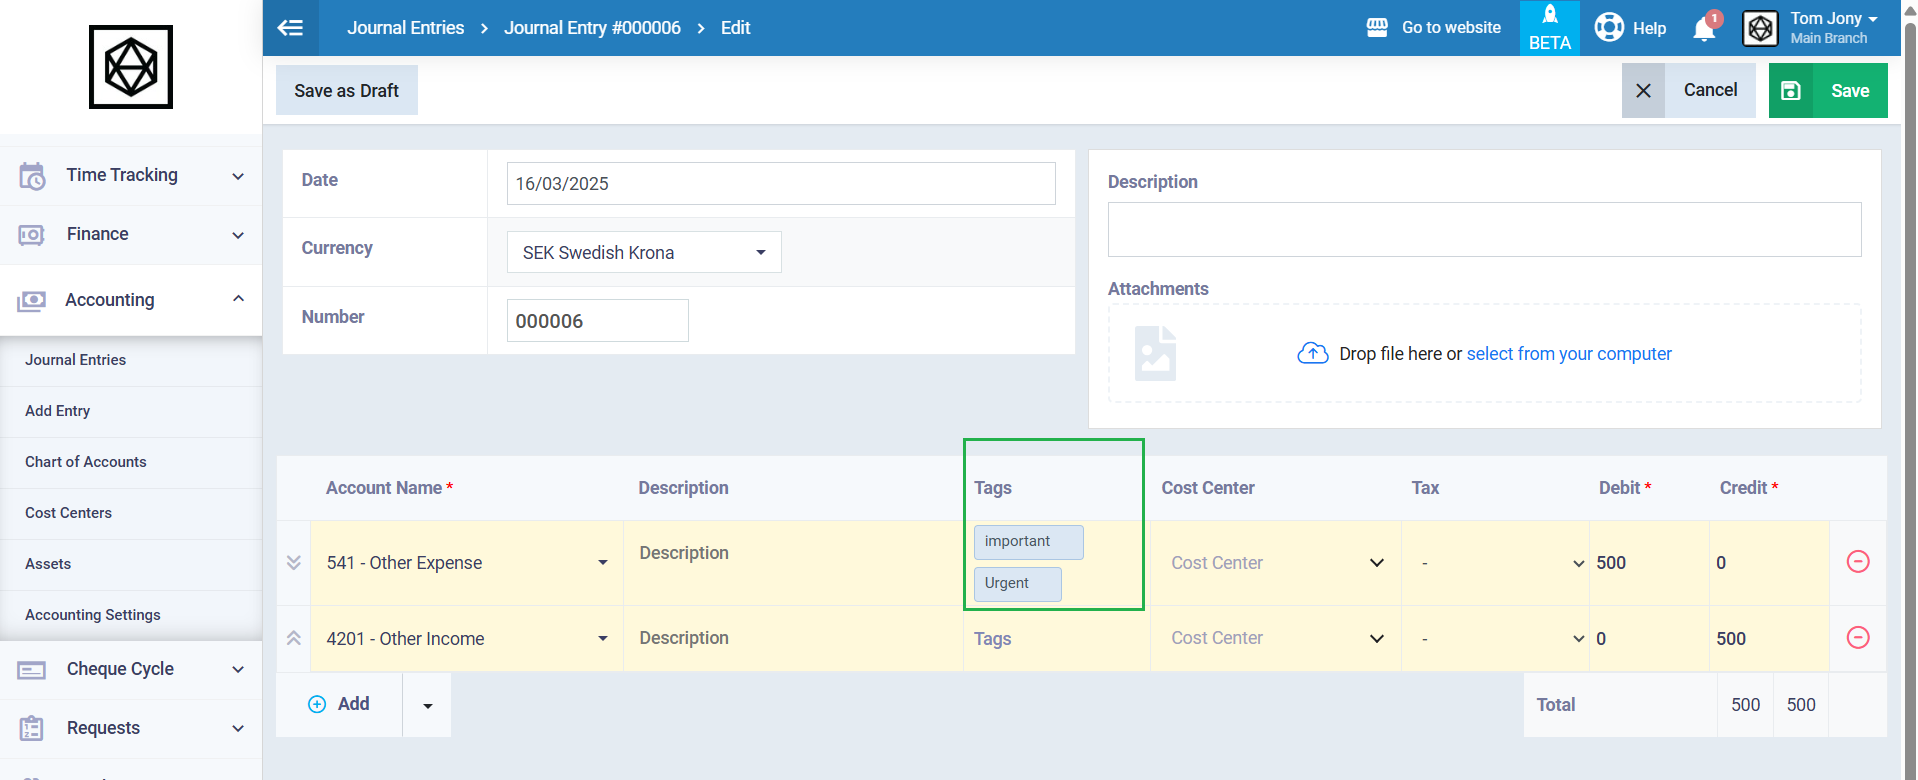
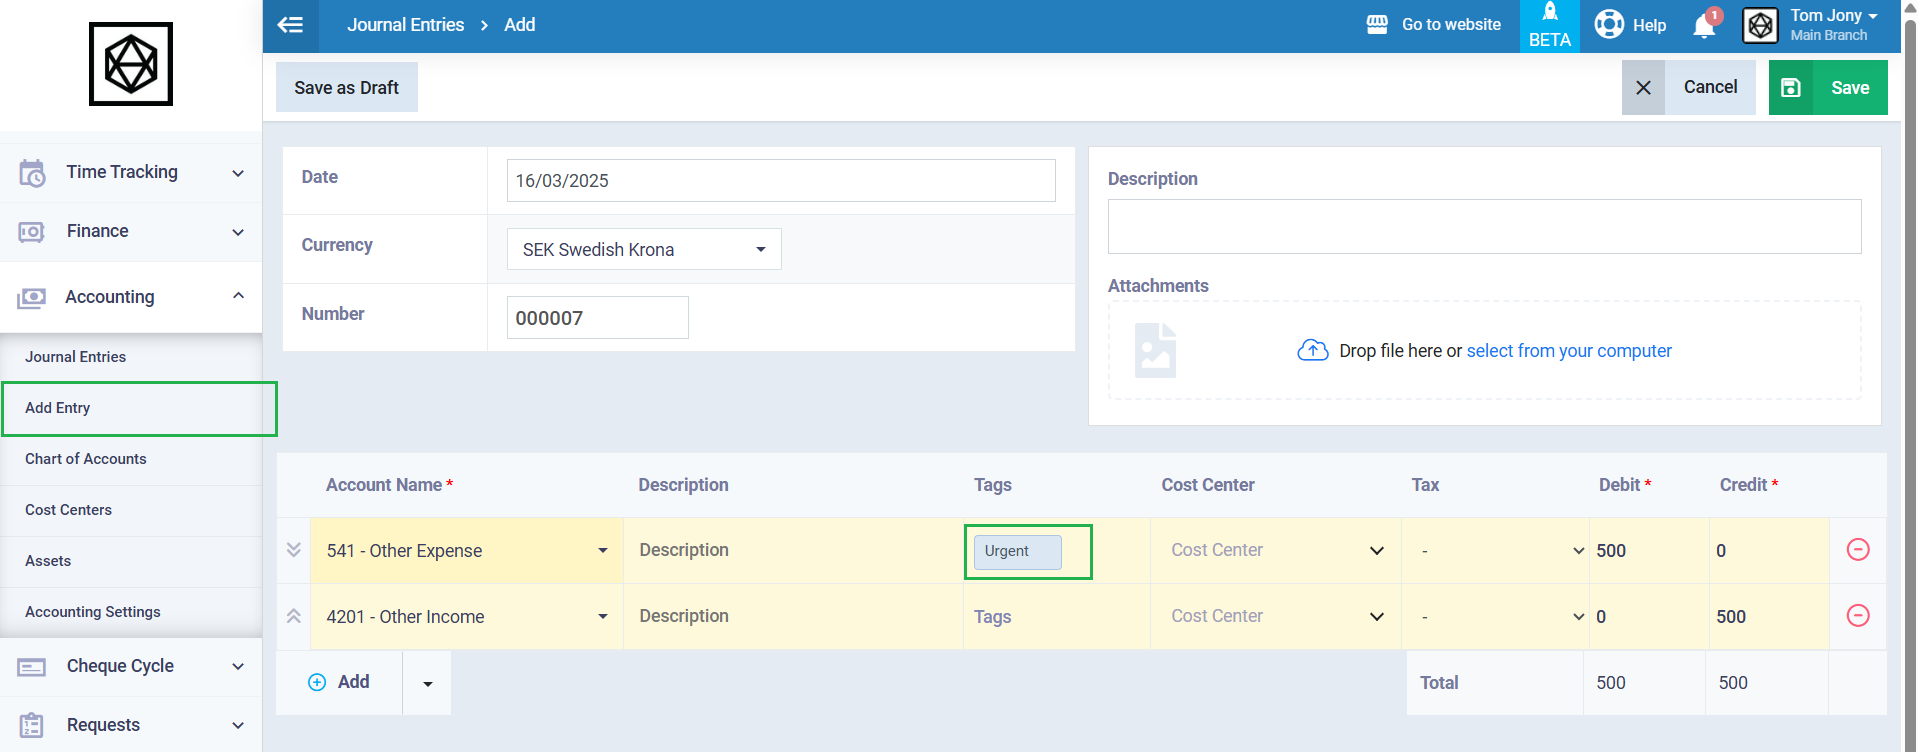
After activating the tag setting for journal entries, go to create a new entry or edit an existing one. You will find a “Tags” field where you can enter the tag you want to use to categorize and find the entry later when searching and filtering.
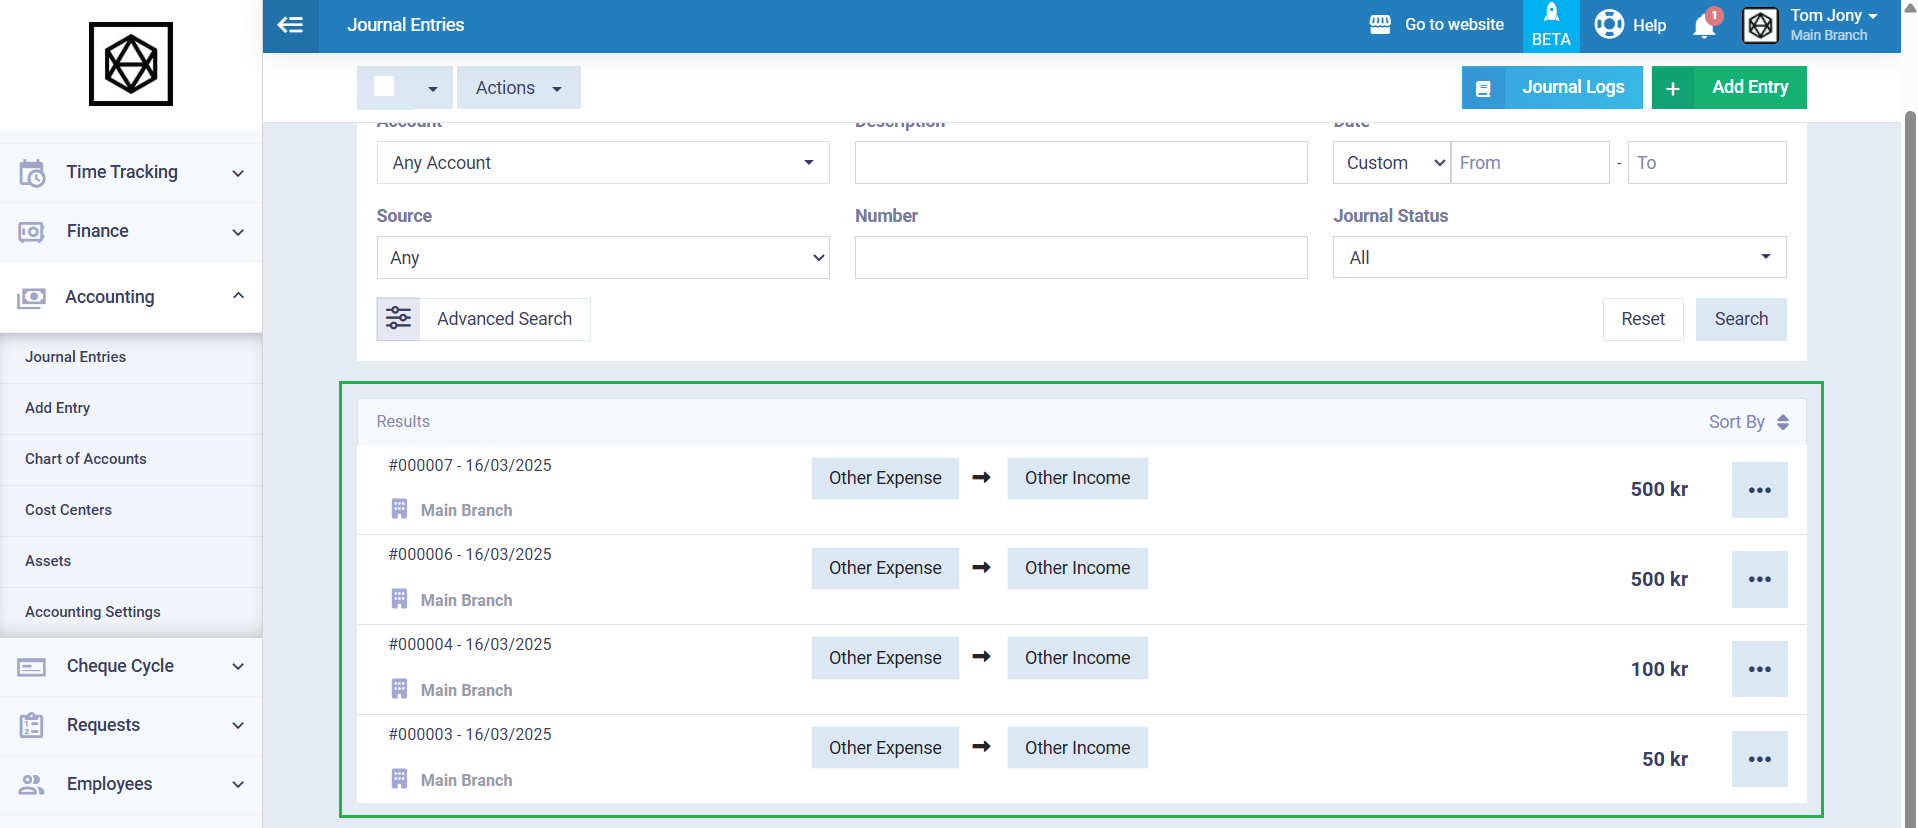
Go to the Journal Entries List by clicking on “Journal Entries” under “Accounting” in the main menu, then click on “Advanced Search.” In the “Tags” field, select the tag you want to filter the entries by to display them, then click the “Search” button.
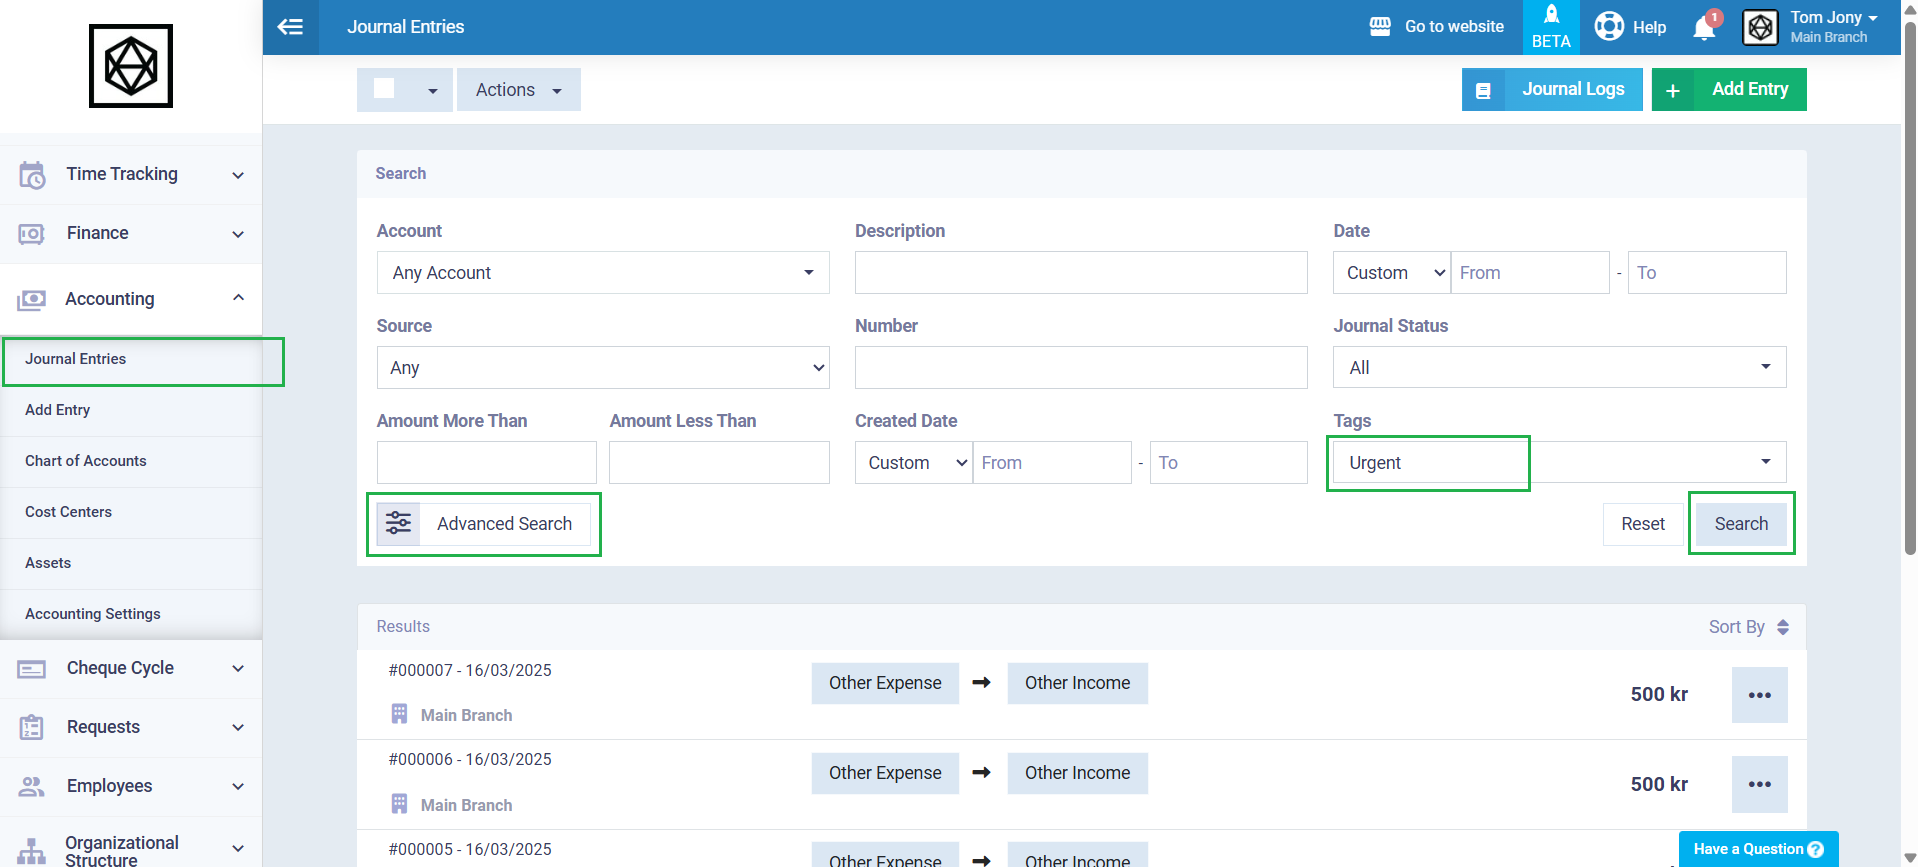
All entries associated with this tag will appear.