Comprehensive Incomes Guide
The system allows you to add income to justify financial transactions received, which is necessary for adjusting reports and financial statements related to your business.
Income Categories
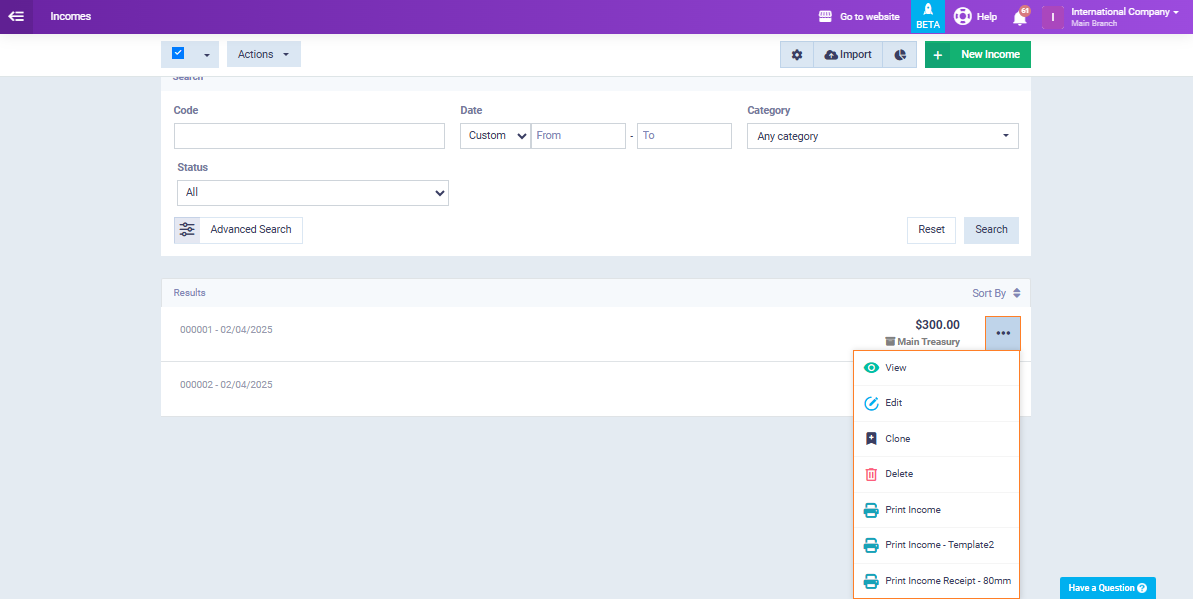
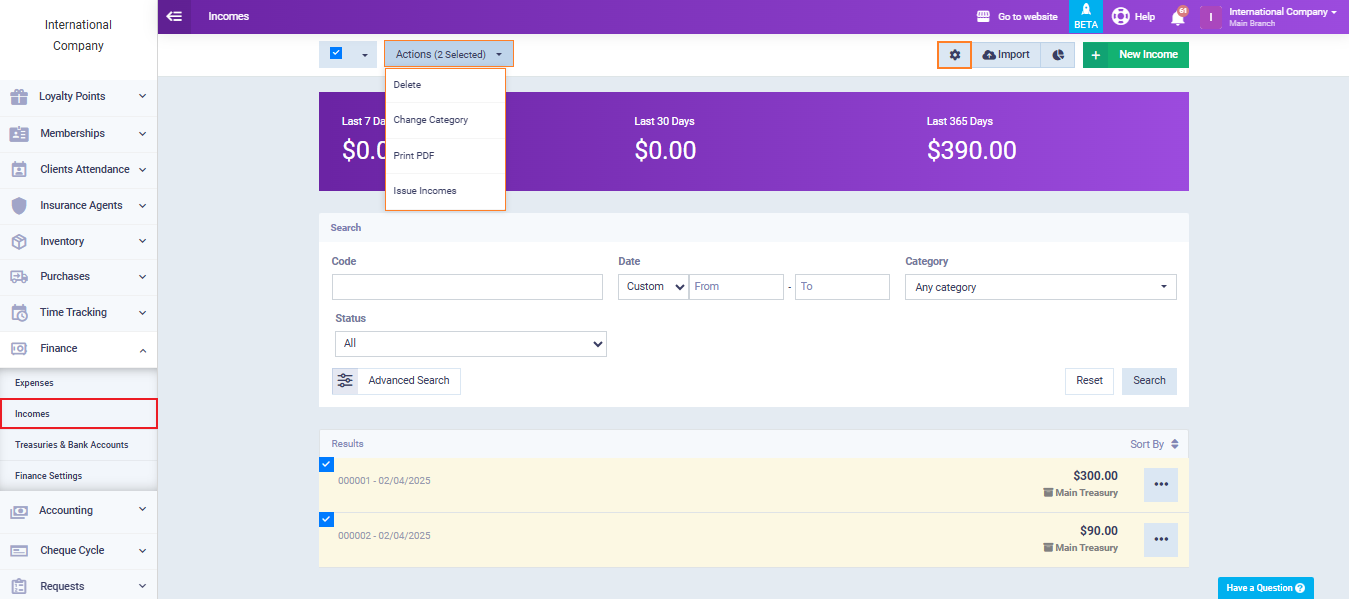
You can perform various actions on income such as deletion, printing, and creating an invoice. Additionally, you can create categories for income.
When creating a new income, you can choose its category, making it more organized. To create a new category, click on “Incomes” under “Finance” in the main menu, then click on the gear icon “⚙” to access the income categories page.
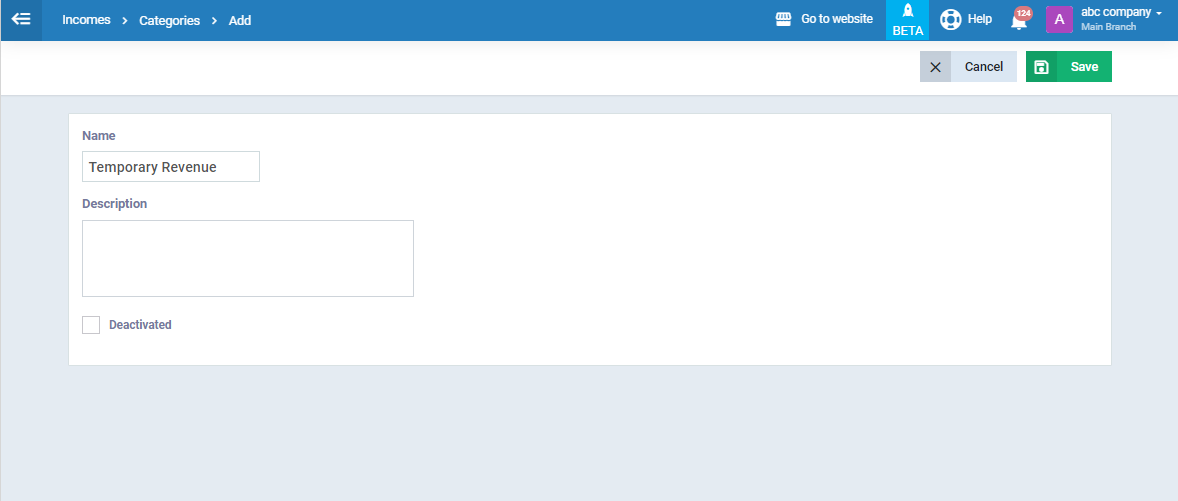
You can edit or delete existing categories, or add a new category for incomes by clicking on the “New Category” button.
Create an Income
Click on “Incomes” under “Finance” in the main menu, then click on the “New Income” button to create a new income.
You can also perform desired actions on any old income, such as editing and deleting.
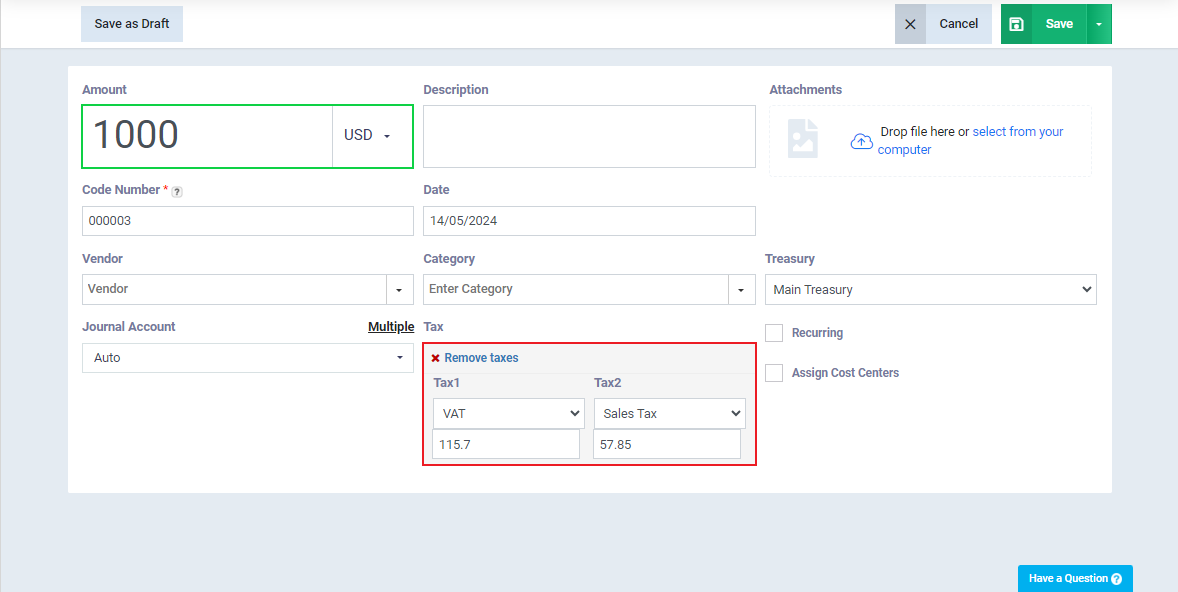
Enter the income data as follows:
- Amount: Enter the value or amount of the income and specify the currency of the income to be recorded.
- Description: Enter any notes or additional guidance that represent the income.
- Attachments: Select the image from your device, or by drag and drop.
- Code Number: It’s a serial number that distinguishes the income. You can change the number and control the format of the serial from the “Auto Numbering Settings” in the account.
- Date: Select the date of adding the income to the system from the calendar.
- Vendor: Enter the name of the person from whom the financial amount was received without registering this person in the system’s database.
- Category: Select one of the categories from the dropdown menu or add a new category for incomes as explained in this guide.
- Treasury: Select the treasury or bank account from which the money will be received, from the treasuries or bank accounts added to the account.
For more details on how to add a new treasury/bank account, you can refer to the “Adding a New Treasury/Bank Account” guide.
- Journal Account: You can redirect the creditor party for the income by selecting the desired account from the list.
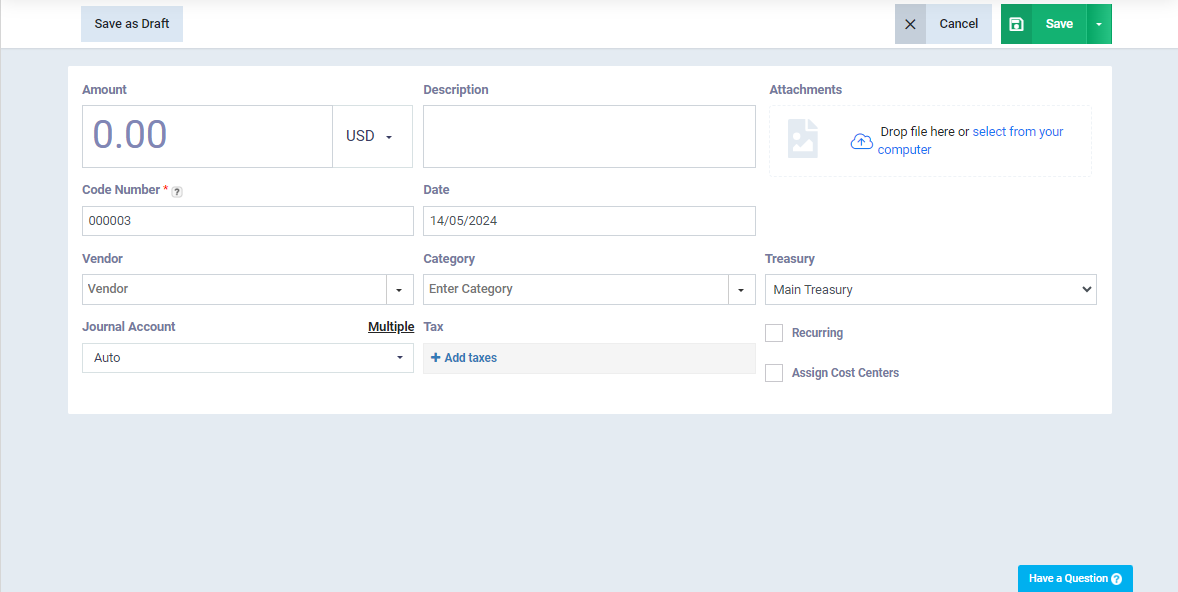
Click on “Add Taxes” to specify the types of taxes to be calculated on the income and their values.
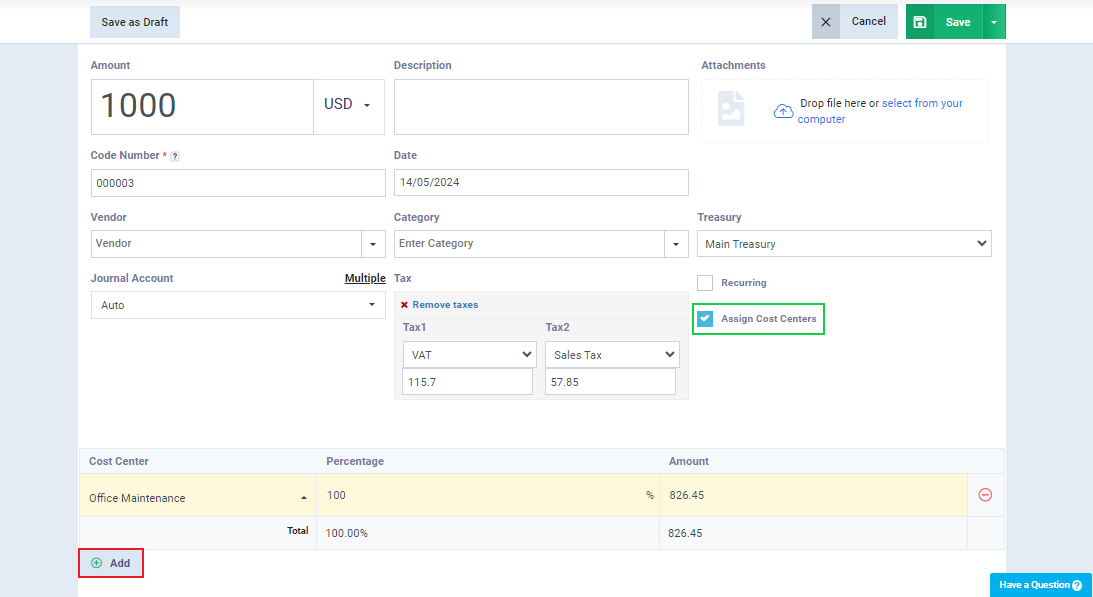
Activate “Assign Cost Centers” to link all or part of the income value with a cost center in the account.
Click “Save” to issue the income.
Recurring Income
You can use this feature in the system if you have recurring income that is received periodically and regularly. You can assign the income, specify its recurrence rate, and set an end date for the recurrence.
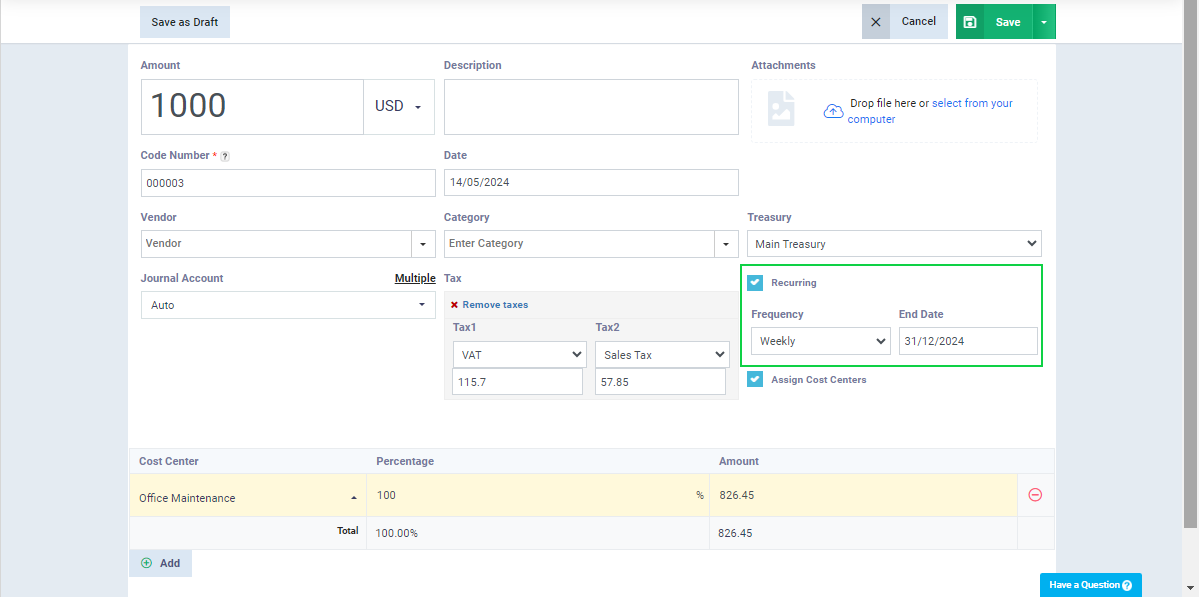
To activate it, click on “Recurring.”
- Select the recurrence “Frequency,” whether weekly, monthly, or yearly.
- Choose the “End Date” from the calendar when the recurrence of the income stops.
Press the “Save” button.
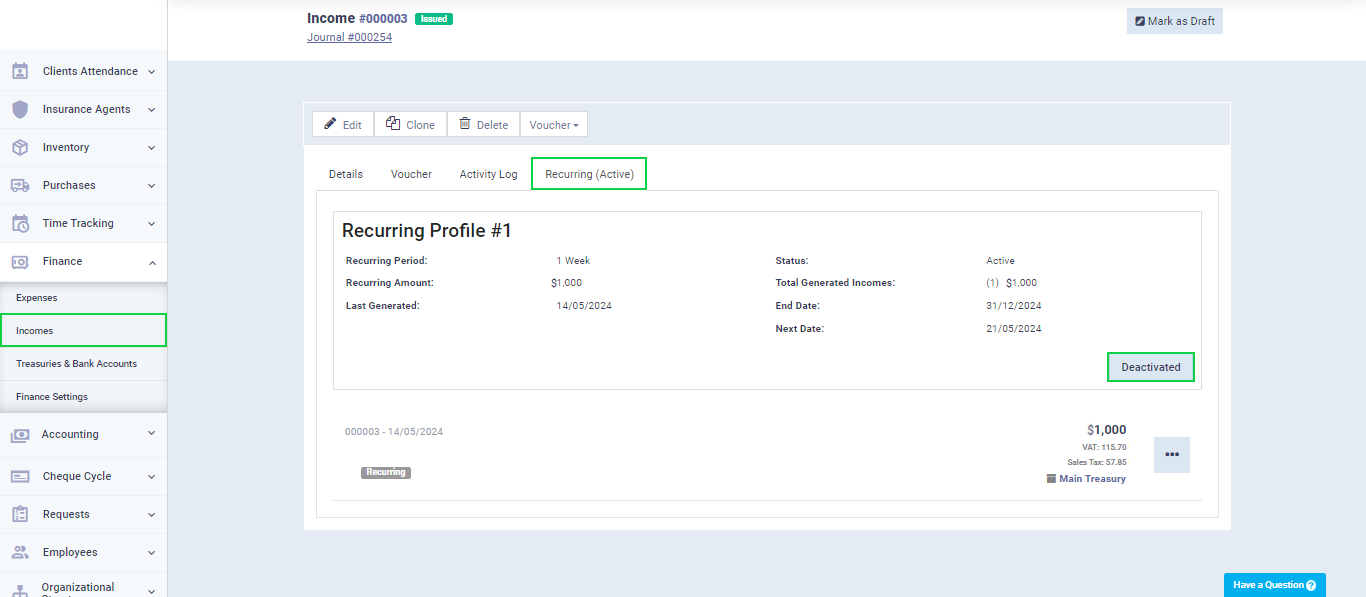
To disable the recurrence of an income, go to the income menu, click on the desired income, then click on the “Recurring” tab, and finally press the “Deactivated” button.
Multiple Income
Through the system, you can issue a multiple income and distribute the revenue to more than one account in your chart of accounts.
From the “Journal Account” field, click on “Multiple.”
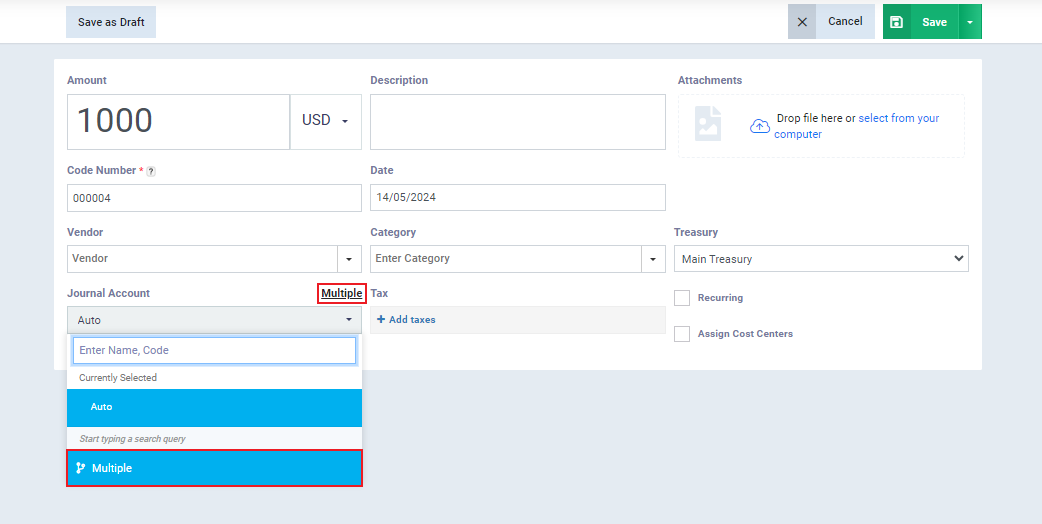
When activating the multiple income feature, the position of cost centers and taxes changes on the income screen, allowing you to assign a cost center and tax for each journal account separately.
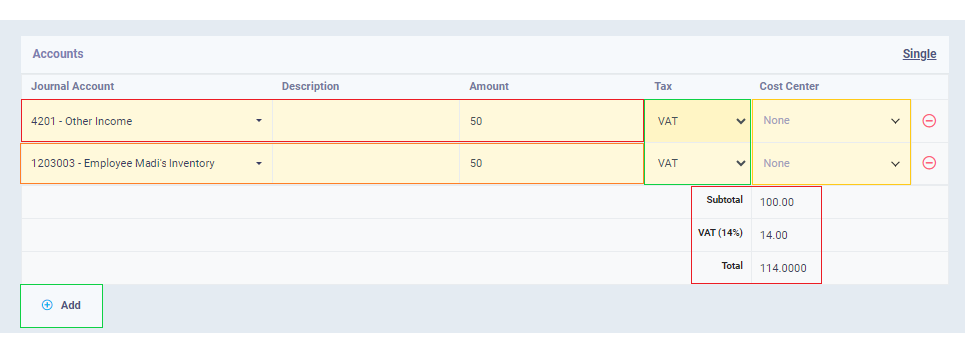
- Journal Account Name: Click on “Default Account,” then search and choose the desired account.
- Description: Enter the description for each journal account related to the transaction.
- Amount: Enter the amount value for each journal account selected in each row separately.
The total revenue amount will be automatically calculated by the program based on the entries in each row.
- Tax: Choose the type of tax to be added to the income value from the dropdown menu for each journal account separately.
- Cost Center: Select the desired cost center to be assigned to the income value for each journal account separately.
Complete the income data and then press the “Save” button.
Income Reports
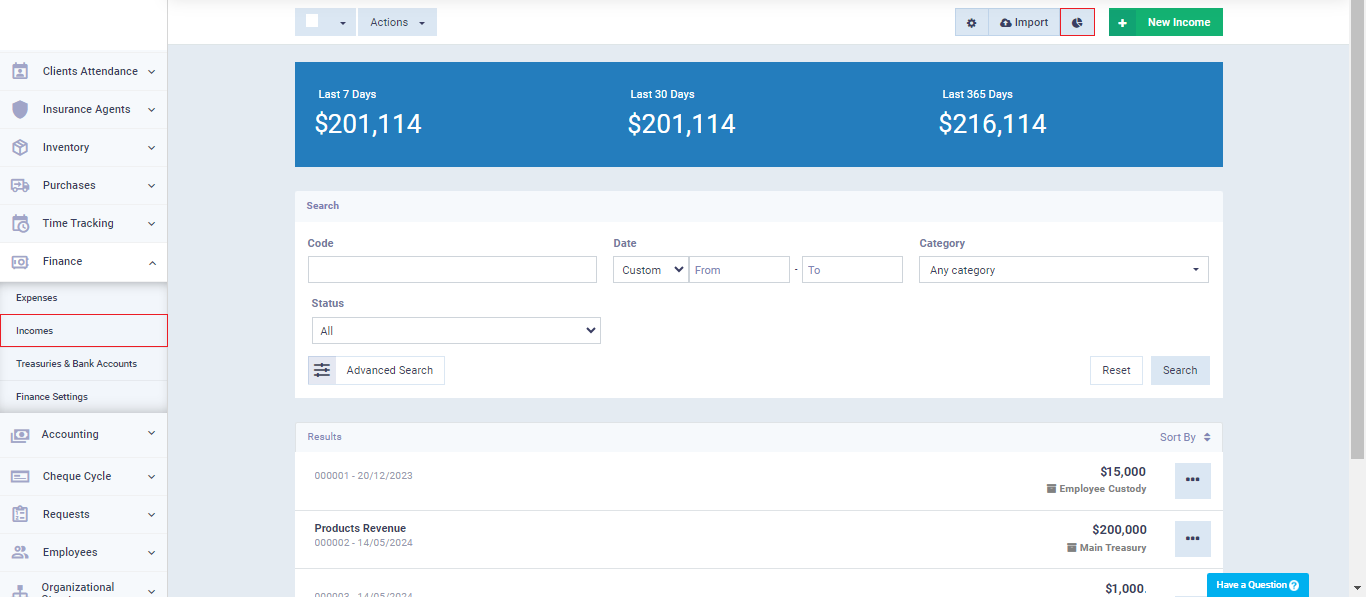
You can access income reports either by clicking on the reports icon “![]() ” on the income page.
” on the income page.
Alternatively, you can access cash receipt reports by clicking on “Accounting Reports” under “Reports” in the main menu, then select the income report you want to view and click on “Details.”
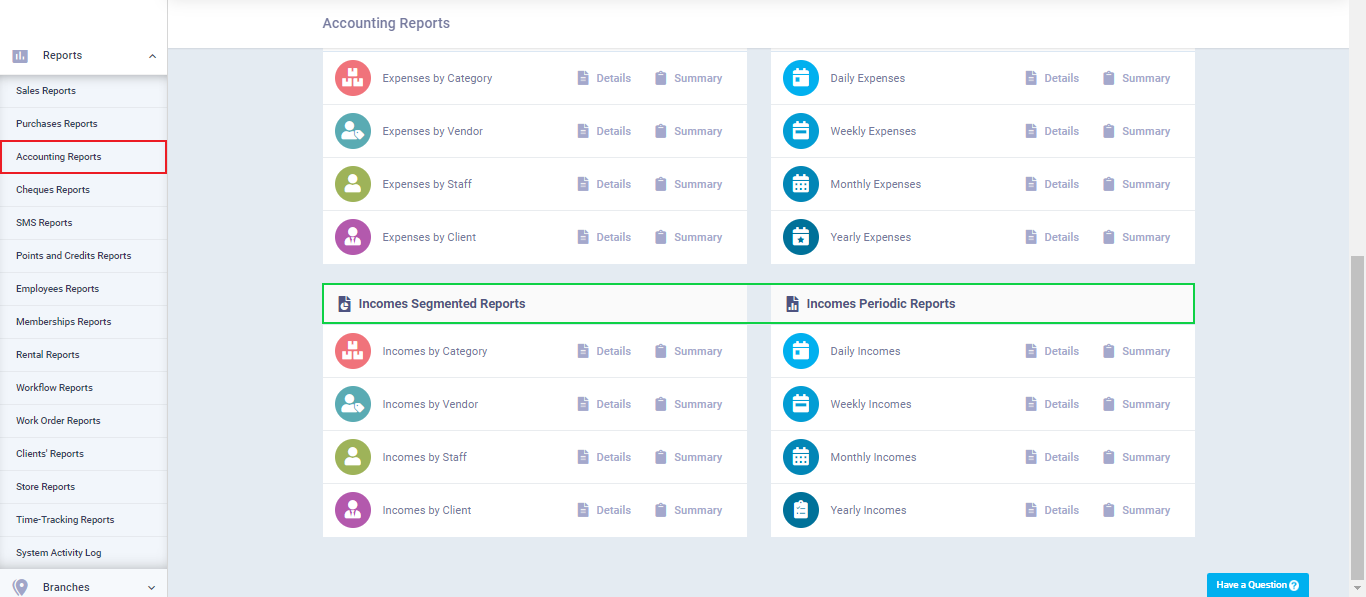
You will find your report displayed, and you can download or print it.


