Comprehensive Guide for Work Orders
The work order helps you to create a specific file for each project with a defined budget, add all the documents and transactions related to this project, and ultimately review its profitability. [The workflows] are similar to the work order, except that workflows are more comprehensive.
How to Add a Work Order
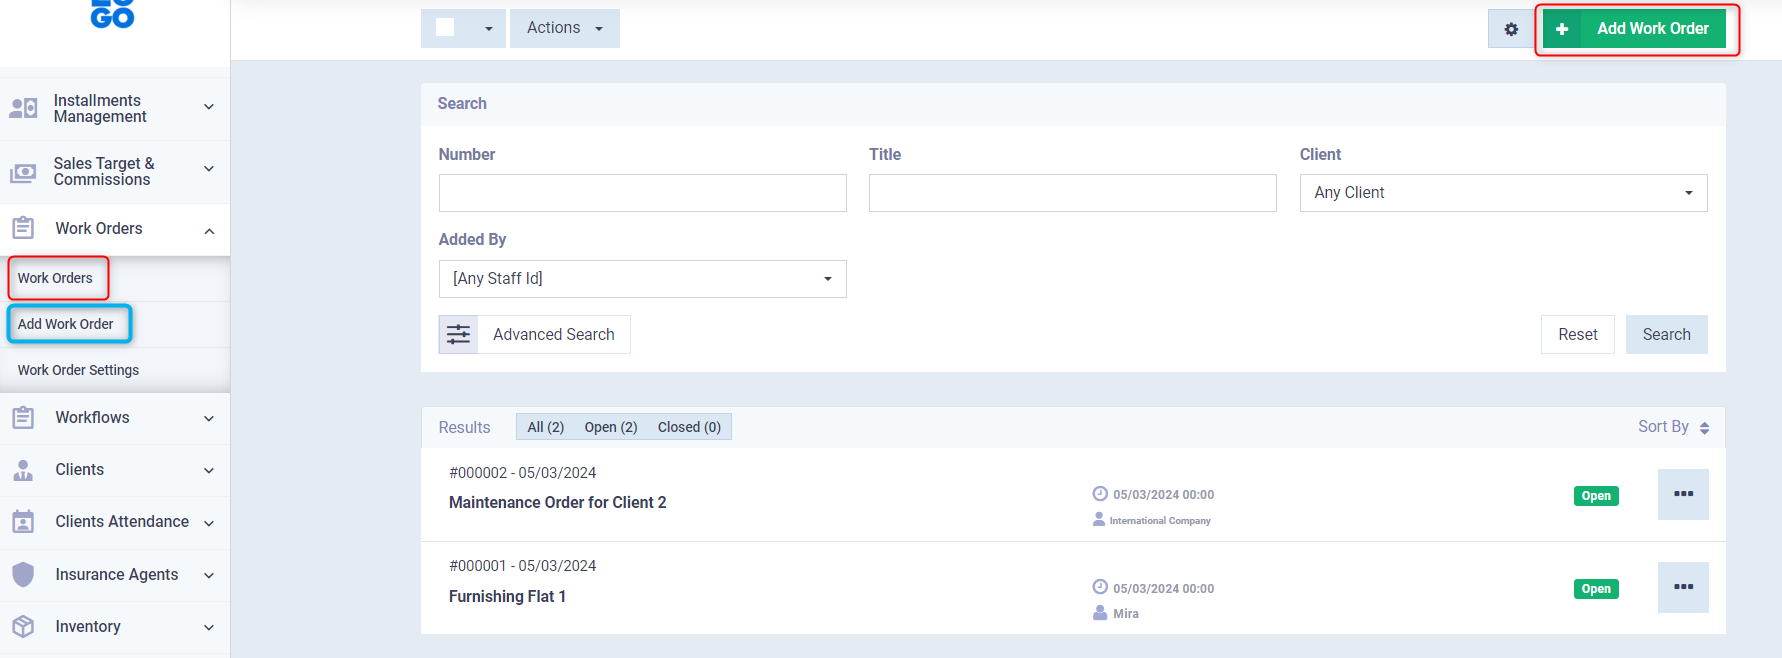
Click on “Add Work Order” from the dropdown under “Work Orders” in the main menu or click on “Work Orders” from the dropdown under “Work Orders” in the main menu then click on the “Add Work Order” button.

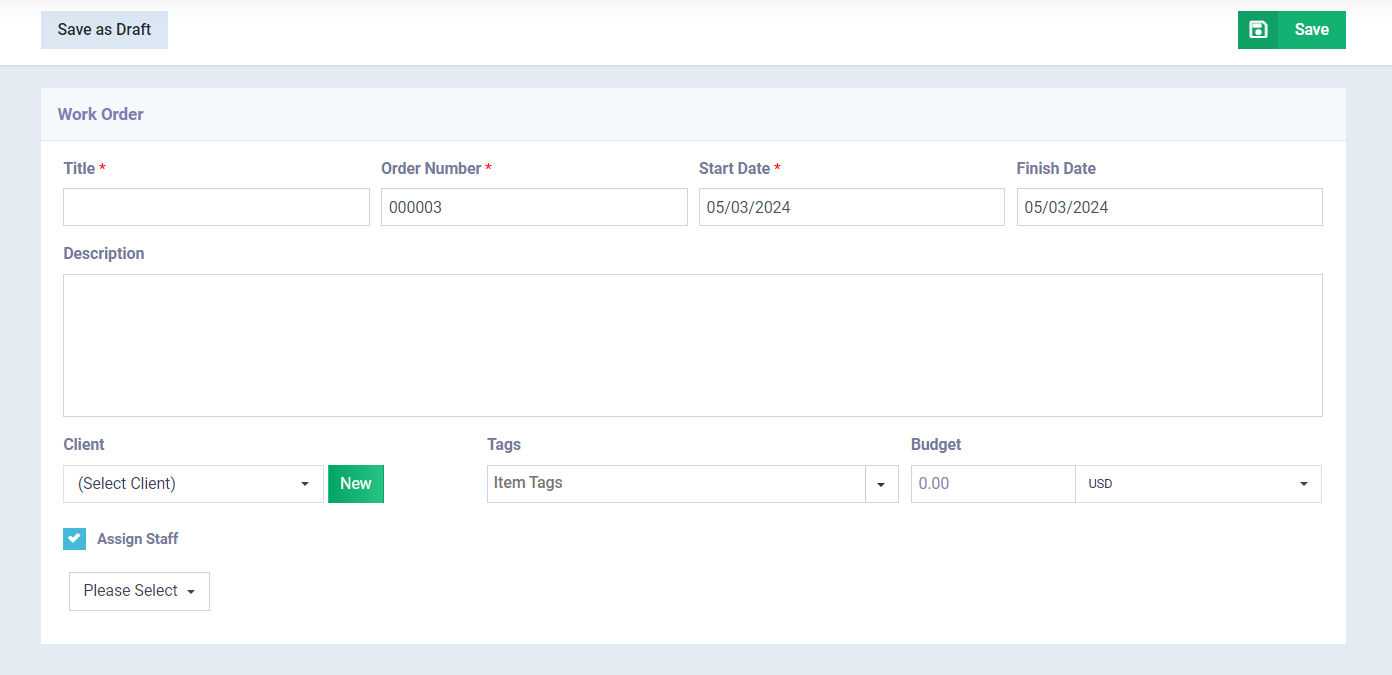
Enter the following work order details:
- Title: Write the name of the work order file as it will appear in the work orders list in the account.
- Order Number: A number or code that distinguishes the work order, placed automatically in sequence, and can be modified or changed through the “Auto Numbering Settings“ inside the account.
- Start Date: Write the start date of the work order.
- Finish Date: Write the finishing date of the work order.
- Description: If you want to write a general description about the nature of the new work order.
- Tags: Write keywords about the work order to aid in search operations within the program.
- Client: Choose one of the clients from the list if the work order is associated with a specific client.
- Budget: Set the value of the budget indicator for the work order.
- Note: The budget indicator in the work order operates according to either the expenses and costs associated with the work order or according to the client invoices within the work order. For more details; you can review the “Setting Up the Budget Calculation in the Work Order“ guide.
- Click on the “Save” button.

You can perform some actions on the work order such as:
- Adding a note/attachment.
- Or scheduling an appointment.
Also, you can add some new documents or assign old documents such as invoices and spending authorizations to the work order.

It is also easy to control the settings of work orders by clicking on “Work Order Settings” from the dropdown under “Work Orders” in the main menu, and these settings include:
- Editing the status list or the actions associated with the work order.
- Or editing the template.
- Or the custom fields.


