
A Complete Tour of a Workday in Food & Beverage POS
This article takes you through a connected tour that simulates a cashier’s complete workday on the restaurant POS app, from the moment the session opens to when it closes, covering all the essential steps: building orders, tracking them, collecting payment, and reviewing the shift’s activity.
Steps for a Complete Workday in Food & Beverage POS
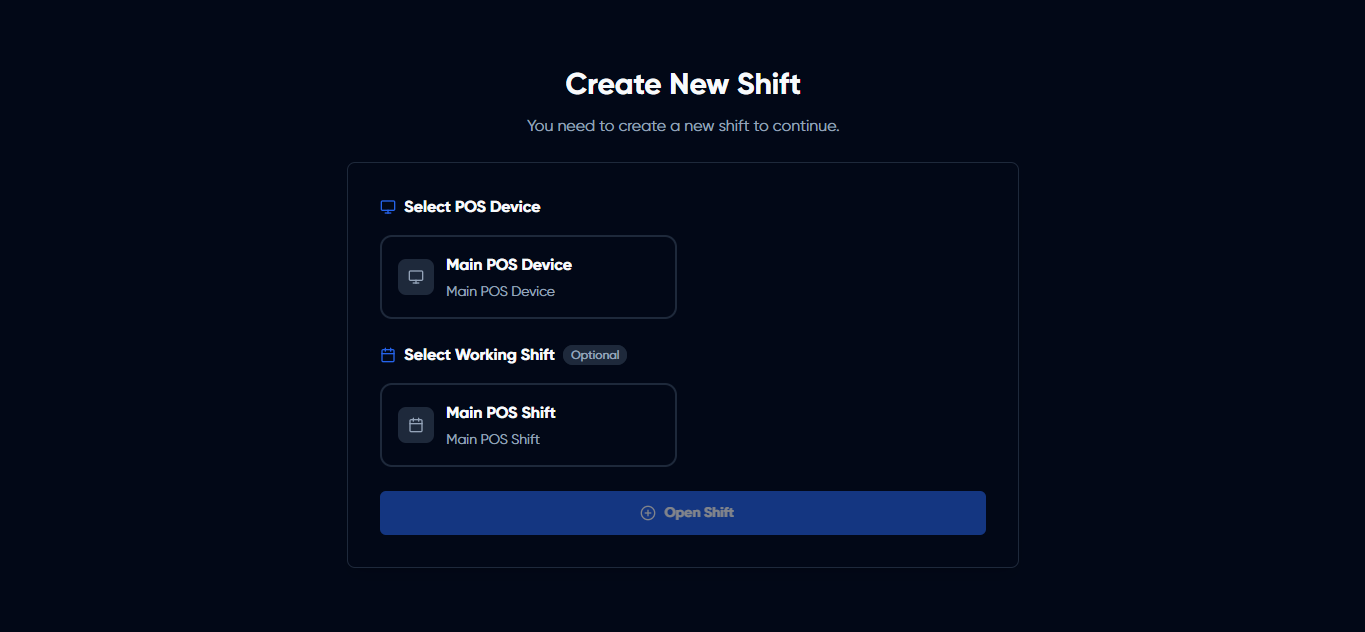
Step 1: Opening the Session (Shift)
Log in to the app, select the device and shift you’re working on, then click “Open Session” to start working. If a session is already open on your branch, the system will automatically display it for you to join.
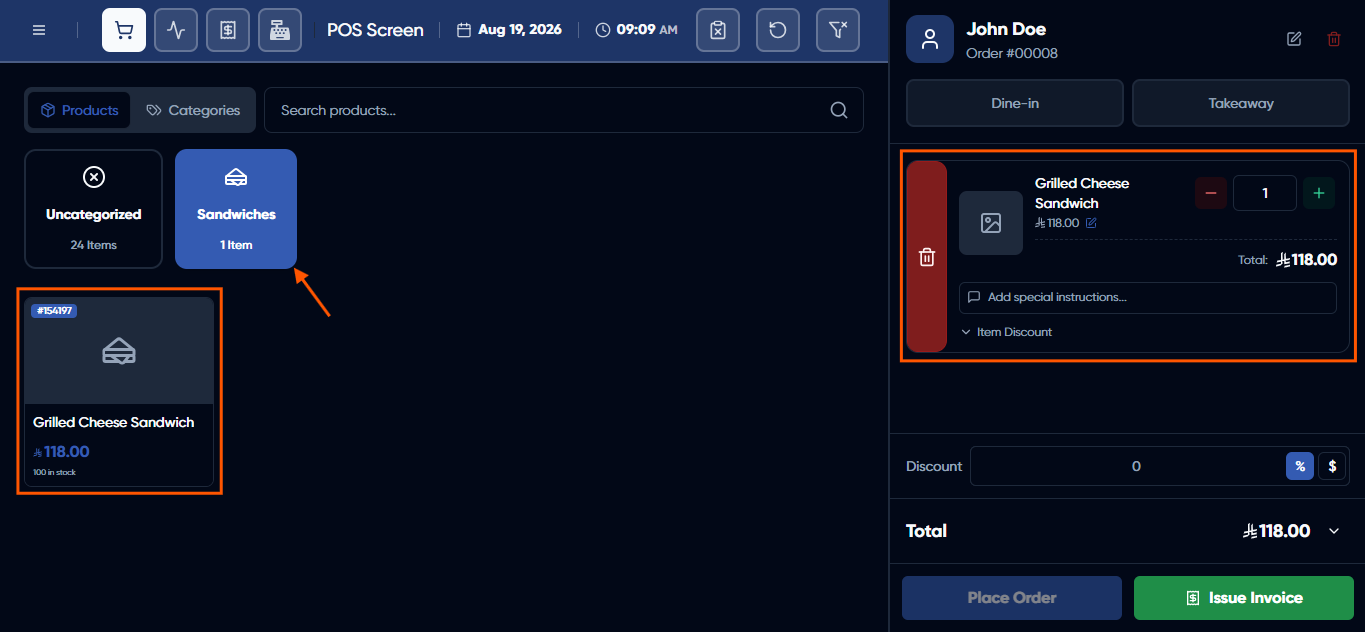
Step 2: Searching for Products and Building the Order
From the POS screen, search for products by name, code, or from categories, and add them to the order. Adjust the quantity, unit, or price as needed, and add notes to any item (such as kitchen instructions).
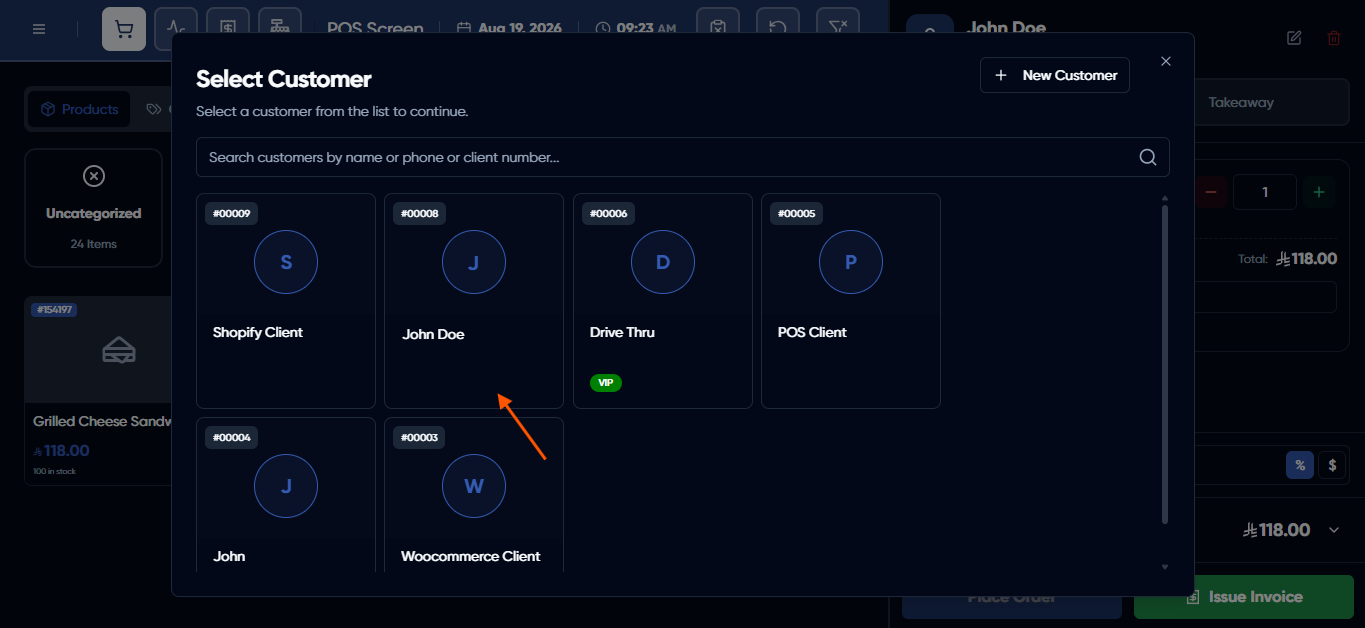
Step 3: Adding the Client and Selecting the Order Type
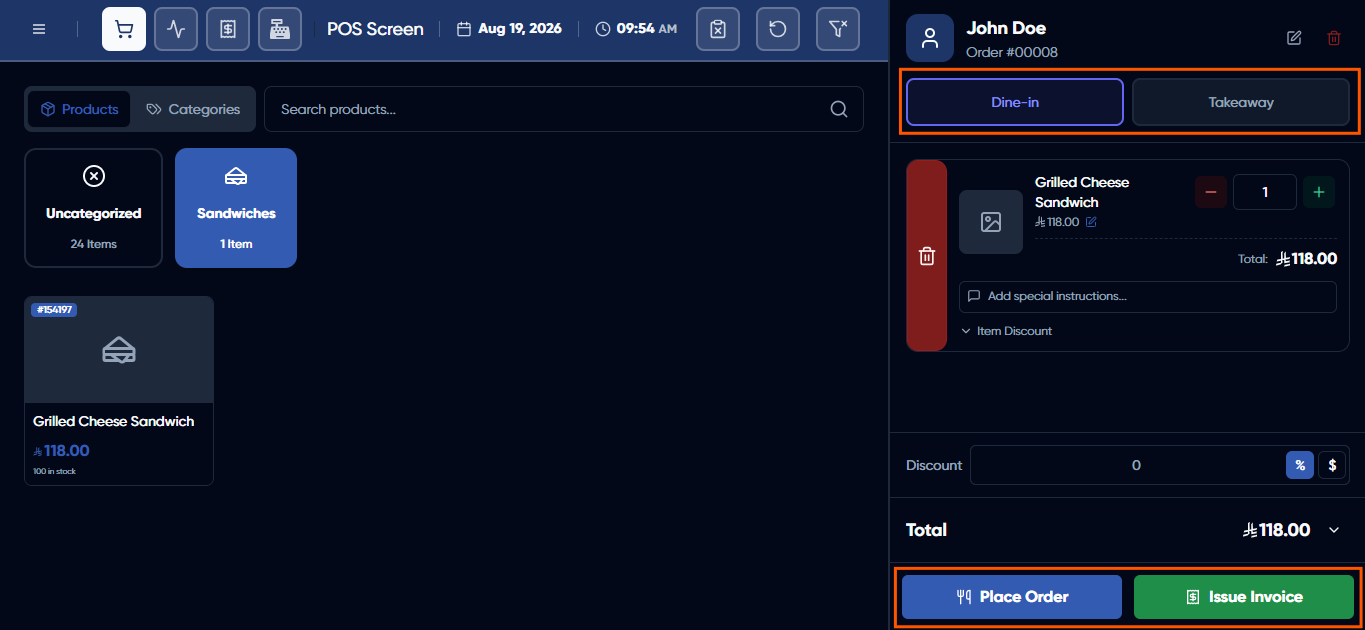
Search for the client or use “Cash Client” for quick orders, then choose the order type: “Dine-in” to select a table from the “Select Table” window (with the option to add a new table if needed), or “Takeaway” to proceed directly.
Step 4: Placing the Order or Issuing the Invoice Directly
Click “Place Order” to save it and send it to the kitchen without an invoice, or click “Issue Invoice” to convert it directly into an invoice via the payment window.
Step 5: Tracking Active Orders
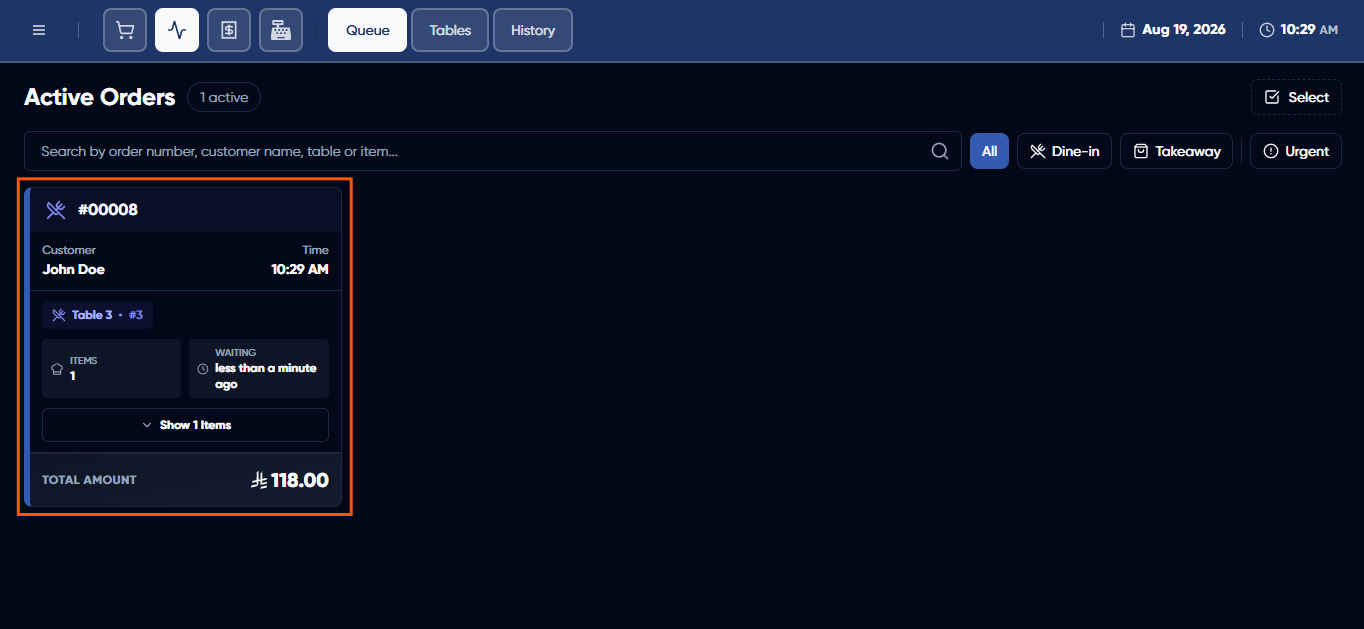
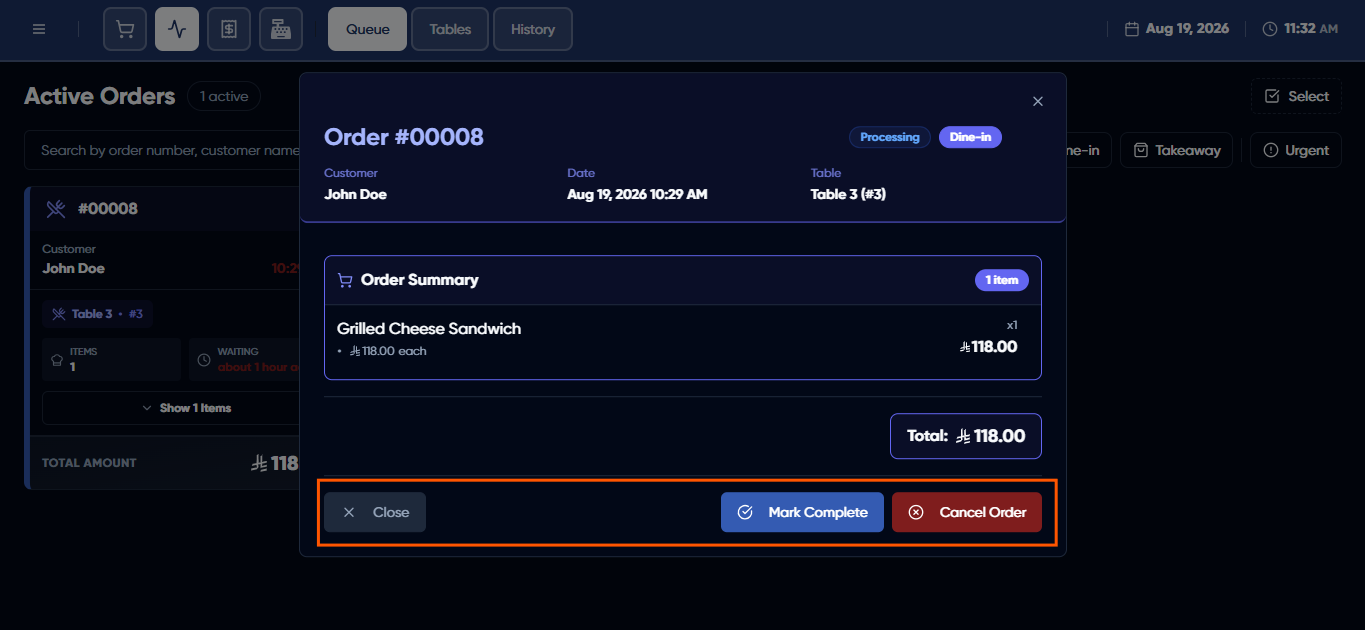
From the “Activity” section → “Queue,” track all ongoing orders, with a visual alert for orders that have exceeded the usual waiting time. Complete any order via “Mark as Complete,” or cancel the order via “Cancel Order.“
Step 6: Collecting Payment
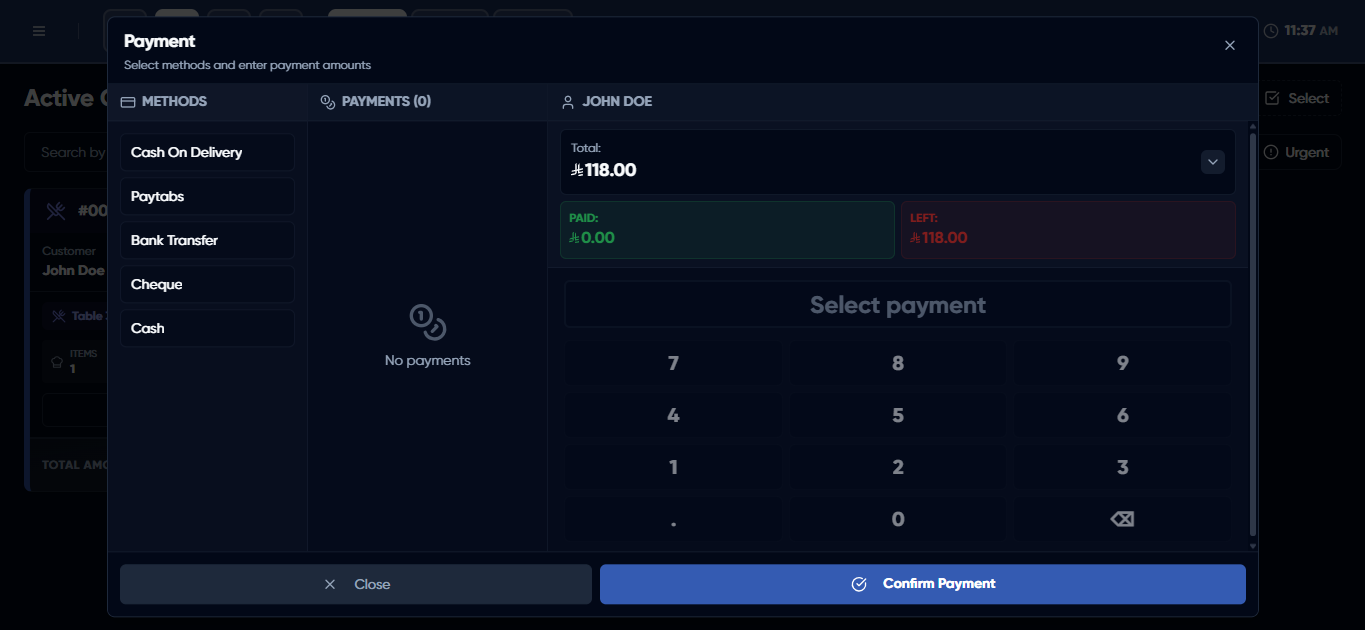
When you mark the order as complete, a new payment window appears. Select the payment method, enter the amount, and split the payment across more than one method if needed. Review the total, paid, and remaining amounts, then click “Confirm Payment” to issue the invoice.
Step 7: Reviewing the Shift’s Activity
At any point during the shift, you can review everything that’s happened:
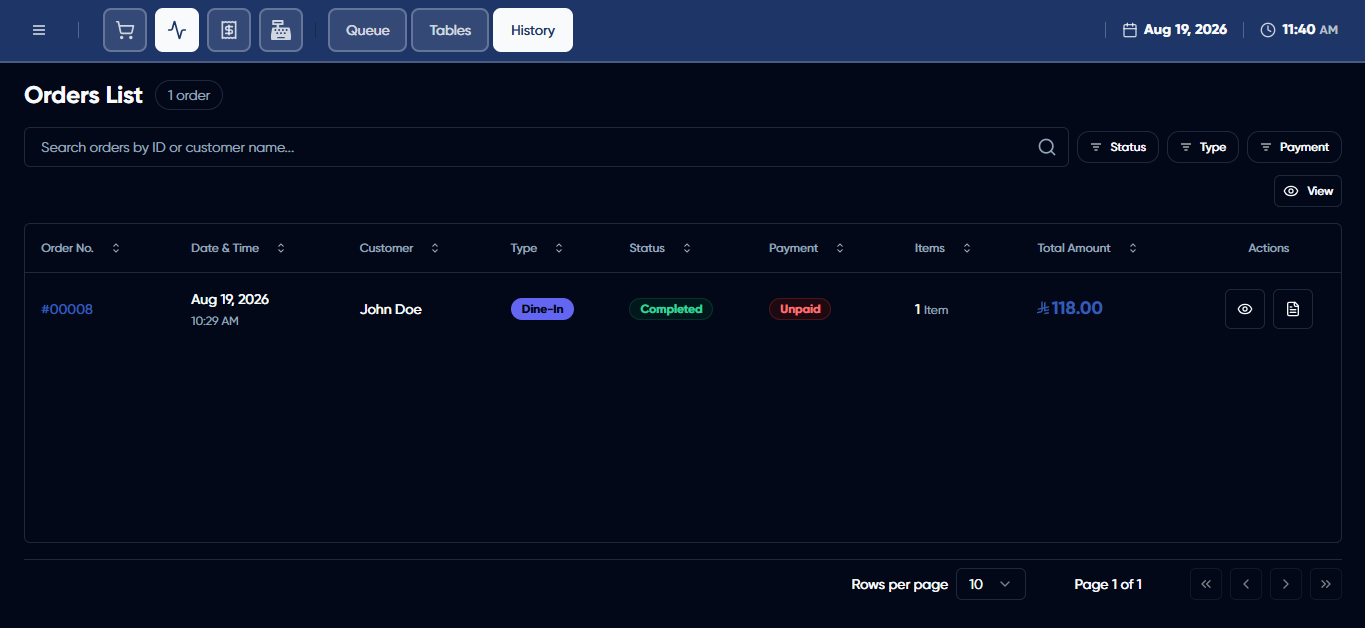
- From “Activity” → “History“: all recorded orders (completed, cancelled, and ongoing) with Status, Type, and Payment filters.
- From “Invoices“: the invoices issued during the current shift.
- From “Invoices” → “Returned Invoices“: any invoices that have been returned.