Automatic and Manual Invoice Statuses and Tags
By adding different statuses and tags, you can easily distinguish invoices. These tags are likely to be used later in the search process to filter invoices more efficiently.
Automatic Invoice statuses
Invoice statuses are automatically assigned to indicate the delivery and payment states, based on the transactions occurring on the invoice.
Delivery Statuses
The delivery statuses are as follows:
(Partially Delivered – Partially Rejected – Under Delivery – Delivered – Rejected)
The delivery statuses are affected by warehouse receipts generated by the invoices.
Payment Statuses
The payment statuses are as follows:
(Unpaid – Partially Paid – Paid – Returned – Partially – Returned – Overpaid – Draft – Due – Overdue)
Manual Invoice Statuses
You can manually add statuses to invoices as needed. These statuses distinguish the invoice and assist in the search and filtering process. They also help manage invoices effectively and follow up with clients.
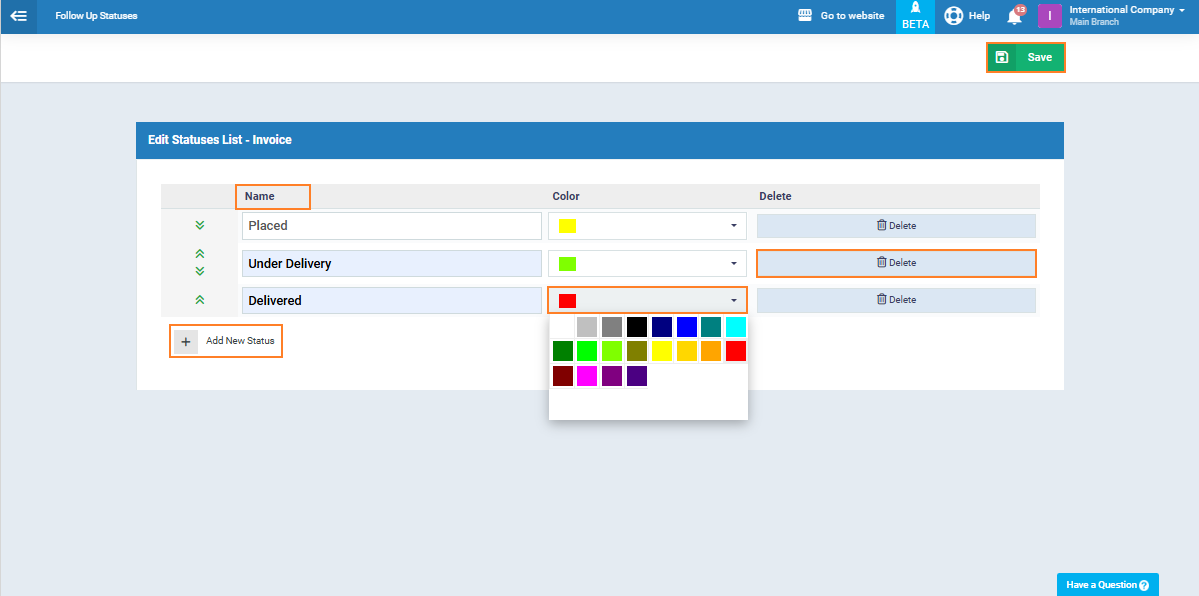
Click on “Sales Settings” from the “Sales” dropdown in the main menu, then click on “Invoice Statuses.”

Control the name and settings of the status through the following field data:
- Name: Enter the name of the status, ensuring it is concise and descriptive.
- Color: Choose the color for the status.
- Delete: If you wish to delete a status, click the “Delete” button and confirm the action.
- + Add New Status: Click the “+ Add New Status” button to add more statuses and fill in the fields. After adjusting the field data, click the “Save” button.
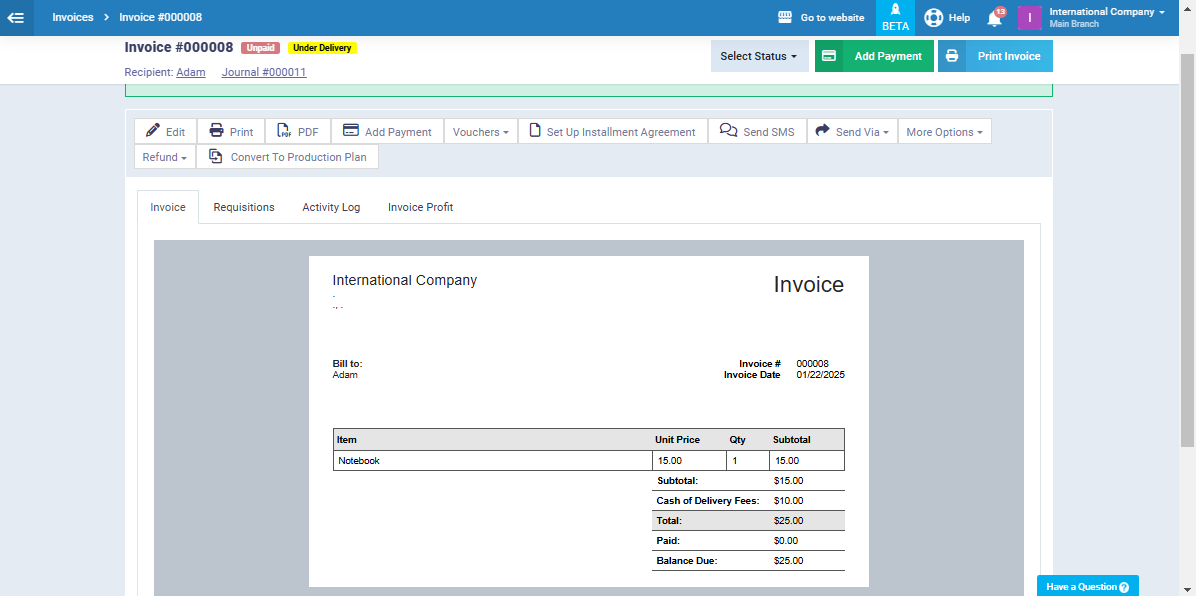
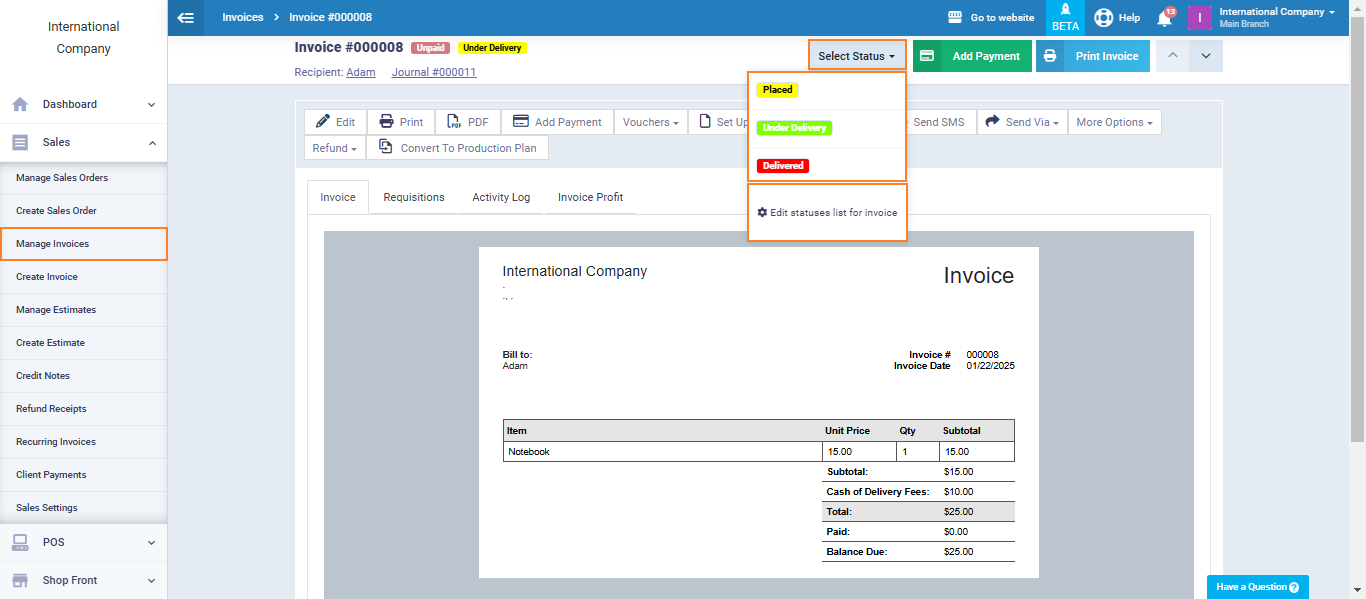
After adding the manual statuses, they will appear in the invoice file, and you can select the appropriate status from the dropdown menu. Alternatively, you can modify the manual status list by clicking on “Edit Statuses List for Invoices.”
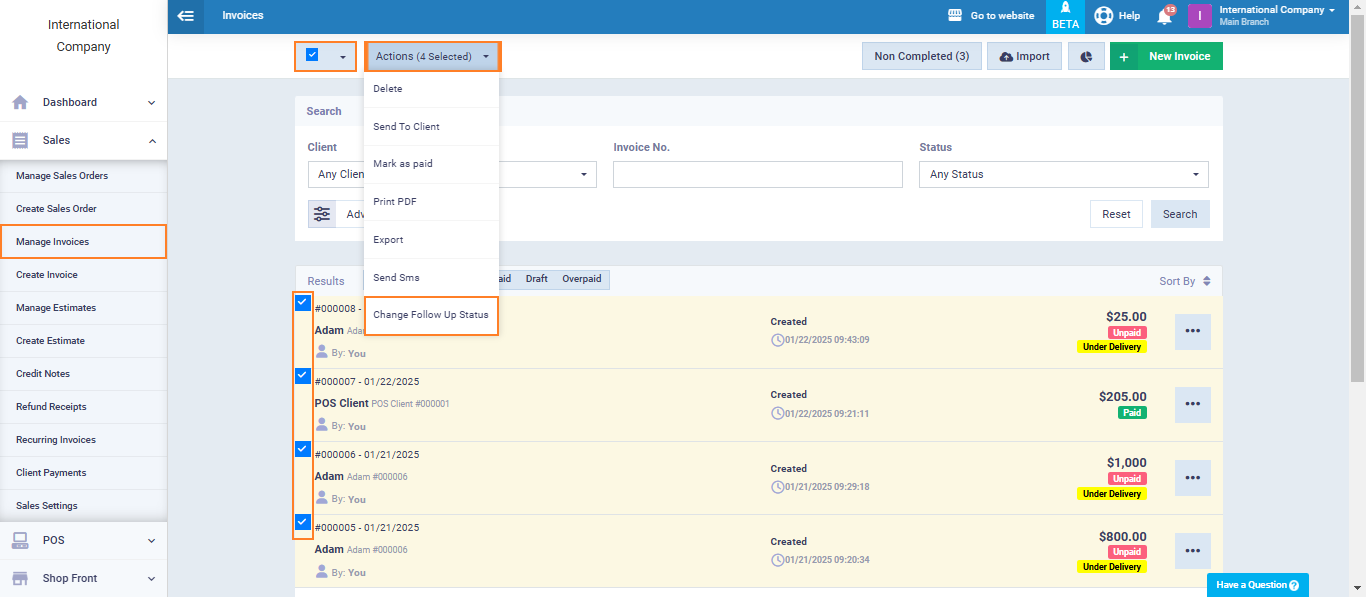
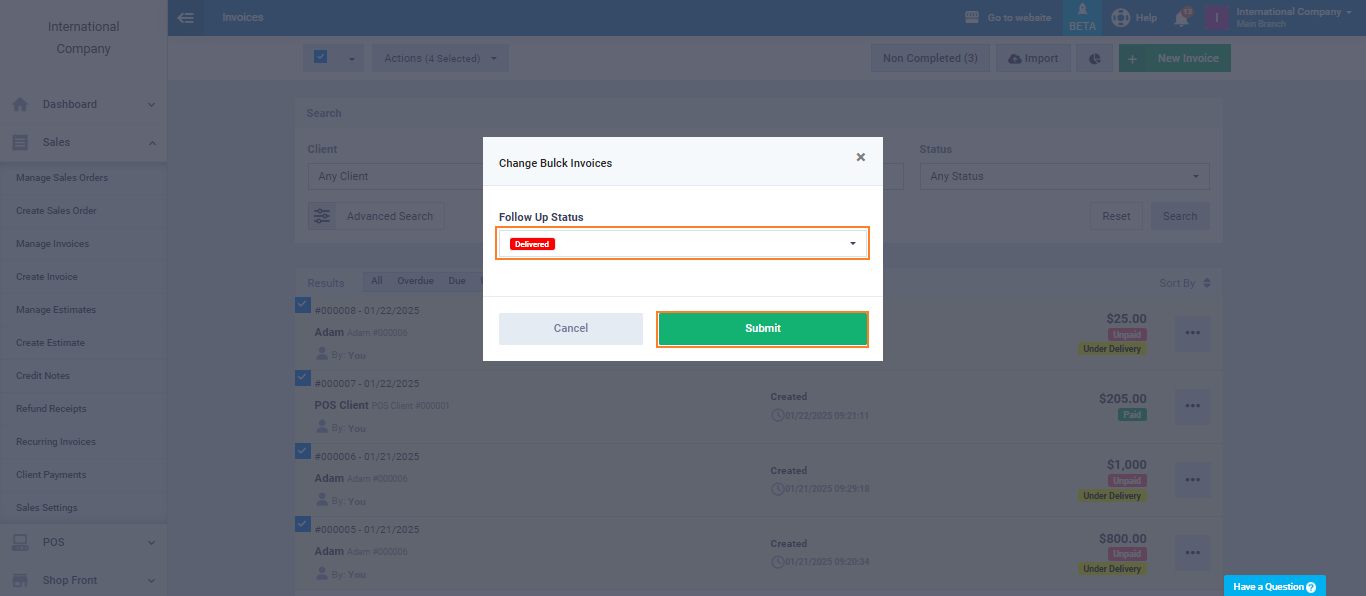
Bulk Update Invoices Status
Select your desired status and click on “Submit“.
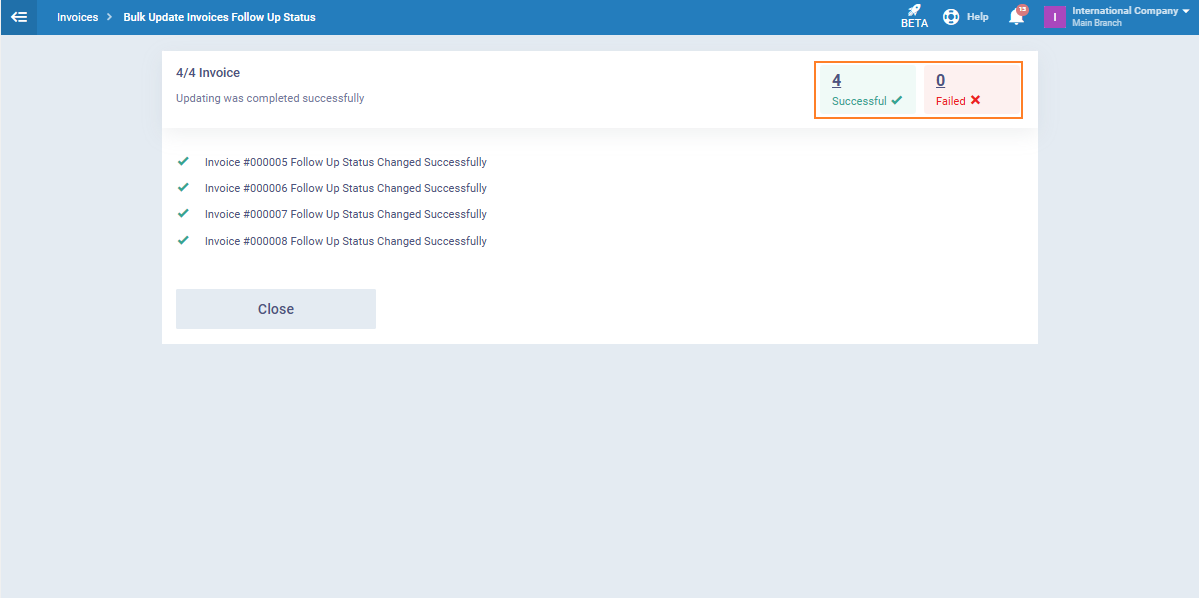
The statuses of the selected invoices will be updated, and you will see the number of invoices that were successfully updated, as well as those that failed.
Tags
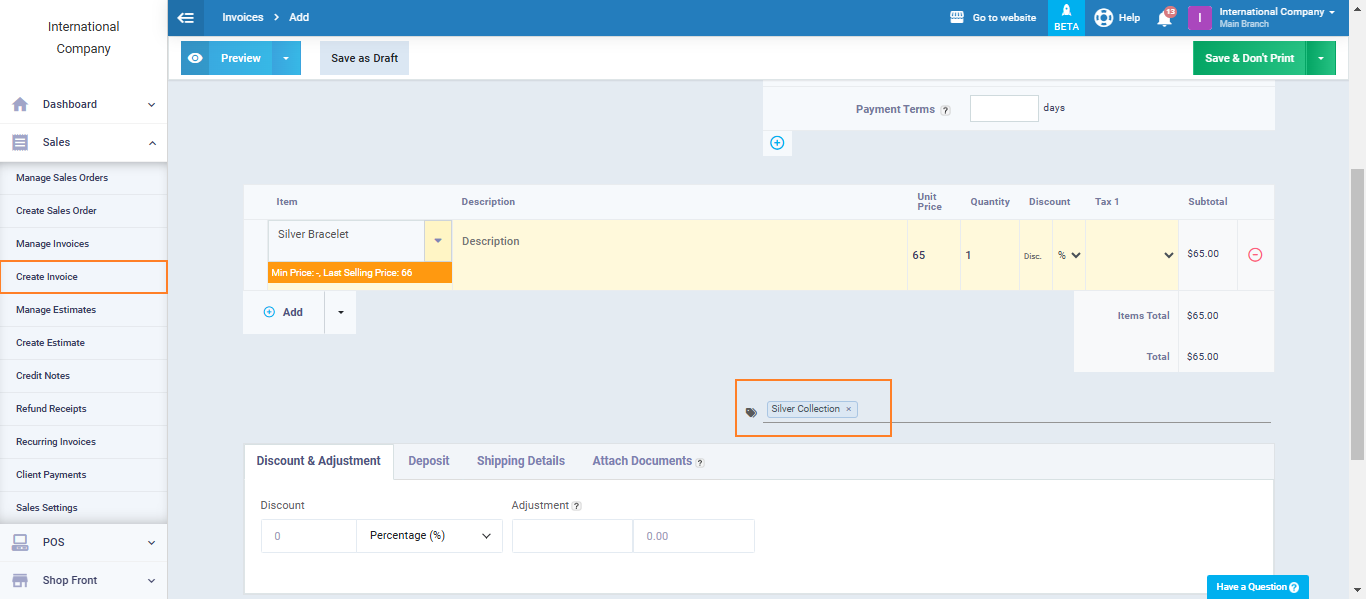
Viewing and Using Statuses and Tags for Search and Filtering
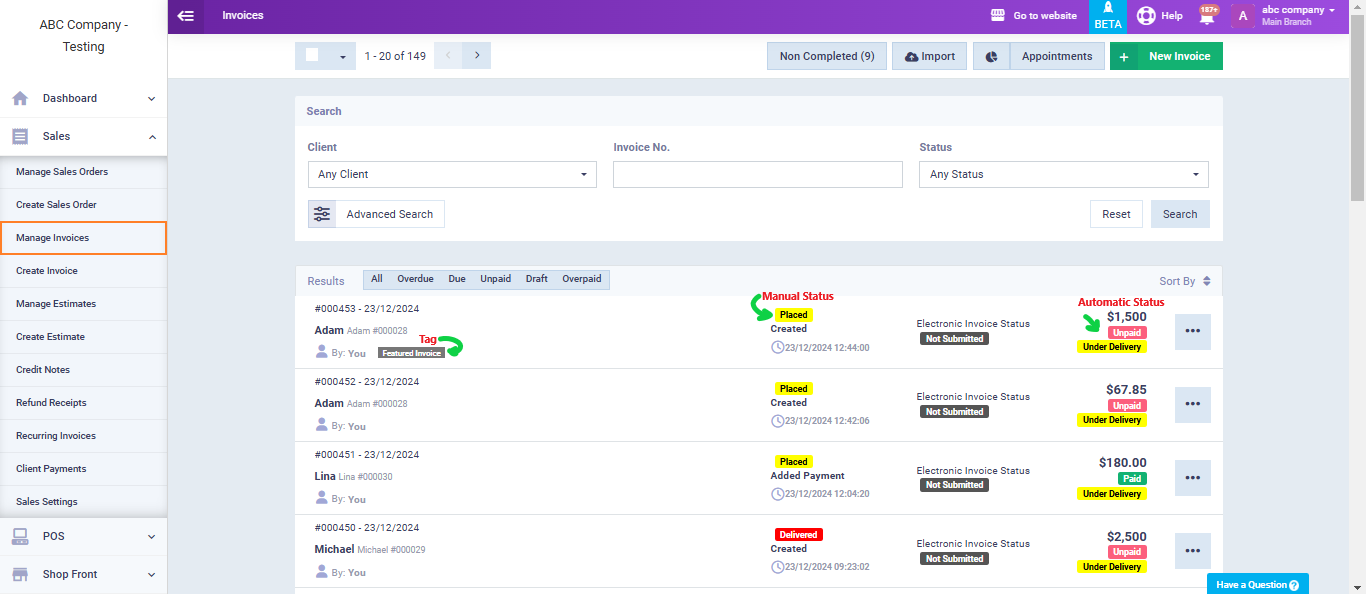
When you go to the “Manage Invoices” menu under “Sales” in the main menu, you may find multiple labels used to distinguish an invoice.
- You will find the tag next to the invoice number and the user who created it. In the current example, the tag is “Featured Invoice.“
- Manual statuses appear above the invoice creation timestamp. In this example, the status is “Placed.”
- Automatic statuses are displayed to the left of the invoice. In this example, the payment status is “Unpaid” and the delivery status is “Under Delivery.”
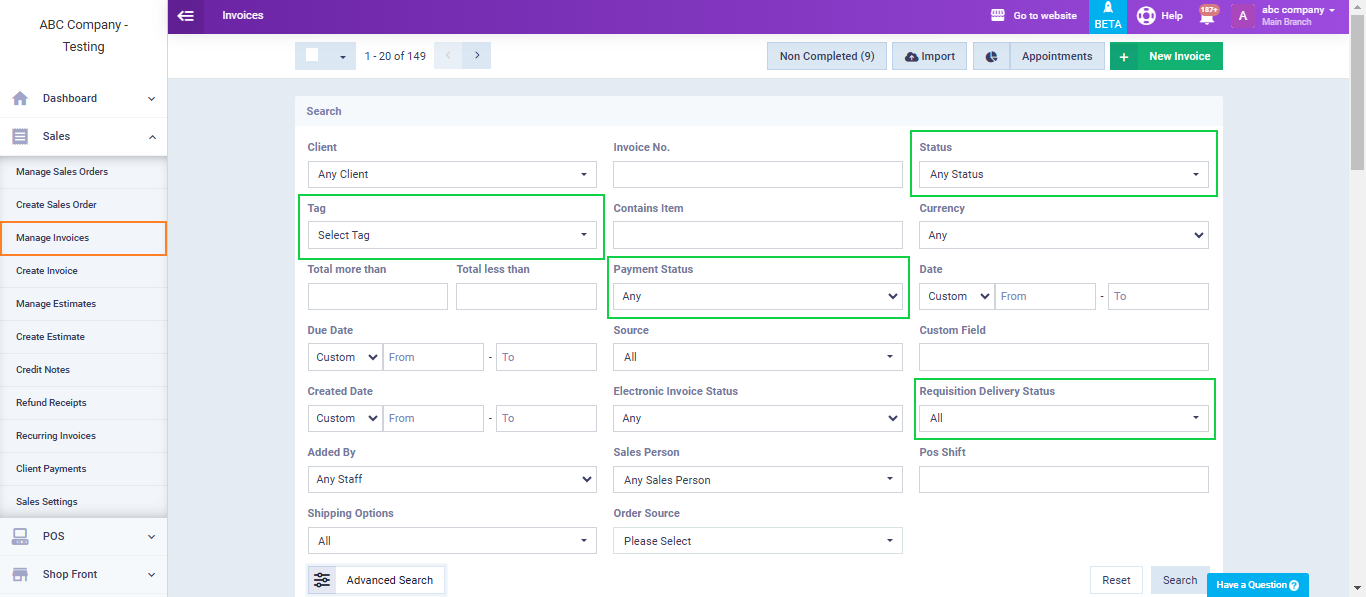
To filter invoices based on status or tag, go to “Manage Invoices” under the “Sales” dropdown in the main menu, then click on the “Advanced Search” button to expand the search options.
There are several fields related to statuses and tags, including:
- Status: For manual statuses.
- Tag: For tags.
- Payment Status: For the automatic payment status.
- Requisition Delivery Status: For the automatic delivery status of the invoice.
Select the desired field to filter by, choose the status, and then click the “Search” button.

