Managing POS Session
In some fast-paced sales activities like supermarkets and retail stores in general, issuing paper or electronic invoices traditionally cannot keep up with the required speed to provide good service. This is where the need for a point of sale (POS) system comes in. Through this system, a large number of invoices can be generated quickly with sales activity monitoring on a simple and user-friendly screen. What are the features that you will enjoy and make it easier for you to manage your business through the point of sale screen from the system?
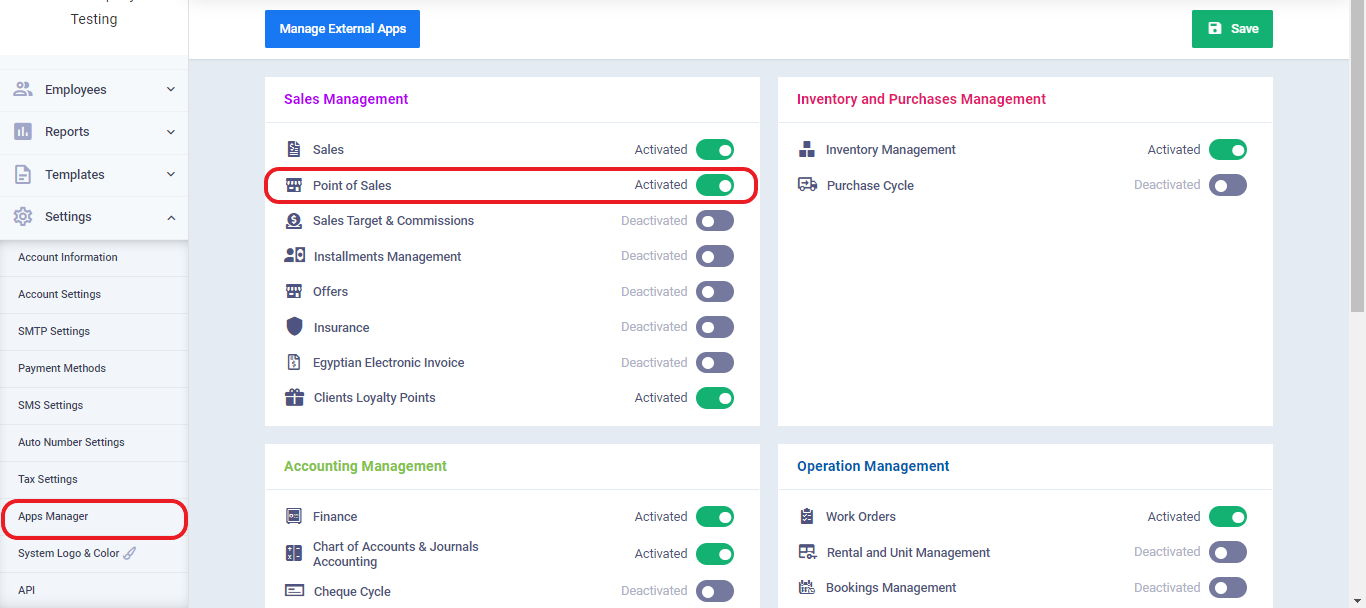
First, you need to activate the “Point of Sale” application by going to “App Manager” in “Settings” from the main menu.
Defining Devices and Shifts
The default setup of the Point of Sale program in the system includes a basic device and a basic shift to start a sales session. If you wish to add new devices or various shifts, you can do so before opening the session.
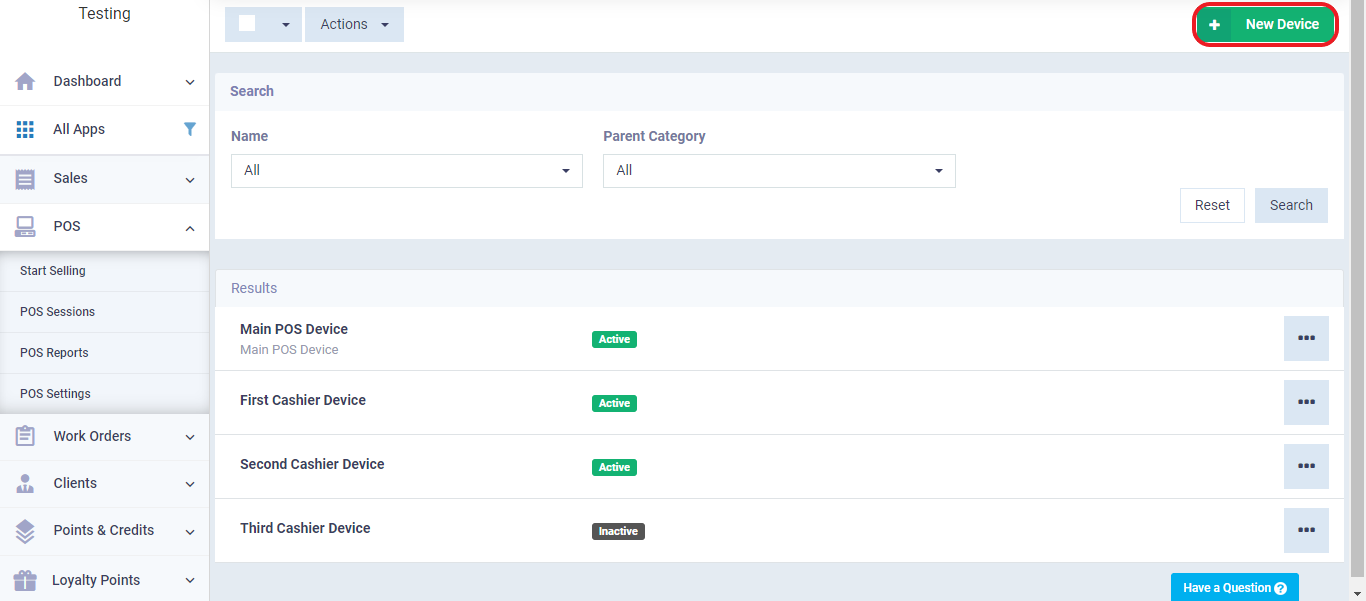
To add a new Point of Sale device, go to “Point of Sale Settings” and click on the card for “POS Devices.”

Click on “New Device”
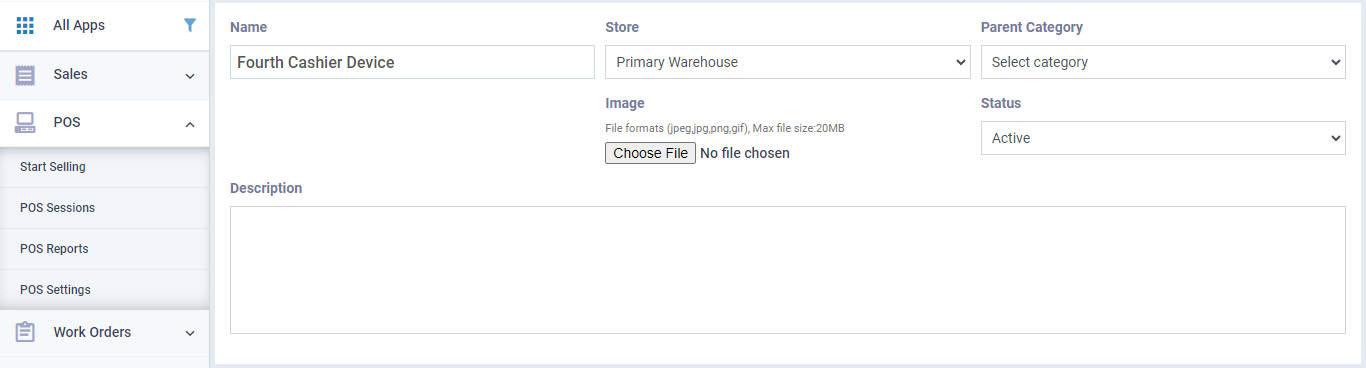
Write the device’s name and choose a parent category (another device) that the new POS device falls under. This way, you can add the new device as a specific branch of another main device, where all POS devices for this branch are grouped.
This helps you view reports in various ways. Then select the device’s status as “active” or “inactive,” which you can reset to enable or disable starting sessions on a specific device.
To add a new Point of Sale shift, go to “POS Settings” and click on the card for “POS Shifts.”
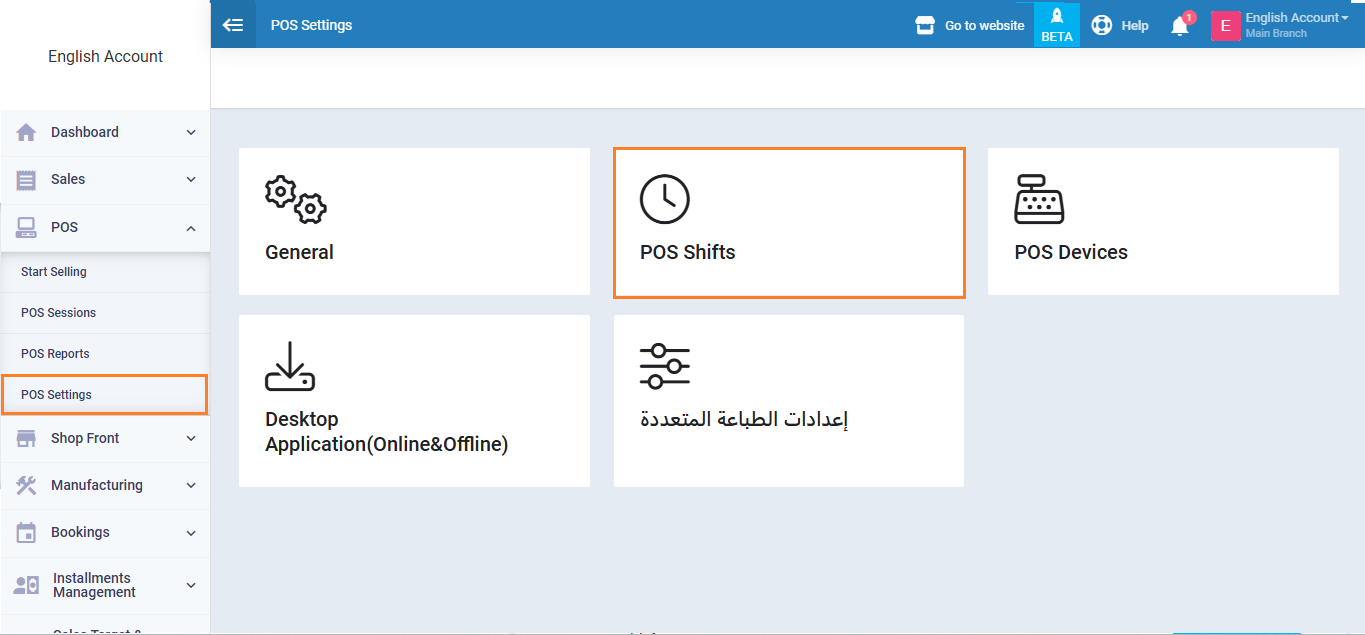
Click on “New Shift”
Write the name of the shift, and choose a main category (another shift) under which the new Point of Sale device falls. This allows you to organize the new station under a specific category, helping you review reports in various ways.

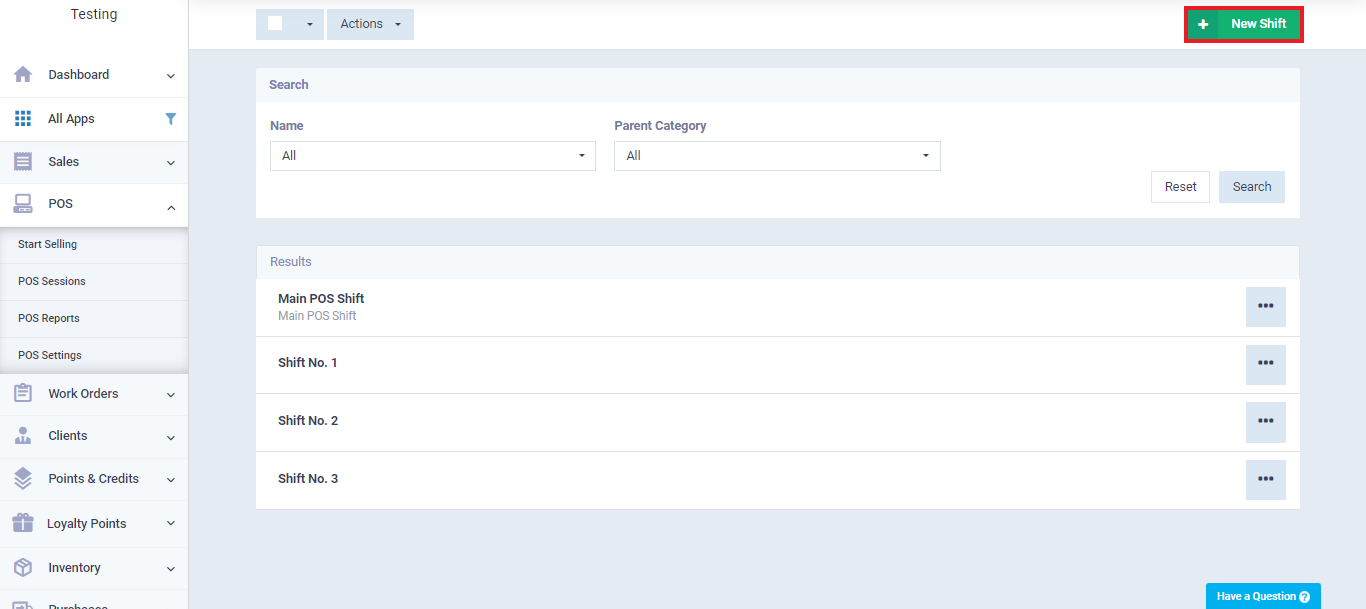
In addition to the POS shifts and device settings, many other settings in the POS software from the system allow you to customize its features to fit your business needs. You can access these settings by clicking on “POS” in the main menu then navigating to “POS Settings” and clicking on the card labeled “General.” Some of these settings include:
- Choosing a fixed client layout and a fixed invoice layout that will appear in all POS invoices.
- Defining available payment methods.
- Controlling which product categories appear on the sales screen.
- Select the account directory location for transferring deficit or surplus adjustment entries in POS sessions.
- Specifying whether the POS entry will be for the entire session or each invoice.
These are just a few of the settings you can configure to tailor the POS software to your specific business needs. You can find detailed steps for these settings .
Opening the Session and Viewing Invoices and Clients
There are two ways in which you can directly sell from the point of sale program:
- Open a new sales session.
- Start selling directly to continue working on an open session or by opening a new session as well.
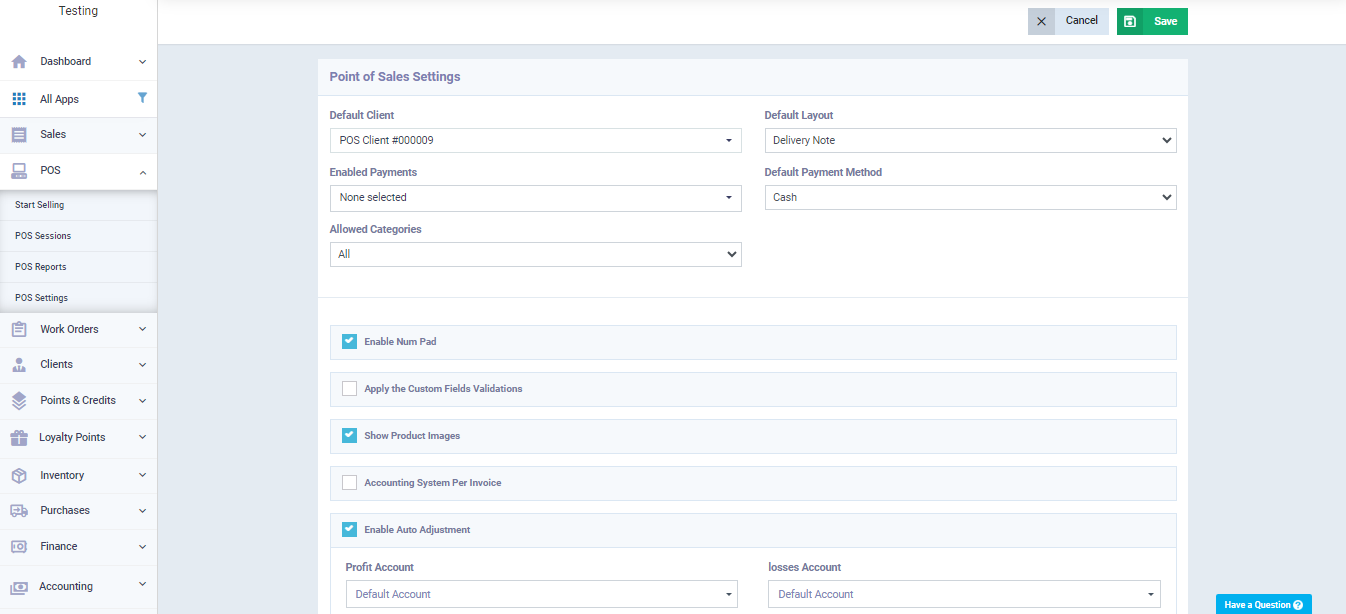
Go to “POS Sessions” under “POS” in the main menu, then click on the “New Session” button or click on one of the open sessions and then go to the “Sales Screen.”
When opening a new session, select the register and the device, then press the “Confirm” button.
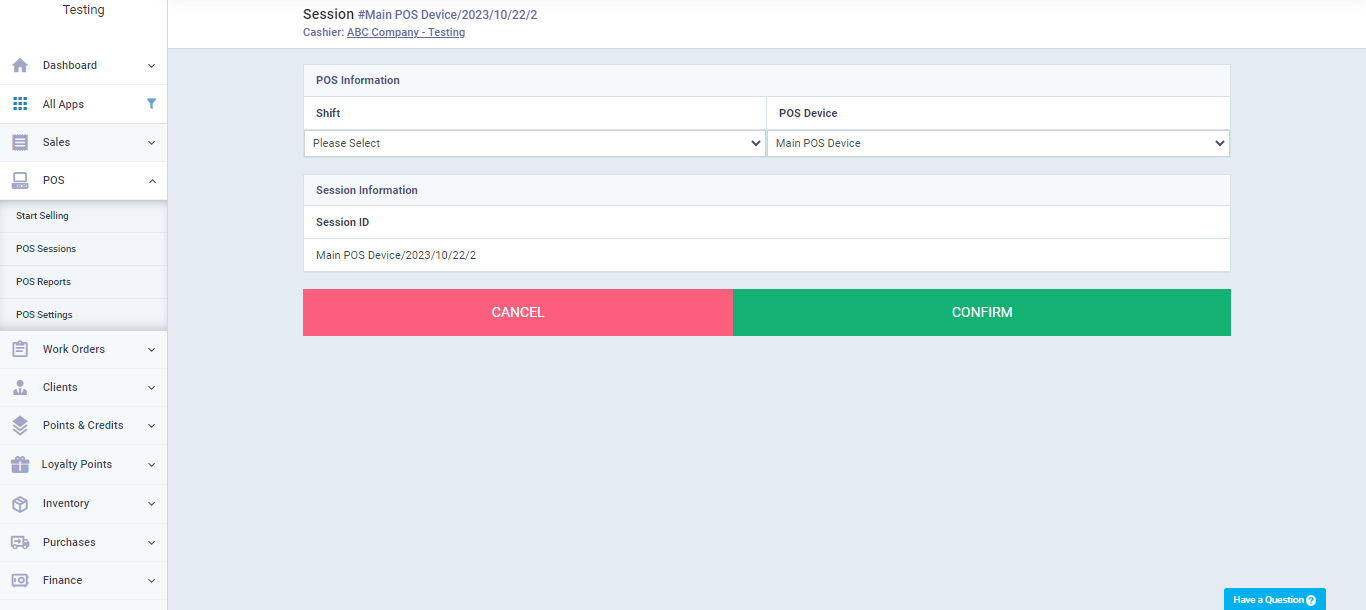
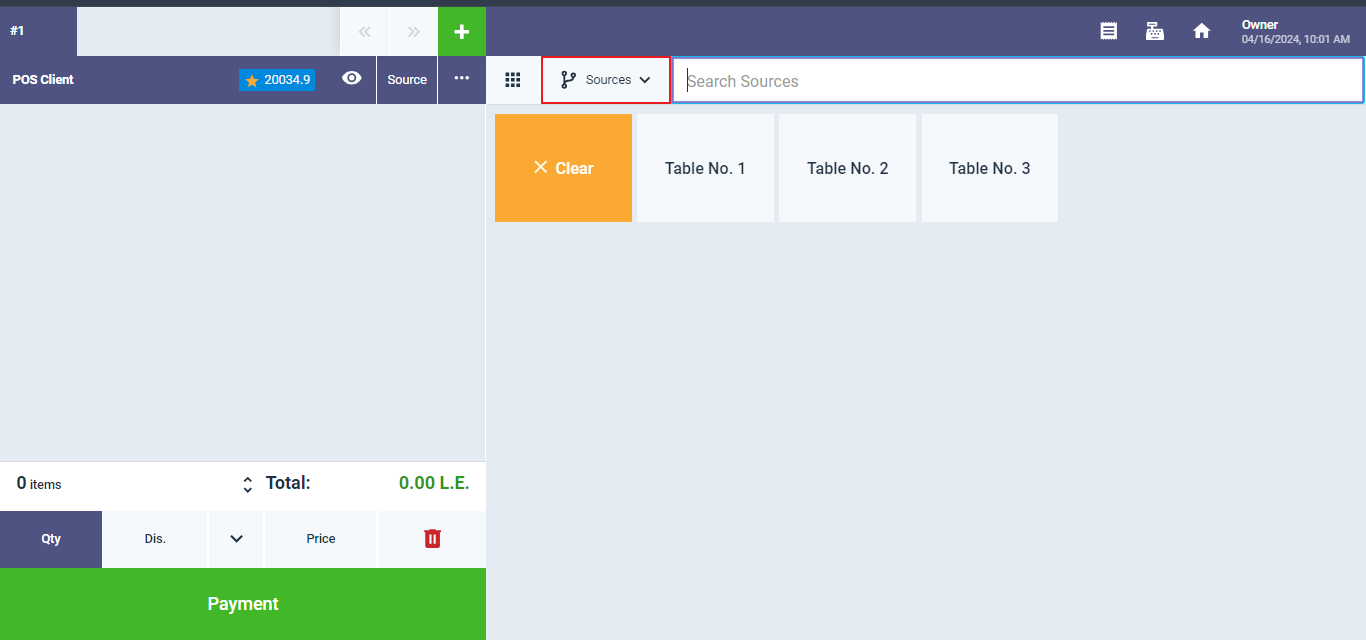
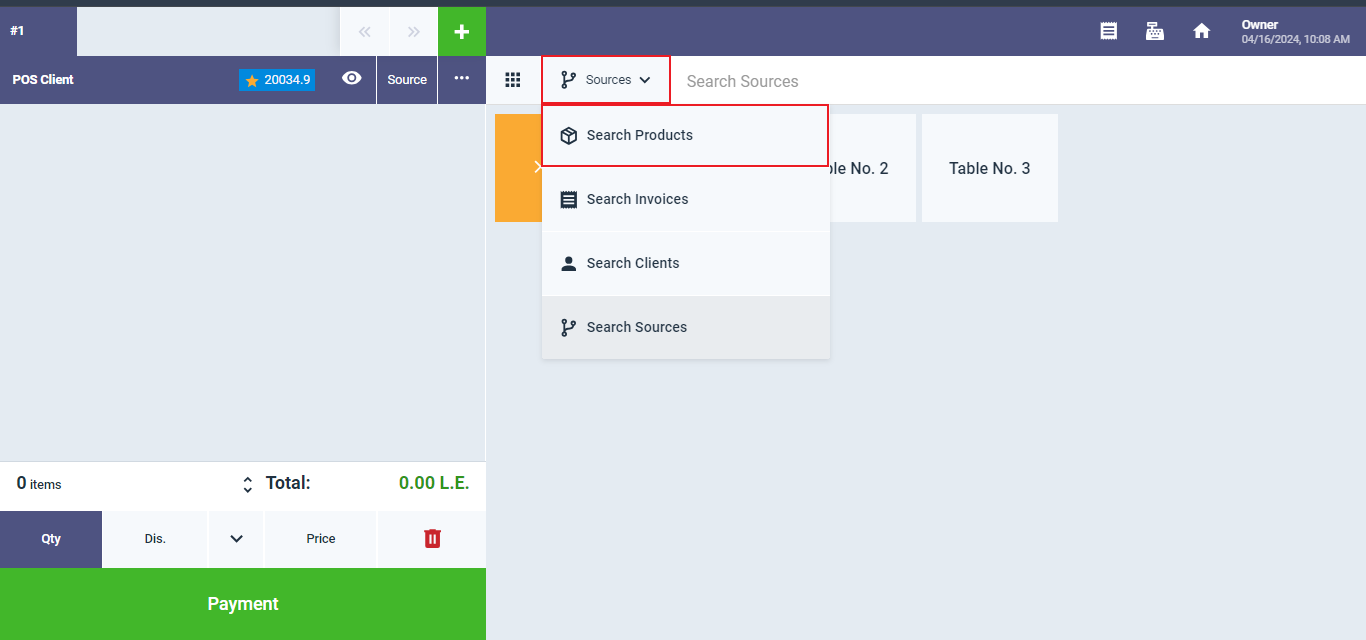
The screen appears like this when you open a session and contains:
- Sources: Here you can find the sources of your orders to specify the source of the invoice request. For more details about order sources, refer to this guide.
- Invoices: This section displays the invoices related to this session and any returns associated with them.
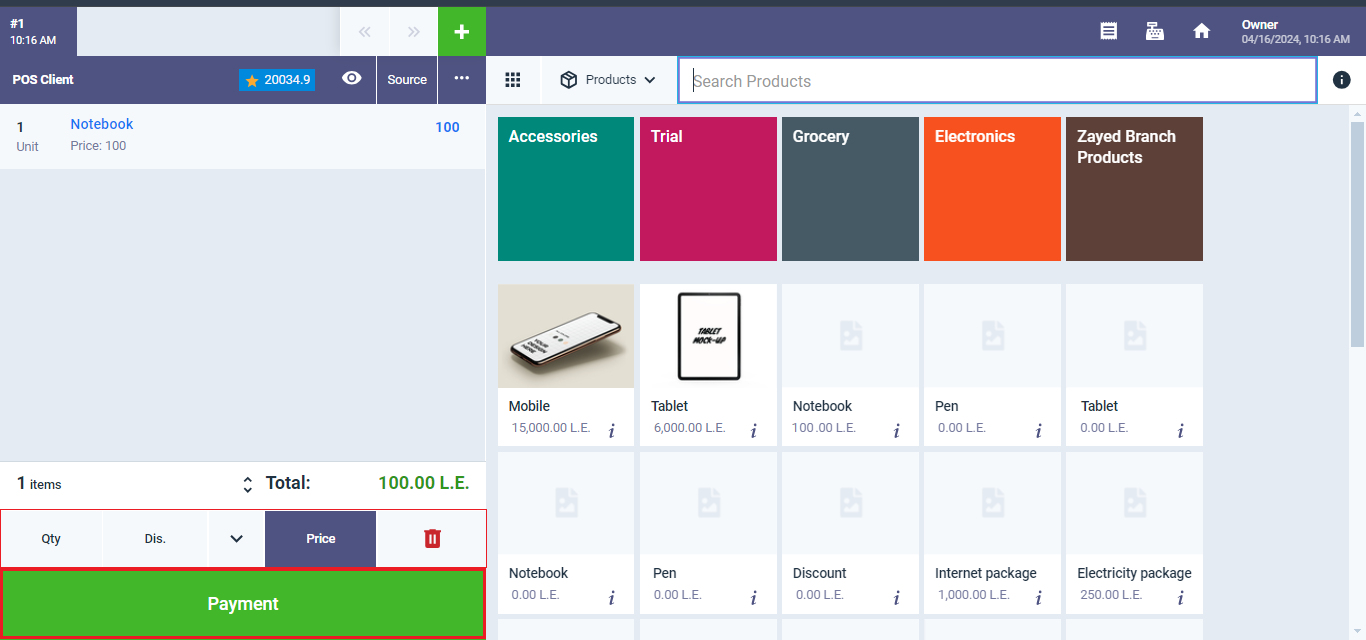
- Products: Product categories and individual products are shown here, facilitating the selection of a product to generate a sales invoice from the point of sale.
By clicking on the designated title for the current page, such as “Sources” or “Products,” a menu appears containing all the titles of the other pages, such as “Clients,” allowing you to easily navigate from one screen to another on your main display.
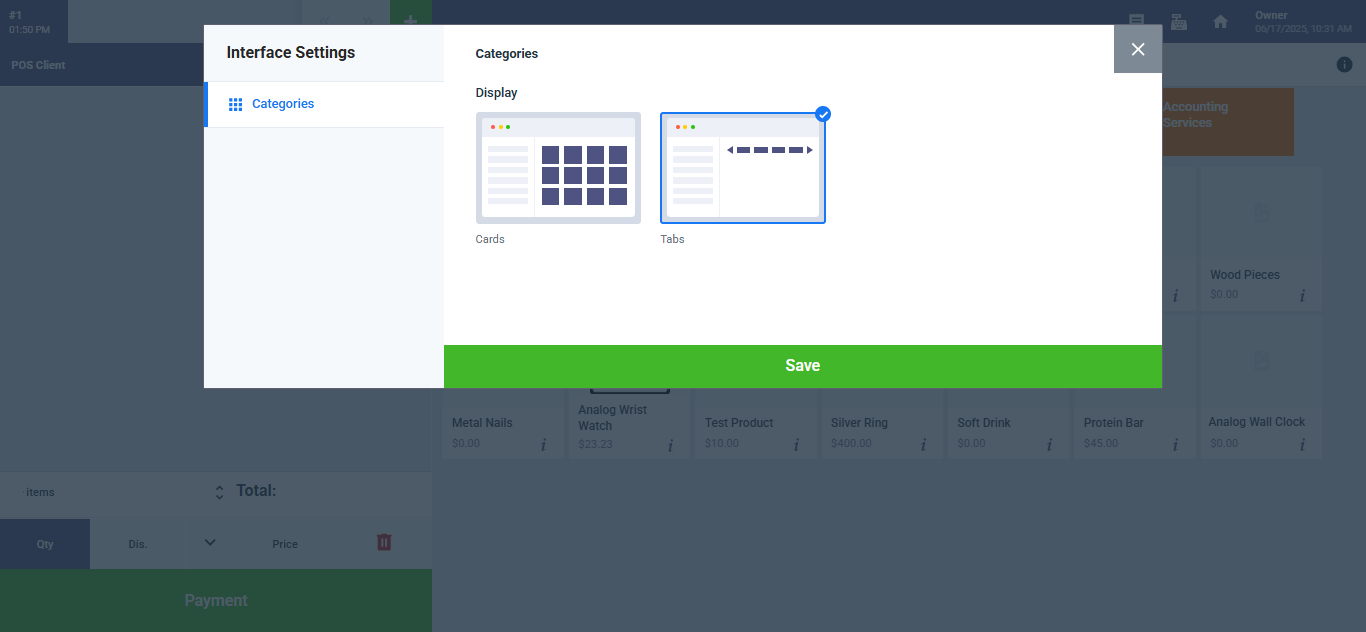
You have the flexibility to choose how products are displayed in the interface, depending on your preference and workflow. Click on “Owner“, then choose “Interface Settings“.
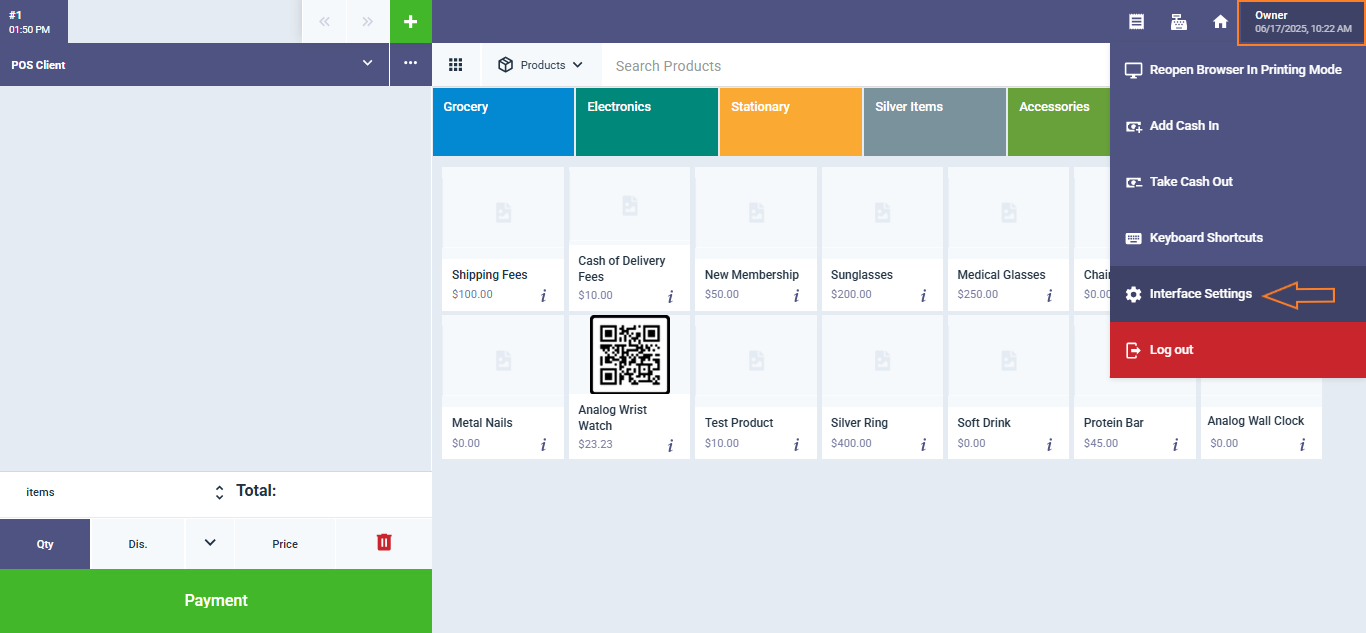
Select the preferred view, then click “Save“.
When selecting the “Products” page, you can click on the desired products, and then press the “Checkout” button to create the invoice.
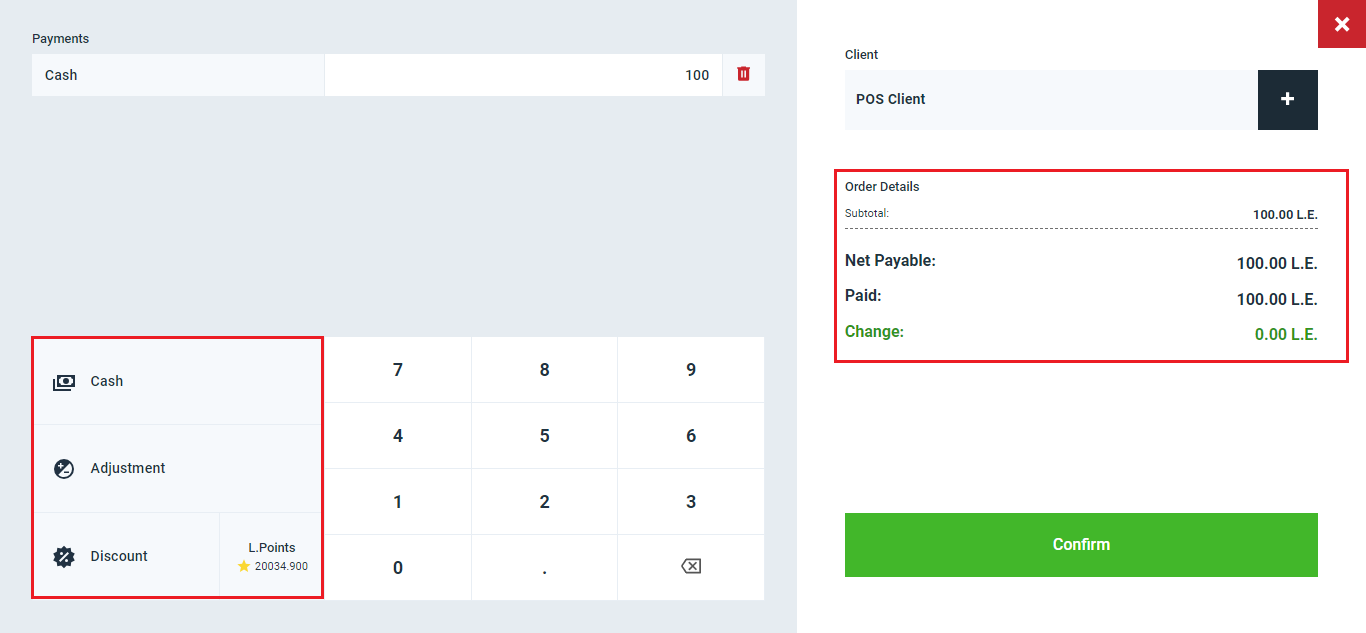
You can add discounts, perform adjustments, and use point-of-sale systems for payment, then confirm the invoice.
Additionally, before confirming the payment, you can edit the amount paid by the customer if there is an increase or decrease from the actual value of the invoice. This allows you to identify any shortfall or excess profit before finalizing the settlement.
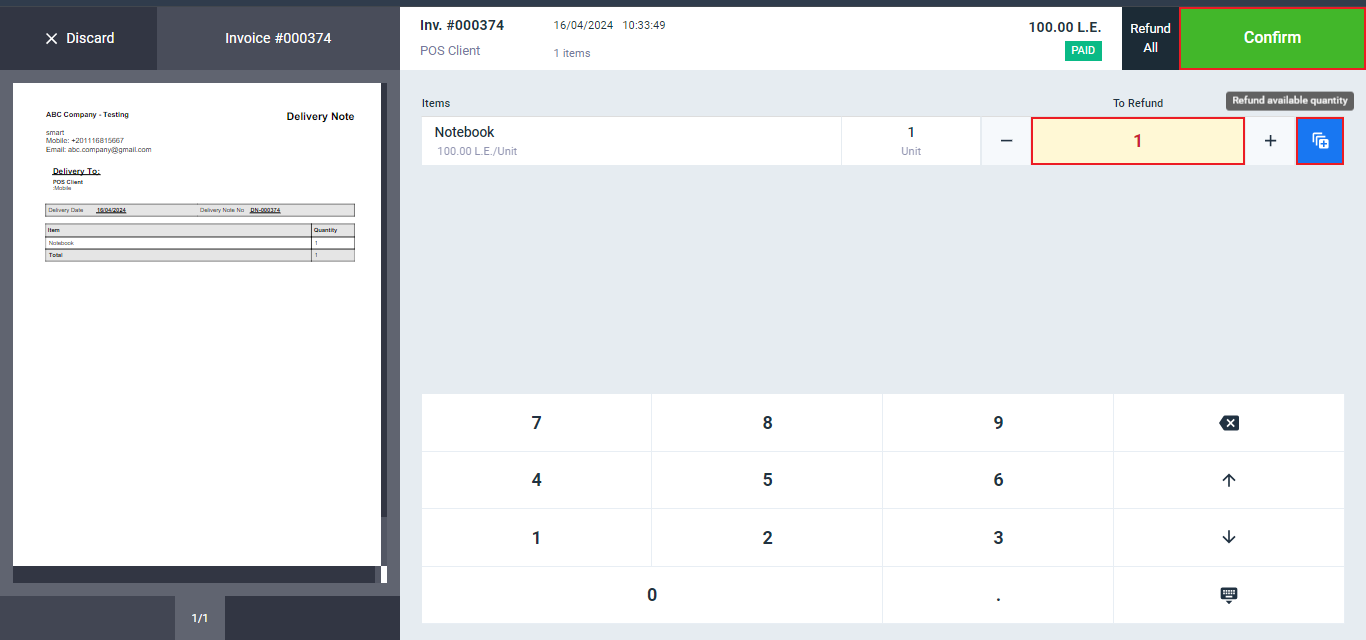
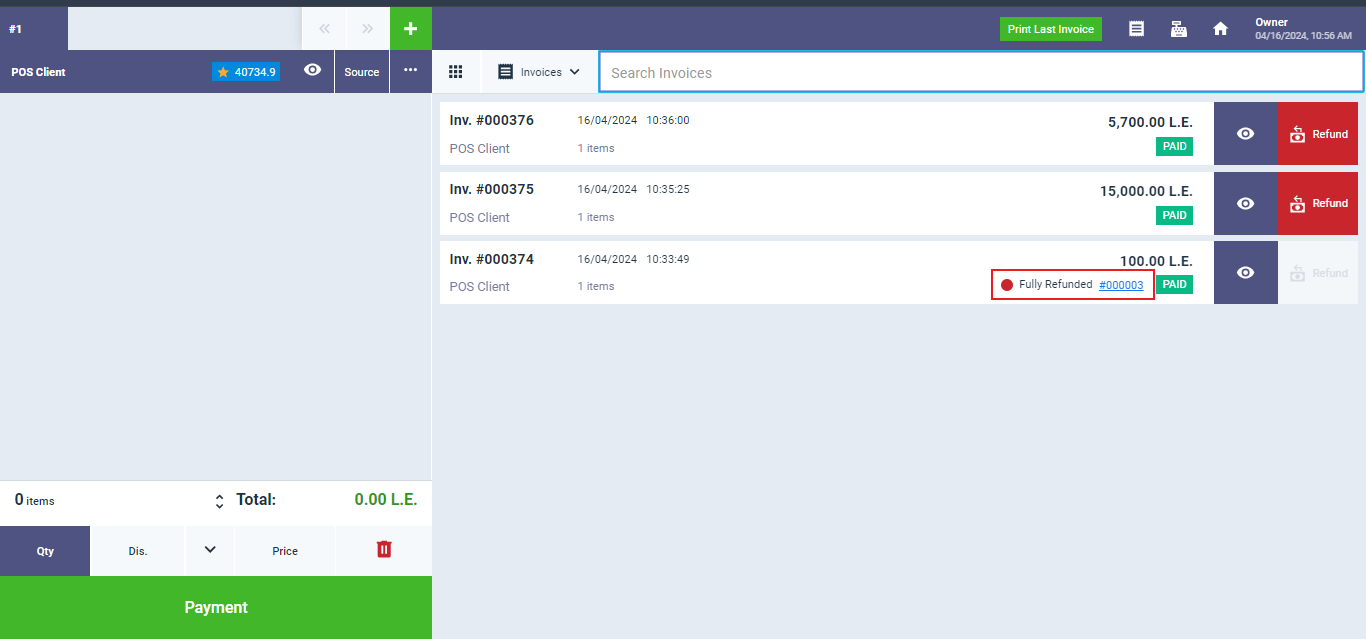
By going to the “Invoices” page, you’ll find all the invoices for this session. You can click to view the desired invoice or press the “Refund” button if you wish to create a return for the invoice.

You can refund the invoice partially or entirely by controlling the products to be returned and their quantities. You can also click on “Refund All” or “Refund Available Quantity” as commonly used options in returns.
Then, click on the “Confirm” button.
Enter the amount paid for the return and use the discount and adjustment options if desired, then press the “Confirm” button.
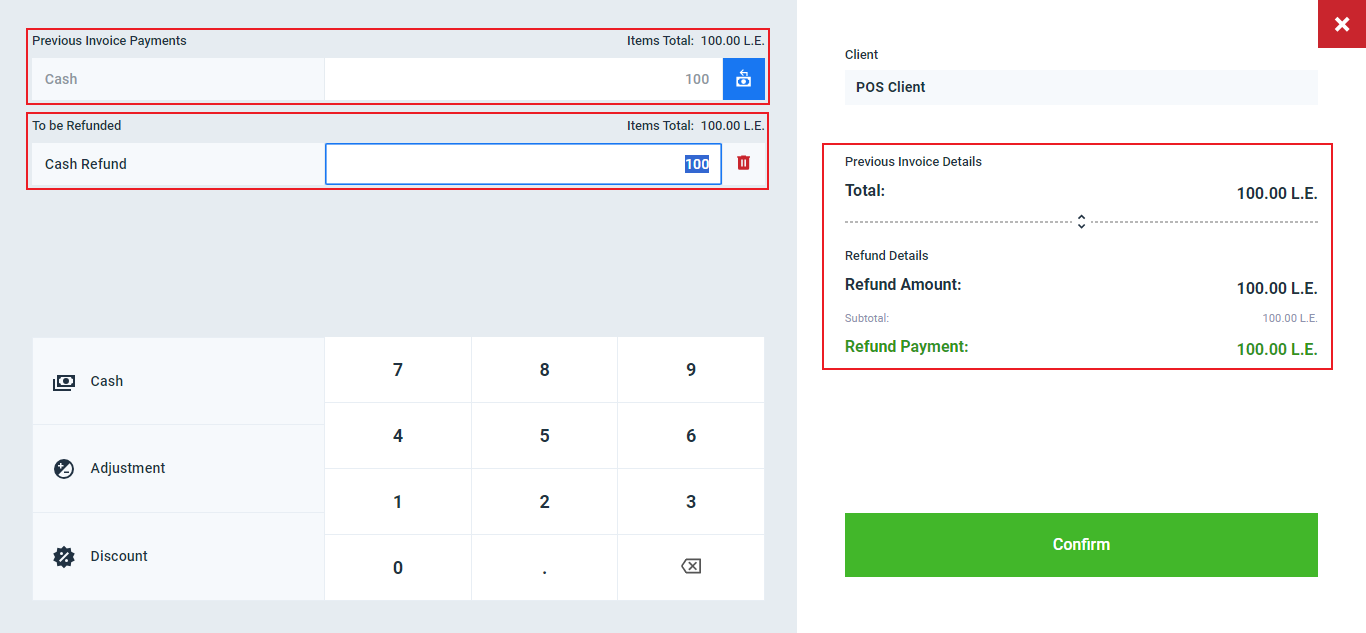
From the “Invoices” page, you’ll see whether the invoice has been partially or fully refunded. You can review the return by clicking on its unique serial number.
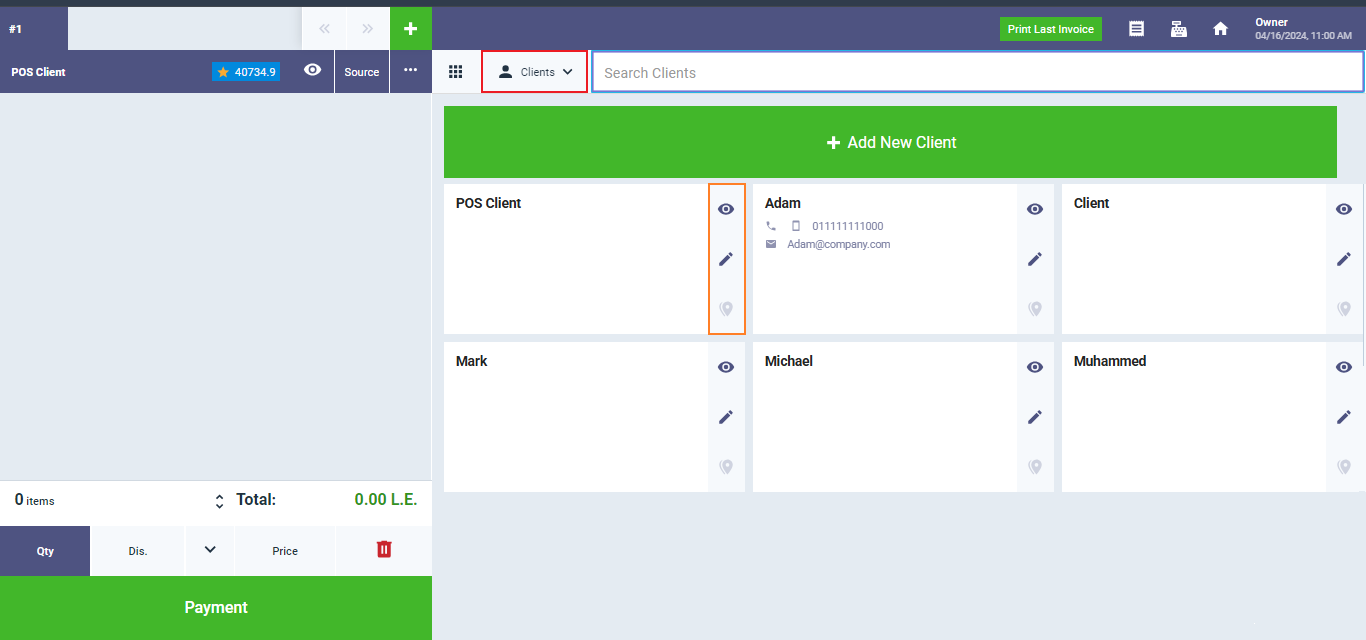
By going to the “Clients” page, you can review or edit client data, create an invoice for them, or add a new client. It’s important to note that you must select the client for whom you want to create the invoice from the point of sale’s client page, as changing the client after starting to create the invoice is not possible.
Add in and Take out Cash
During a session, an employee may need some cash for various reasons, and this cash can be given to them by another employee or taken from the cash register.
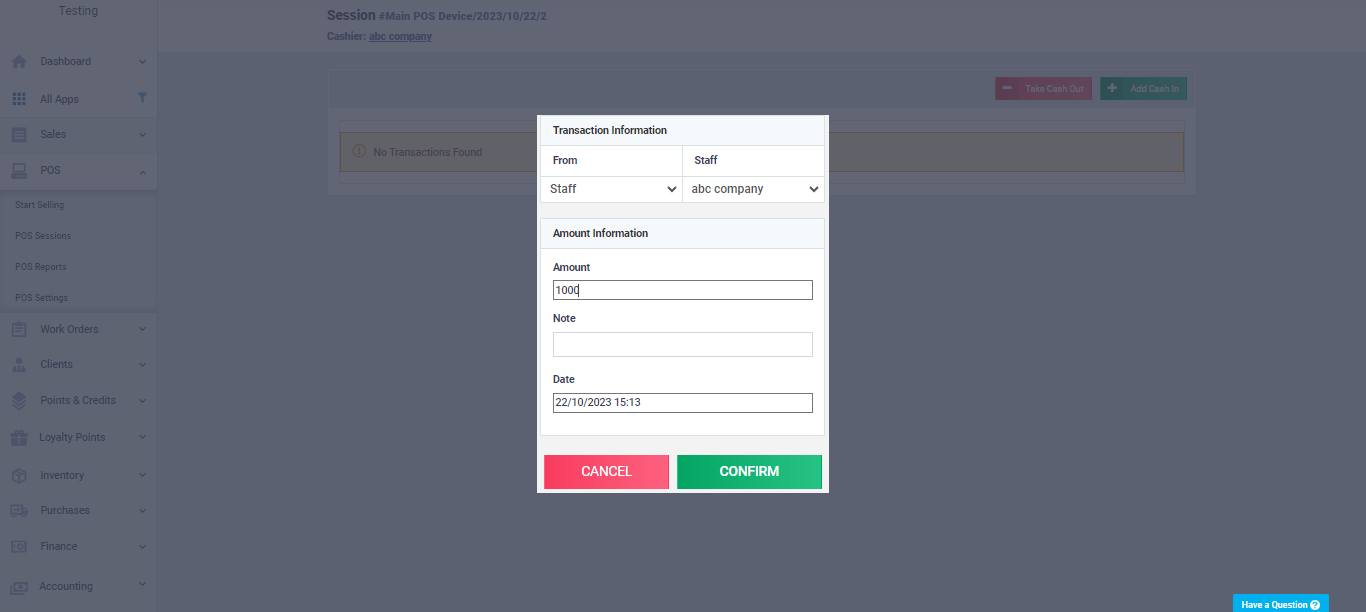
Additionally, an employee may need to provide cash to another employee, and all of these transactions should be recorded in the system. This can be done from the open session screen. The employee can click on their name to access a list of actions and then choose either “Add Cash in” or “Take Cash out” as required.
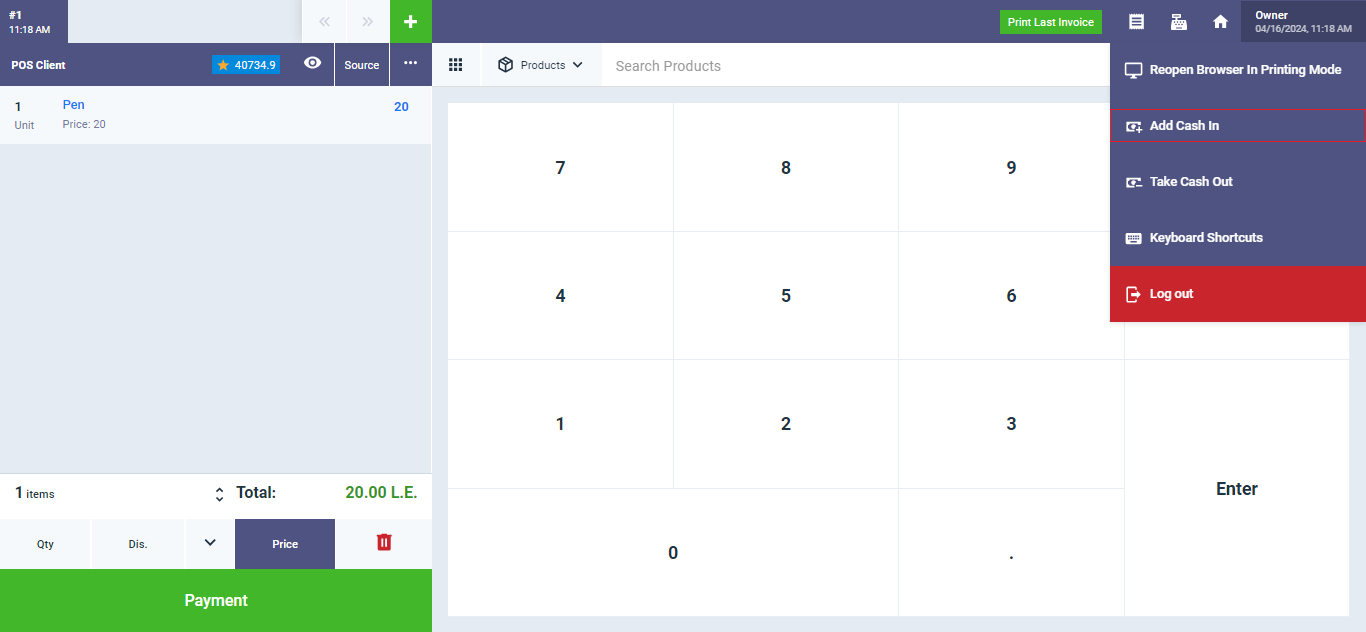
The employee is directed to a detailed screen where they can enter the following information:
- The amount of cash dispensed or received.
- The name of the employee or the cash register from which they received or to which they dispensed the cash.
- The date and time of the cash transaction.
- Any additional notes or comments the employee wishes to record regarding the reason for dispensing or receiving the cash or any other relevant details.
After entering this information, they can press the “Confirm” button to complete the cash transaction.
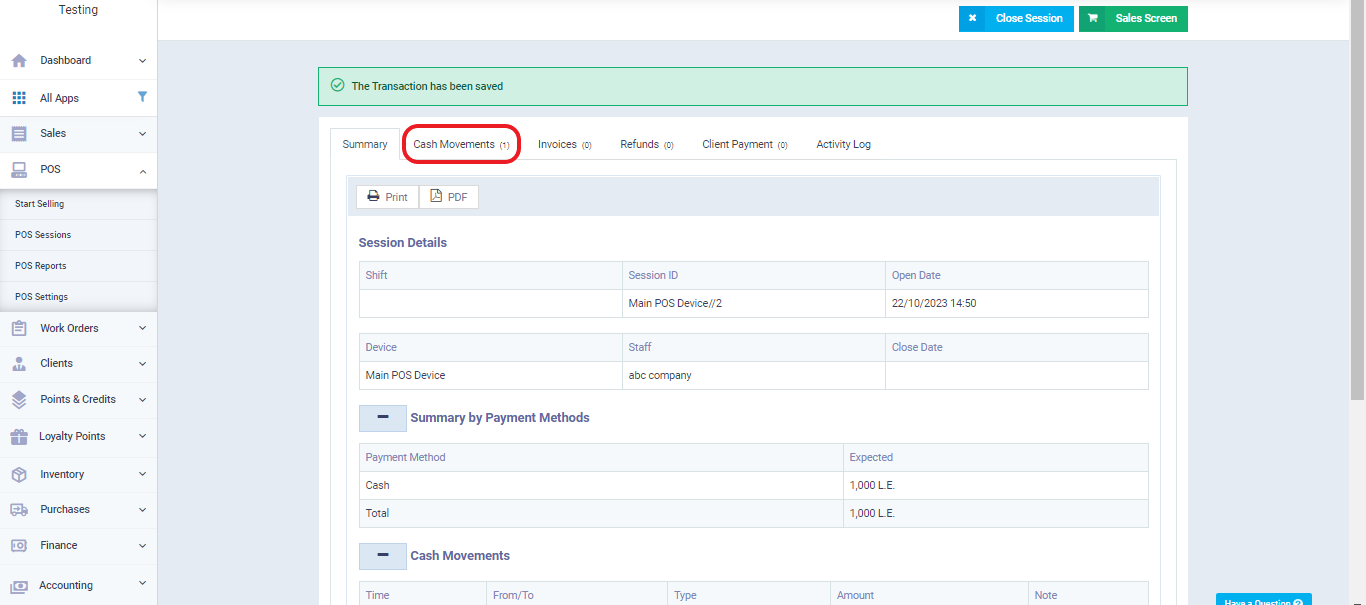
The cash transactions are recorded in the “Cash Movements” tab, which can be found in the session details, whether the session is open or closed.
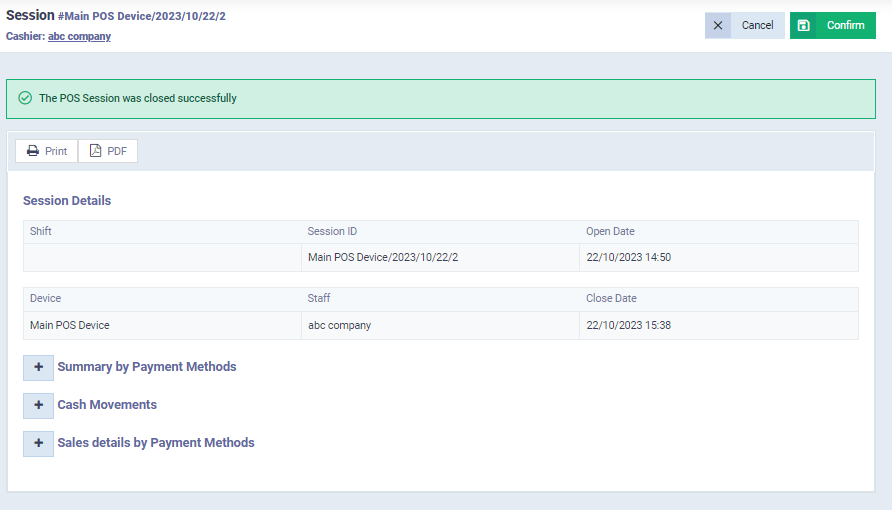
Closing a Session and Handing Over Cash
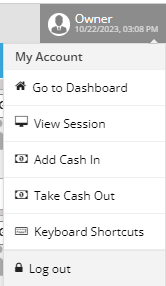
To close the session from the sales screen, go to the drop-down menu under the employee’s name who owns the session, and click on “View Session“.
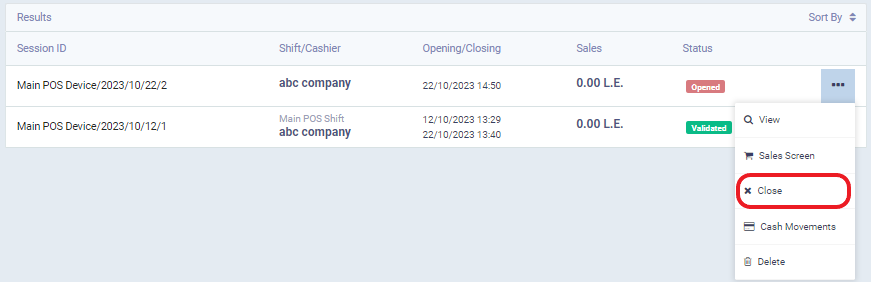
To find the list of sessions displayed to you…
Click on the dots next to the session and choose “Close.”
The system will display the session details for you to review, and you should confirm if the information is correct.
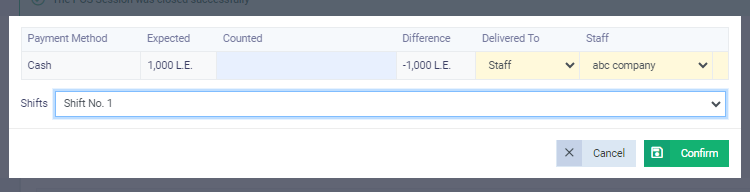
A screen will appear for you to manually input the cash value you have on hand, which the system will then compare to the amount that should be settled based on the total of the invoices in this session. The system will show you a positive value in case of a cash surplus or a negative value in case of a cash shortage. By selecting the employee responsible for the session, the entry will be assigned to them for adjustment in case of a shortage, and the employee who will take over the session or the cashier will receive the responsibility for any surplus.
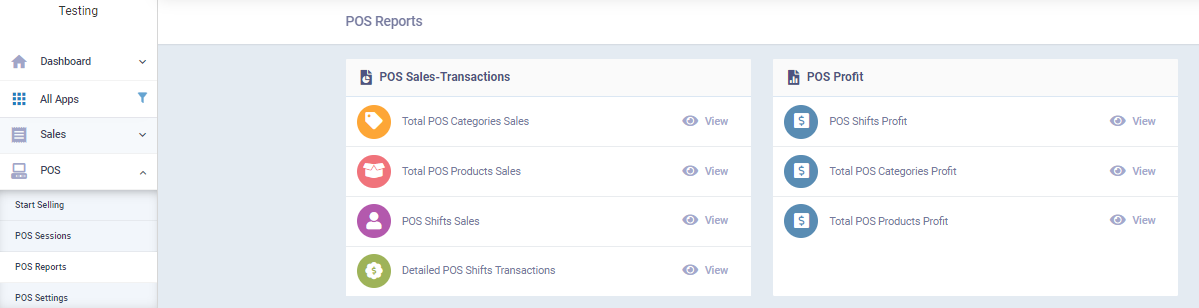
In the end, you can go to “POS Reports” from the drop-down menu under “POS” in the main menu. There, you will find a variety of detailed reports that allow you to track the transactions, profits, and other valuable information related to each session and each sales device.