


Complete Setup of UAE Electronic Invoicing
The system enables you to issue electronic invoices compliant with the UAE Federal Tax Authority (FTA) requirements, export them in XML format, and generate tax audit files. This guide covers all the steps required to properly configure the UAE Electronic Invoice system from start to finish.
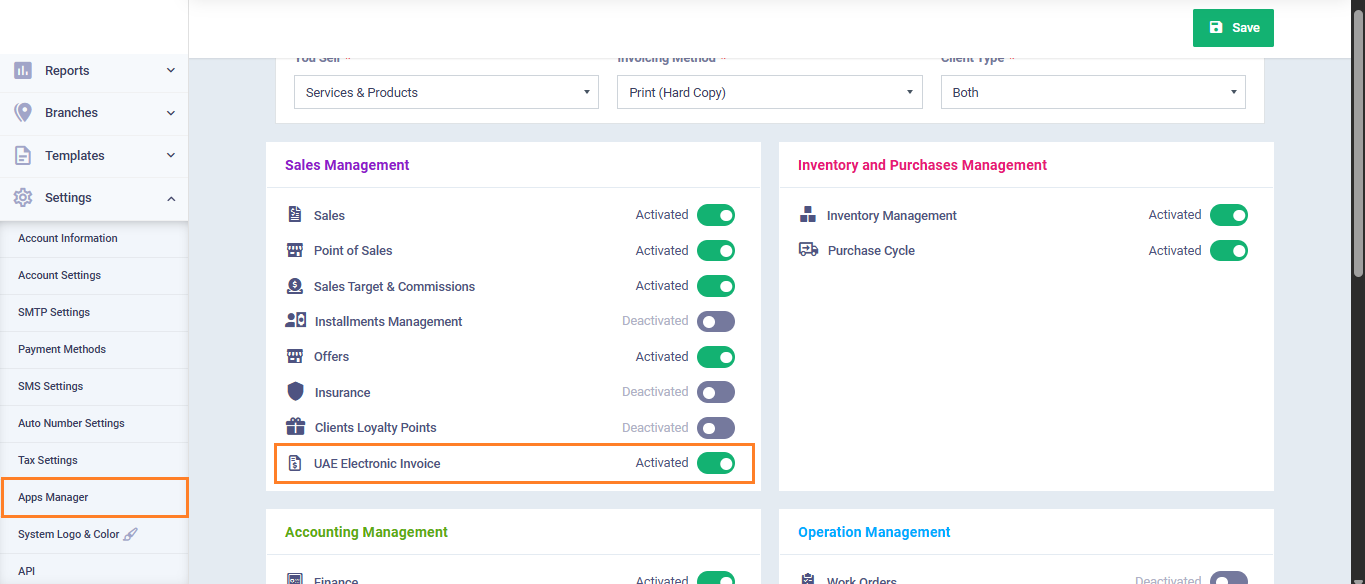
First: Activate the UAE Electronic Invoice Application
- From the main menu, click “Settings“.
- Go to “App Manager“.
- Find “UAE Electronic Invoice” under the “Sales Management” group.
- Click “Activate“.
- Click on the “Save” button.
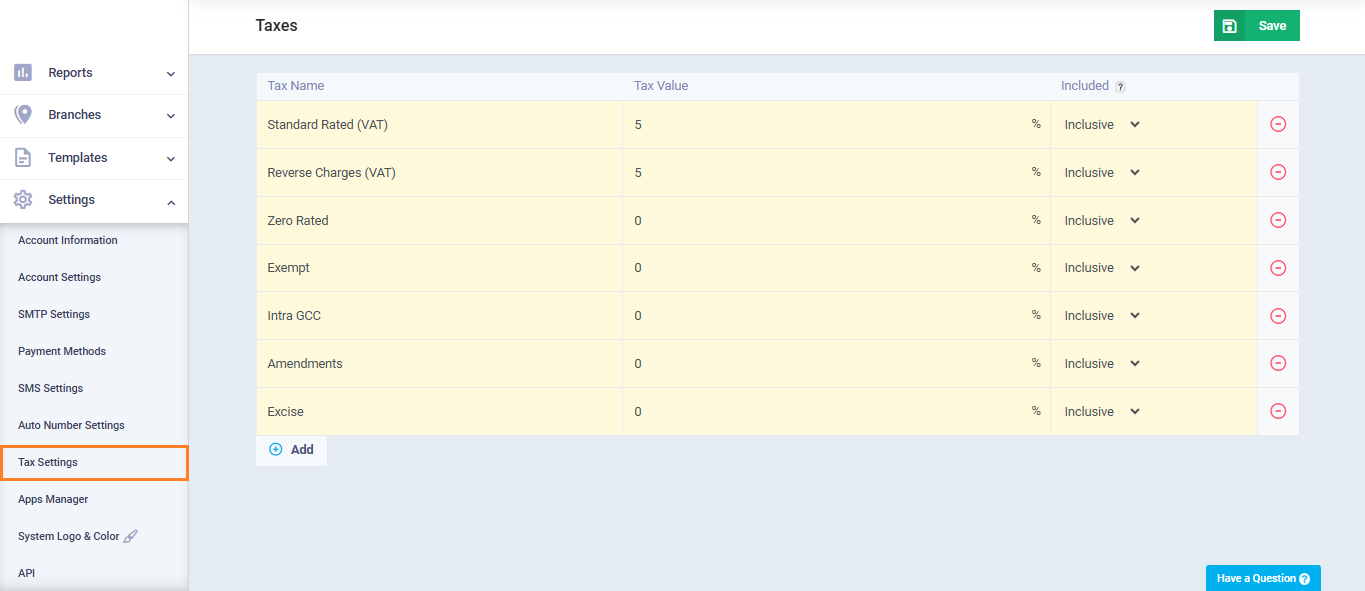
Second: Review Default Taxes
When the account is created with the country set to UAE, the system automatically generates the following taxes. Make sure they exist before proceeding:
- From the main menu, click “Settings“, then select “Tax Settings“.
- Verify that the following taxes exist:
| Tax Name | Rate | Type |
| Standard Rated (VAT) | 5% | Inclusive |
| Reverse Charges (VAT) | 5% | Inclusive |
| Zero Rated | 0% | Inclusive |
| Exempt | 0% | Inclusive |
| Intra GCC | 0% | Inclusive |
| Amendments | 0% | Inclusive |
| Excise | 0% | Inclusive |
Third: Configure UAE Electronic Invoice Settings
- From the main menu, click “Sales“, then select “Sales Settings“.
- Open the “UAE Electronic Invoice Settings” card.
- Go to “General Settings“.
General Settings
Enter the following details related to your FTA tax profile:
- EmaraTax Encryption Key: Your encryption key from the EmaraTax platform
- Tax Agency Name: Official registered tax agency name
- Tax Agency Number (TAN): Issued tax agency ID
- Tax Agent Name: Authorized tax agent name
- Tax Agent Approval Number (TAAN): Official approval number
- FAF Version: Required tax audit file version

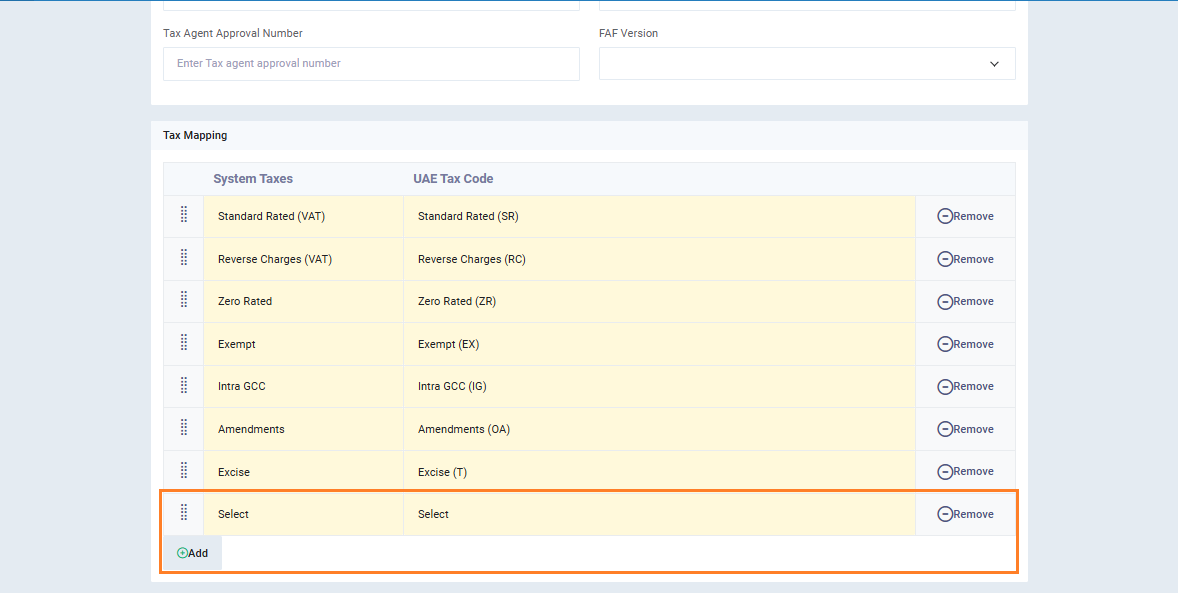
Fourth: Map Taxes to Official Tax Codes
From the same settings page, go to “Tax Mapping“. When the application is activated for the first time, default taxes are automatically mapped to their official codes. Verify and complete any missing mappings. To add a new mapping manually:

- Click “Add” under the mapping table.
- In “System Taxes“, select the required tax.
- In “UAE Tax Code“, select the corresponding official code.
- Click “Save“.
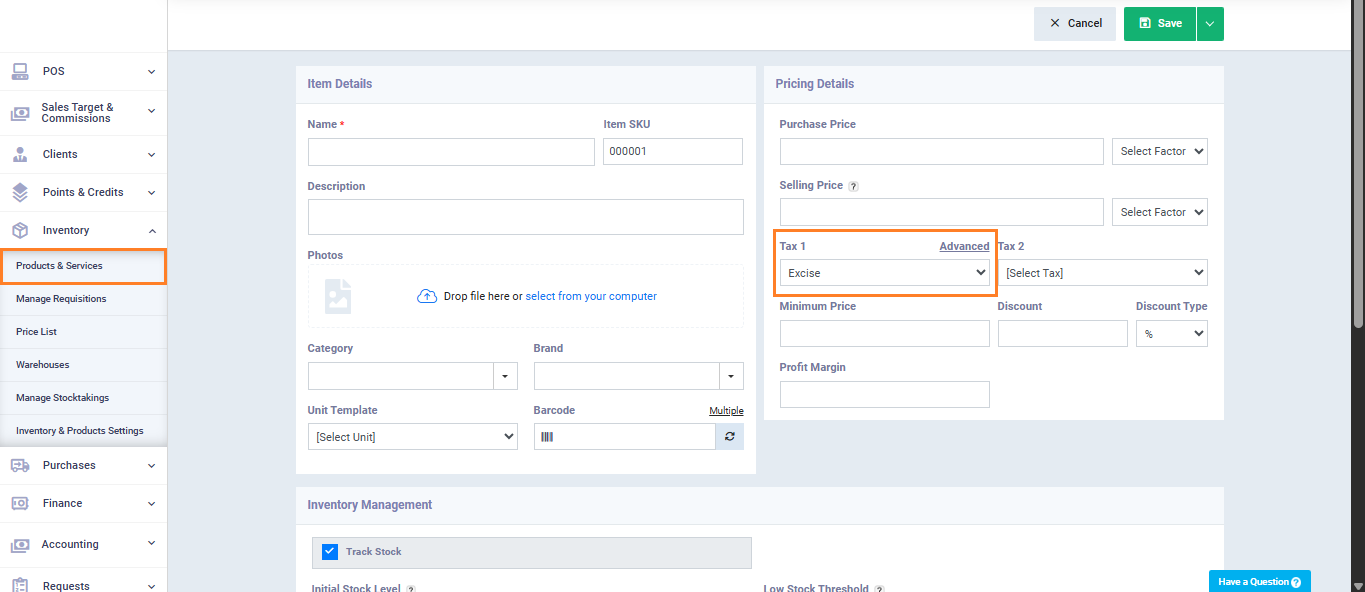
Fifth: Classify Excise Products
If you deal with excise goods, you must classify them so the system can automatically control applicable taxes:
- From the main menu, click “Inventory“, then select “Products & Services“.
- Open an existing product or create a new one.
- Enable “Is Excised Product“.
- Ensure the selected tax is an “Excise” tax.
- Click on the “Save” button.

Validation Checklist
After completing all steps, ensure the following:
- All UAE default taxes exist in Tax Settings
- Tax agency details are filled in general Settings
- All taxes are correctly mapped in “Tax Mapping“
- Excise tax is linked to Excise (T) if applicable
- Excise products are correctly classified
- “Export XML” button appears in invoices, credit notes, and returns
- Tax Audit Reports section appears under “Reports“